The Azure Information Protection (AIP) Super User feature allows administrators or authorized people full access to the documents and data that is protected by AIP and allows them to update/change the protection if required. An example where the Super User feature could be used is if there are protected documents in a SharePoint site or Team and the owner of those documents has left the organization. In this case the Super User could be used to remove the protection or update to allow other users to mange the documents.
Anyone who has the Super User privilege can manipulate and update any protected data within the organization, hence it is important to have control of who has these rights, when they are being used and why. This is exactly what we can do with Privileged Identity Management (PIM).
Note: Privileged Identity Management requires an Azure Active Directory Premium 2 license. This license is included in Microsoft 365 E5, Enterprise Mobility + Security E5 or can be purchased as a standalone license.
Creating a Group And Enable PIM Support
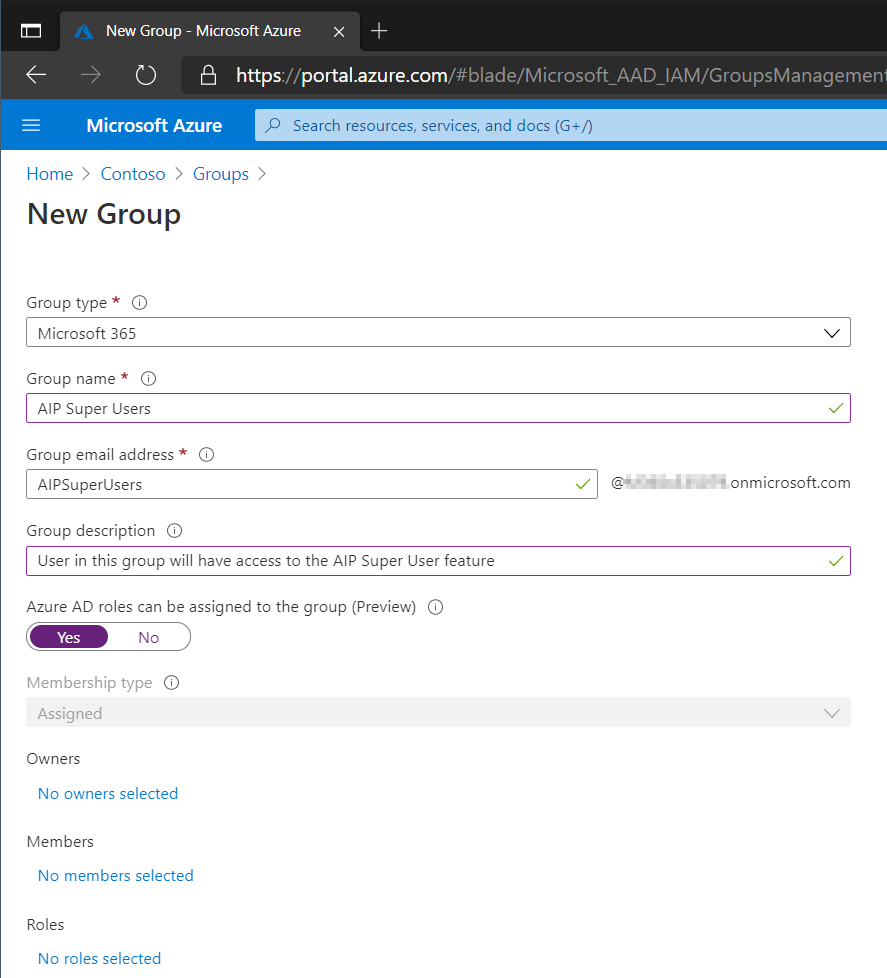
In Azure Active Directory create a new Group. Make sure that the type is set to Microsoft 365 as we need the group to have an e-mail address, additionally make sure that Azure AD roles can be assigned to the group. Make a note of the e-mail address as we will need this later.
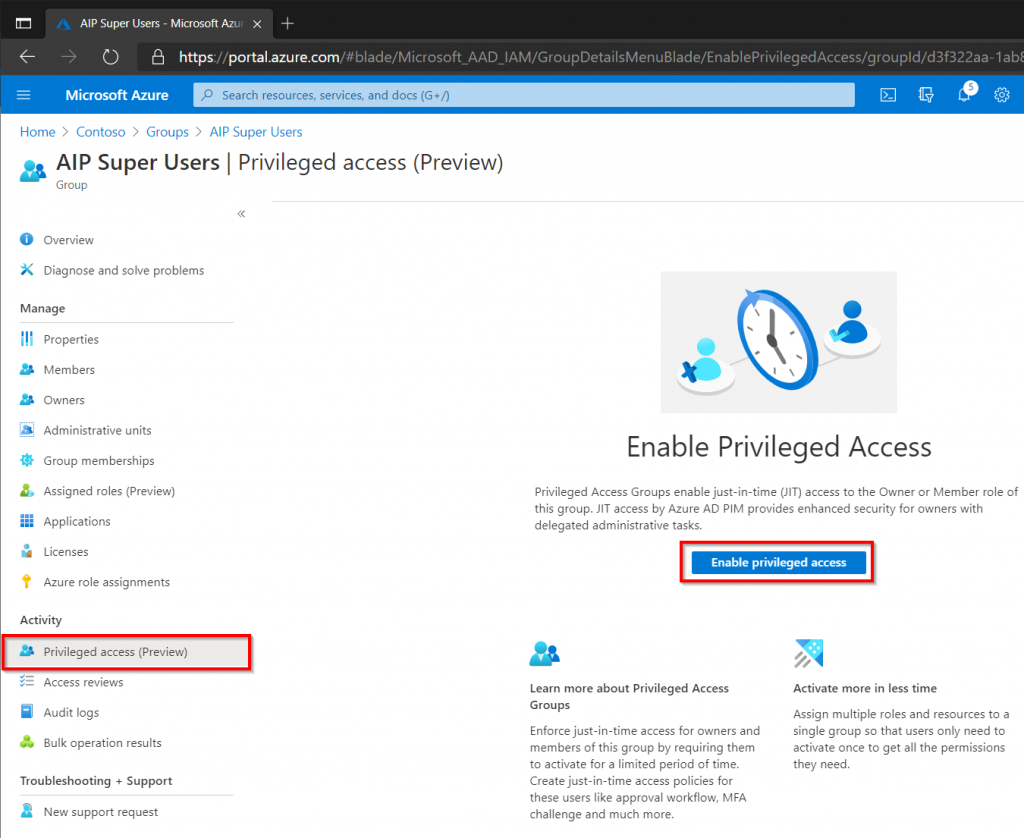
Once the group has been created click Privileged Access, then enable the feature.
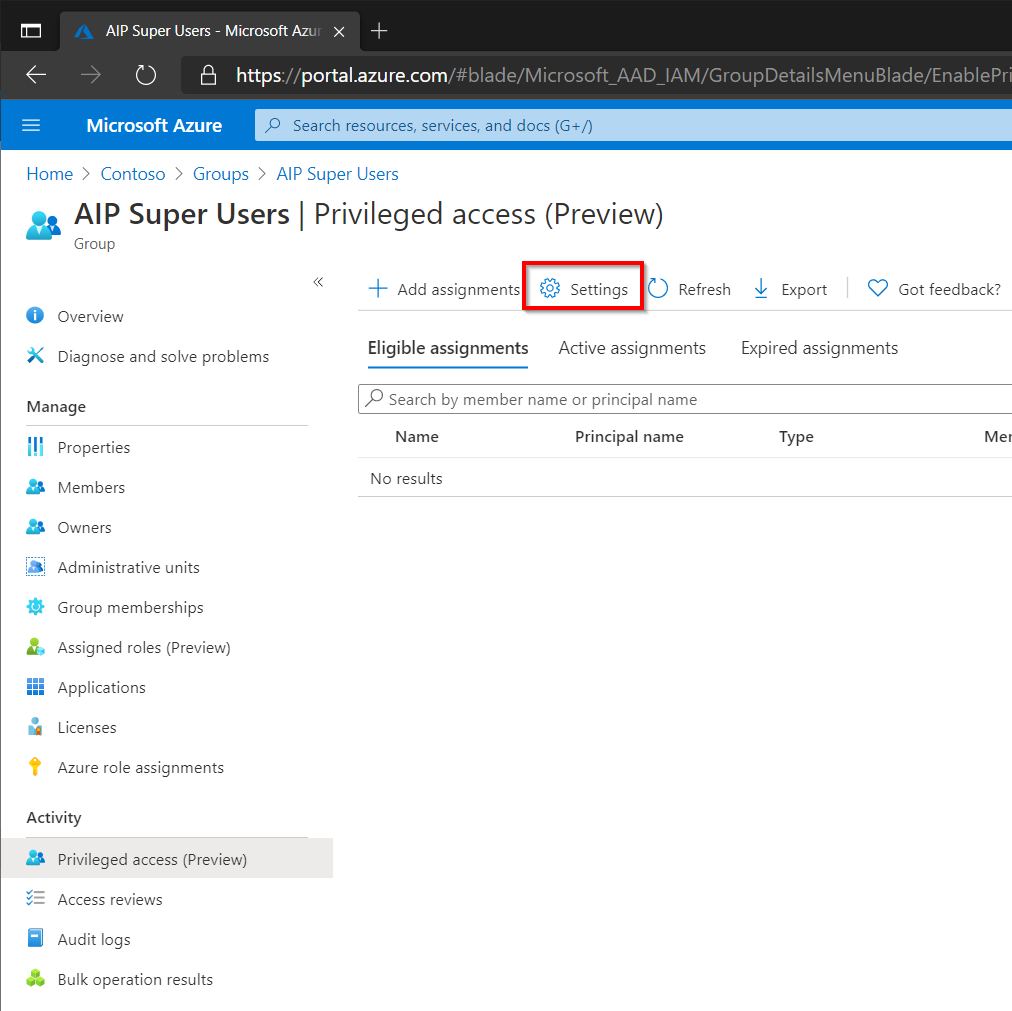
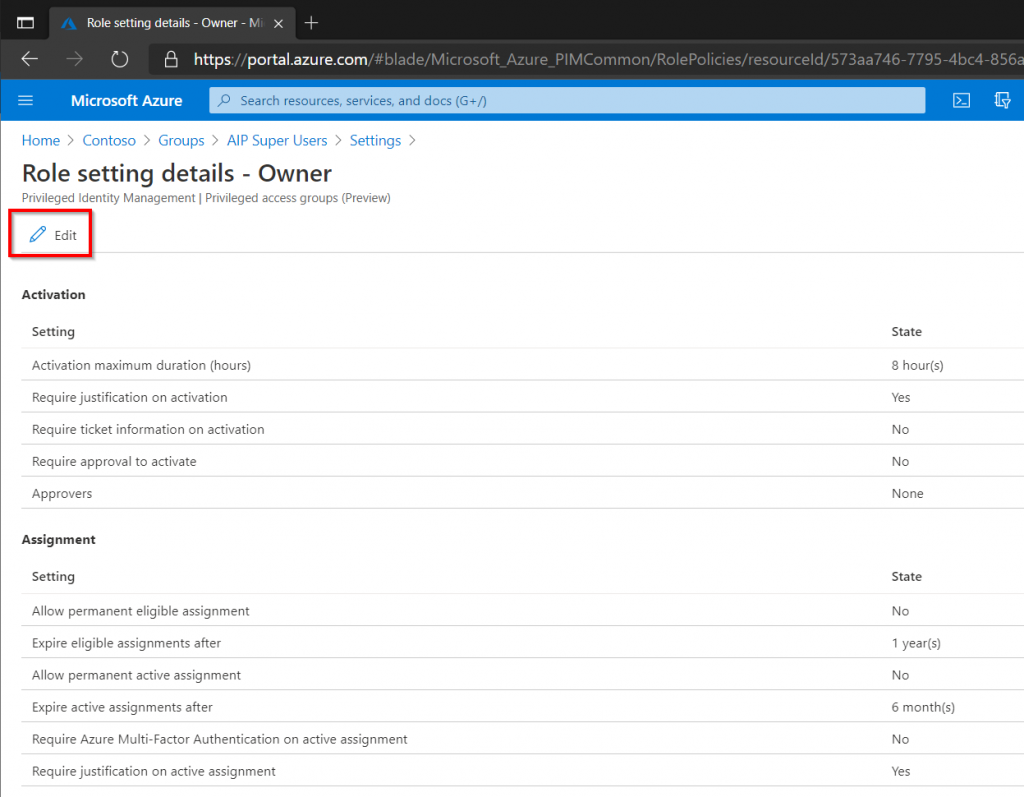
Lets review the Settings and tune the settings to match our security requirements. The group can consist of Owners and Members and there might be a need to have different security settings based on membership type. In this case we will be focusing on Owners so select that (the members setup could of course be identical).
Review the settings for the Owner role and click Edit if any changes are needed. The default activation time is 8 hours and that seems quite a lot for this particular role so we should reduce that.
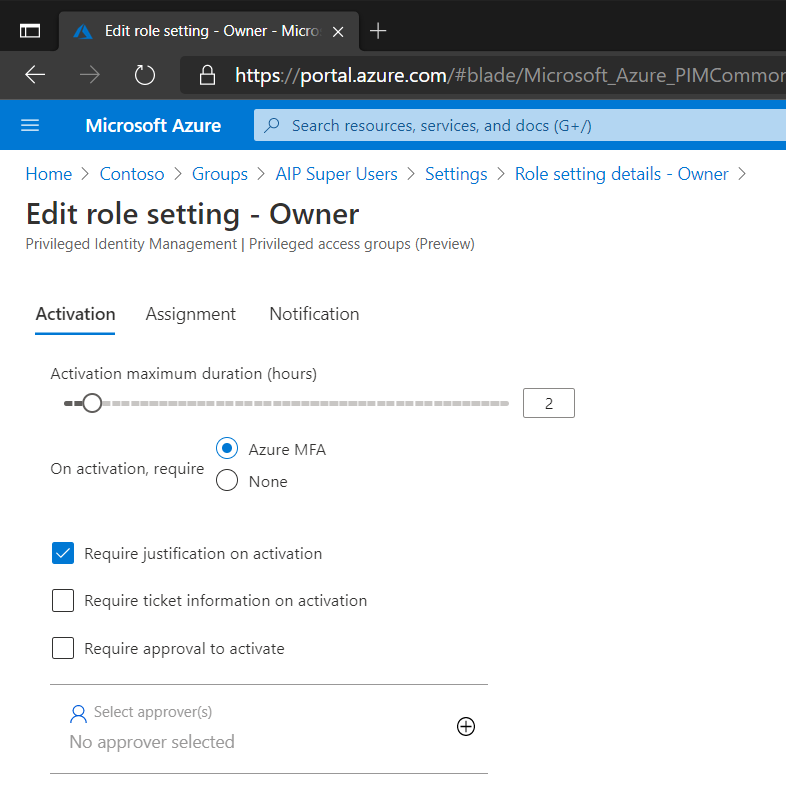
On the Activation page start by reducing the duration the role can be active for. Adjust to suit the needs of your organization but 1-3 hours seems long enough. Secondly we want to make sure anyone who wants to enable this role verifies their identity with Multi-Factor Authentication (MFA) prior to the role actually being assigned. Finally we also want a justification to why these rights are required and optionally require a ticket number in your organization’s ITSM tool.
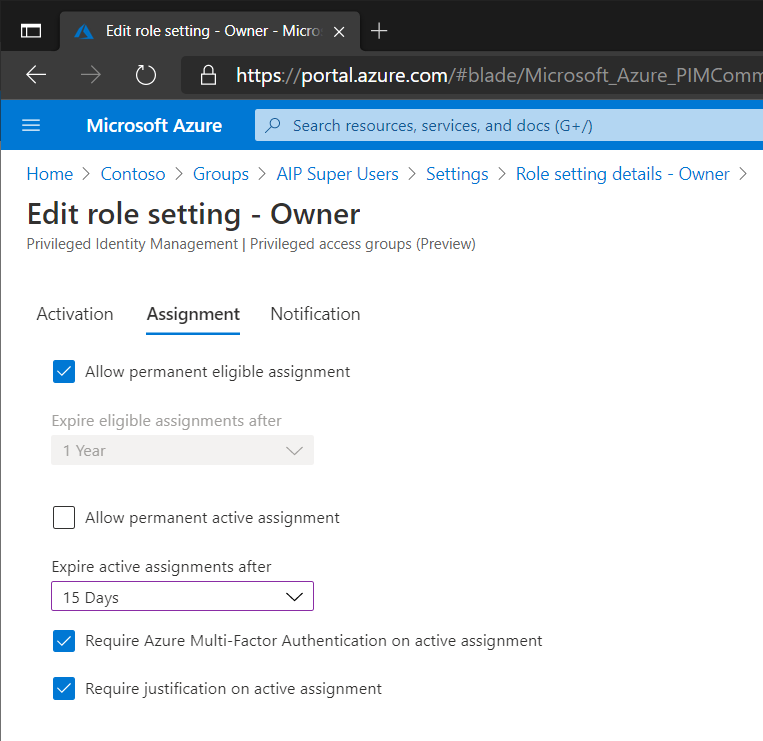
On the Assignment page select if it is possible to assign permanent eligible/active rights. Eligible rights mean that assigned users can activate this privilege when needed but will not have the rights longer than the maximum duration of the role, before a new activation is required. Active rights means that the privilege is constantly active.
Since there might be users who should have the option of enabling this right we will choose to allow permanent eligible assignments but not active assignments. If active assignments are allowed then make sure that MFA and require justification is also enabled.
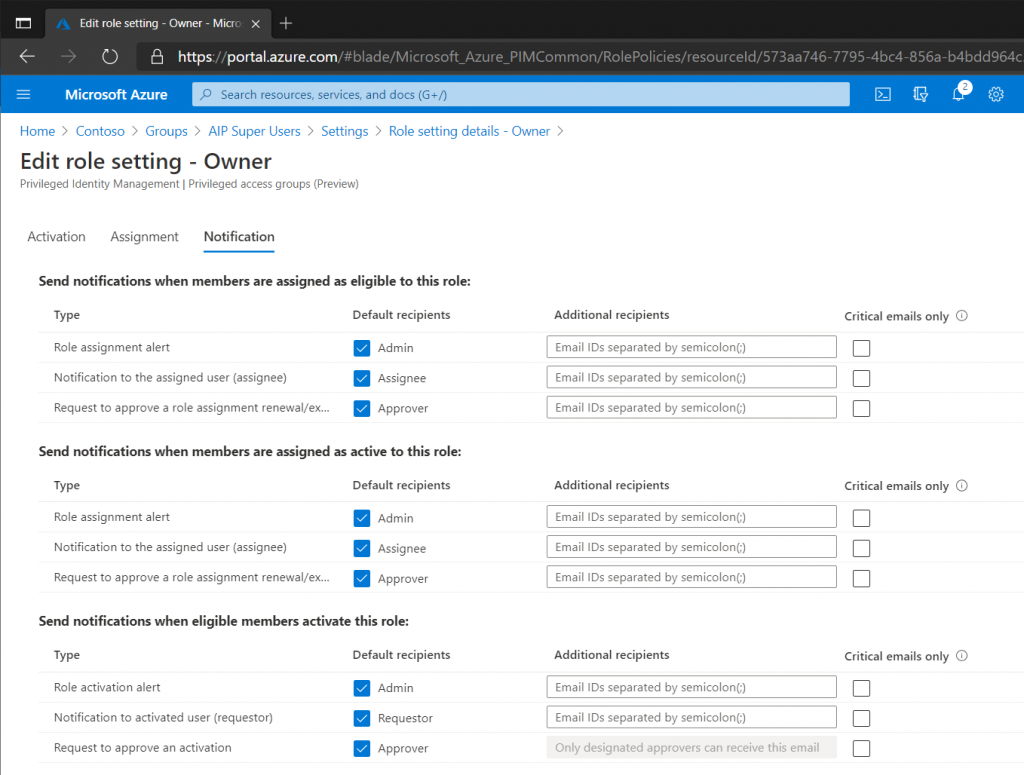
On the Notification page review and adjust who should be notified if there are assignments or role activations (for this LAB environment the defaults will be kept) then click Update.
Enable the group to use AIP Super User feature
Now that we have added the group and reviewed its privileged identity management settings, its time to connect the group to the Azure Information Protection.
Open PowerShell as an Administrator and issue the following two cmdlets.
Install-Module -Name AIPService -Force -Verbose
Connect-AipService
Verify that the Super User Feature in Azure Information Protection is enabled.
$SuperUserFeature = Get-AipServiceSuperUserFeature
if ($SuperUserFeature -eq "Disabled") {Enable-AipServiceSuperUserFeature}
Next associate the group that we created earlier with the Super User feature. Enter the e-mail address from the group we created earlier.
Set-AipServiceSuperUserGroup -GroupEmailAddress AIPSuperUsers@xxxx.onmicrosoft.com
Assigning Users
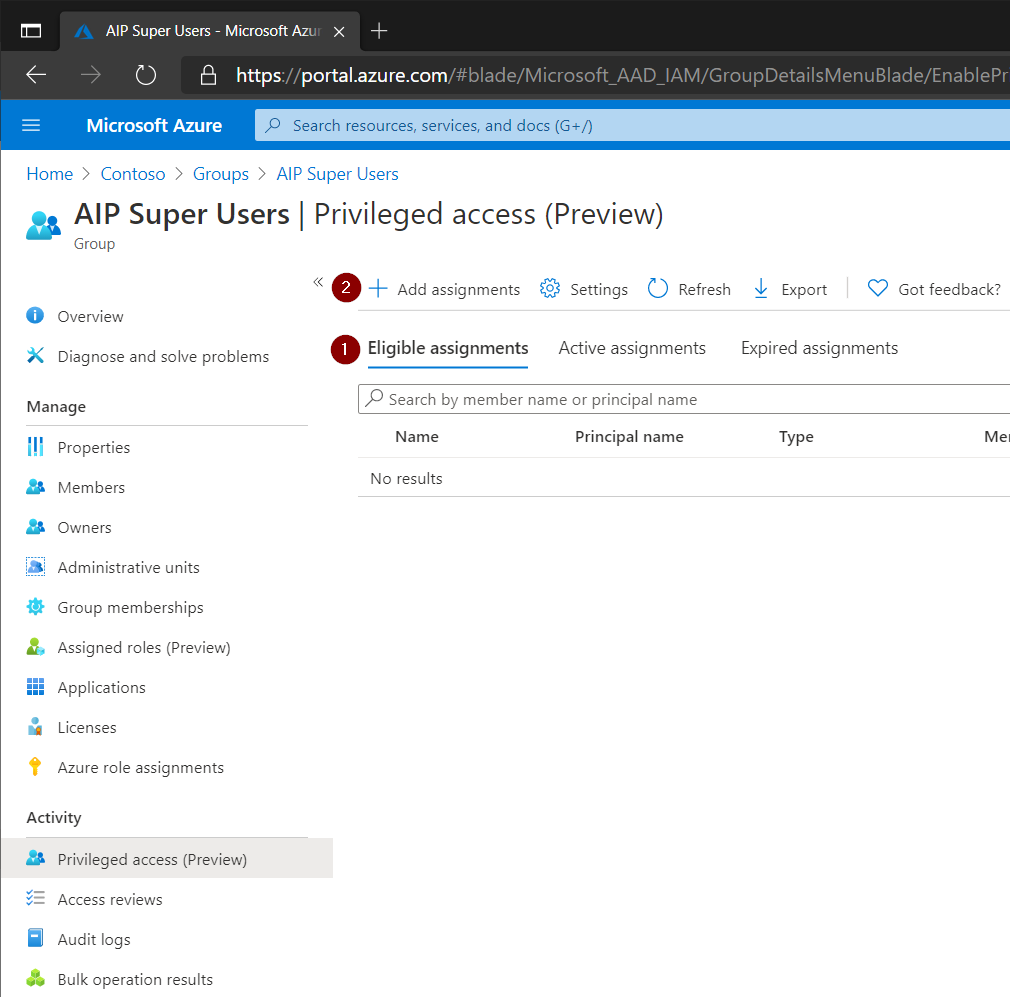
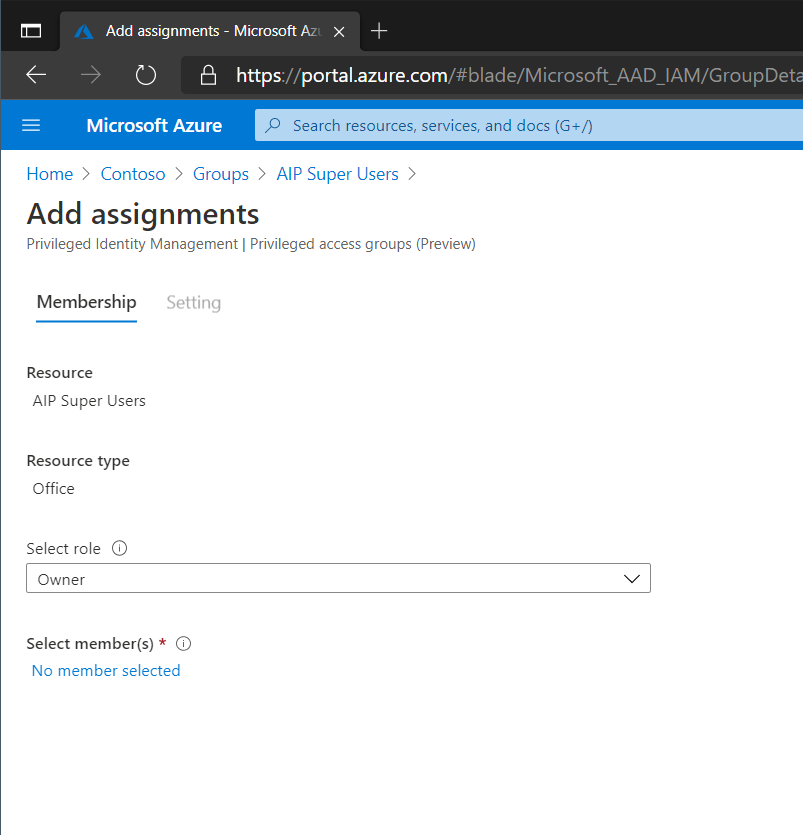
Go back to Azure Active Directory and the group we created earlier. Make sure the Eligible is selected then click Add Assignments.
On the Membership page select the role (Owner/Member) that should be provided then select any users that should have the possibility of activating the privilege.
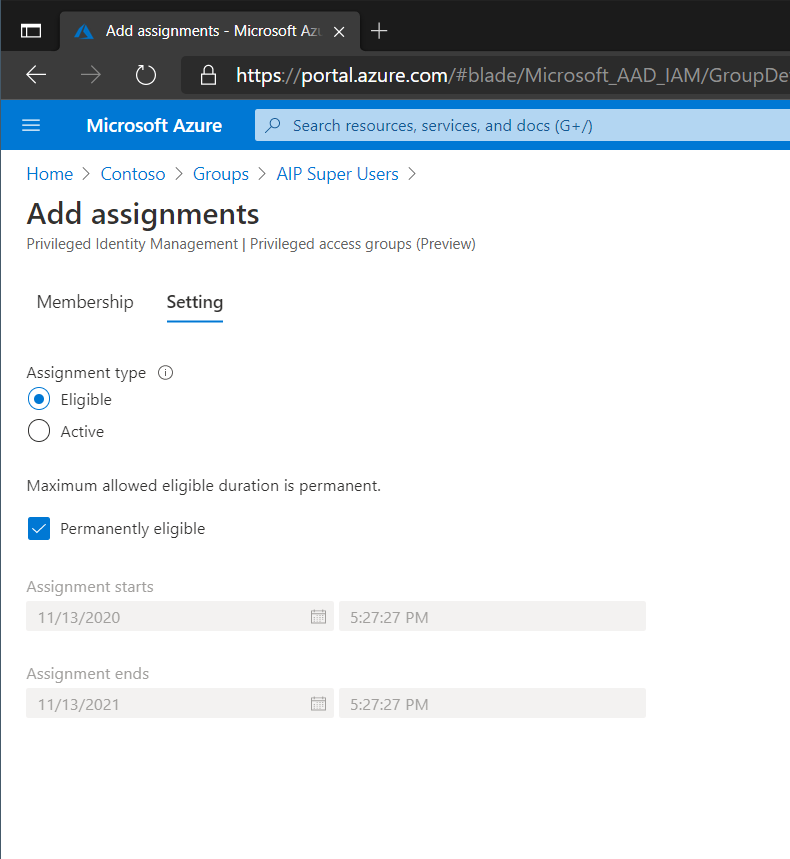
Then on the Setting page select if the assignment should be Eligible/Active and if the assignment is permanent or not.
Activating the Super User Role
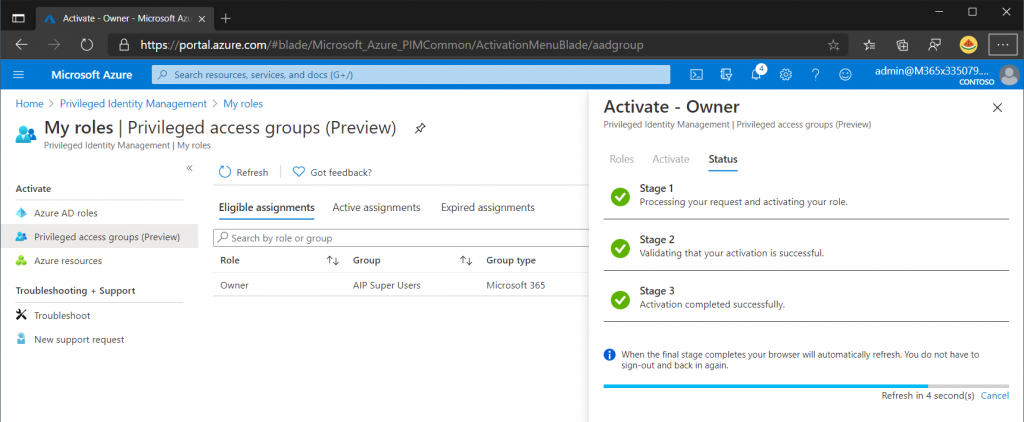
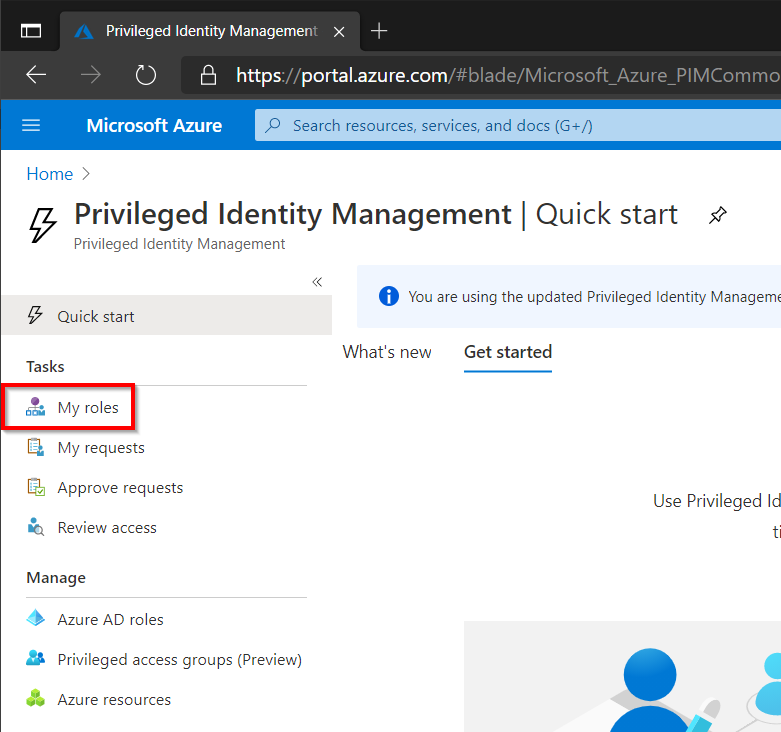
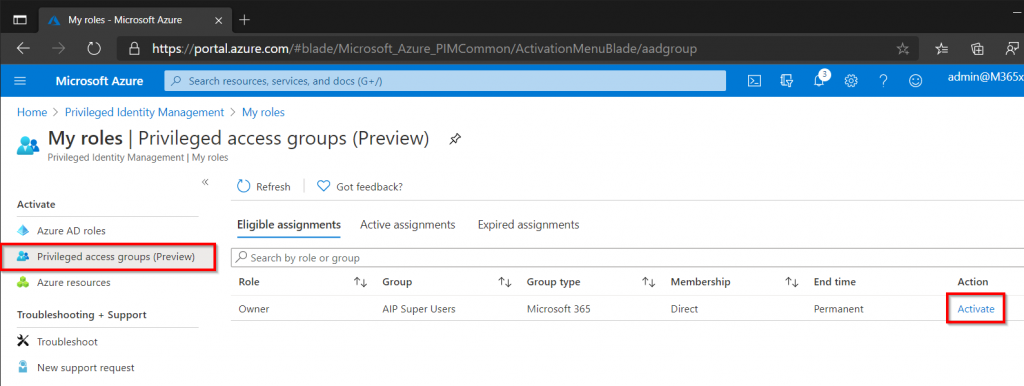
In the Azure Portal open Privileged Identity Management and click My Roles.
On the left hand side select Privileged Access Group and the AIP Super Users group should be visible, click Activate to enable the Super User feature.
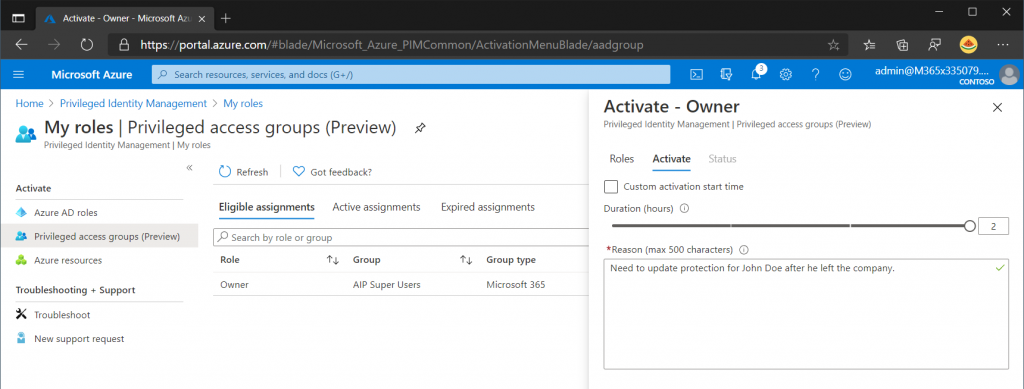
Specify a justification for why the access is needed and optionally a ticket number if that was enabled in the role settings.
The privilege will now be enabled and the user will have the Super User rights assigned temporarily.