
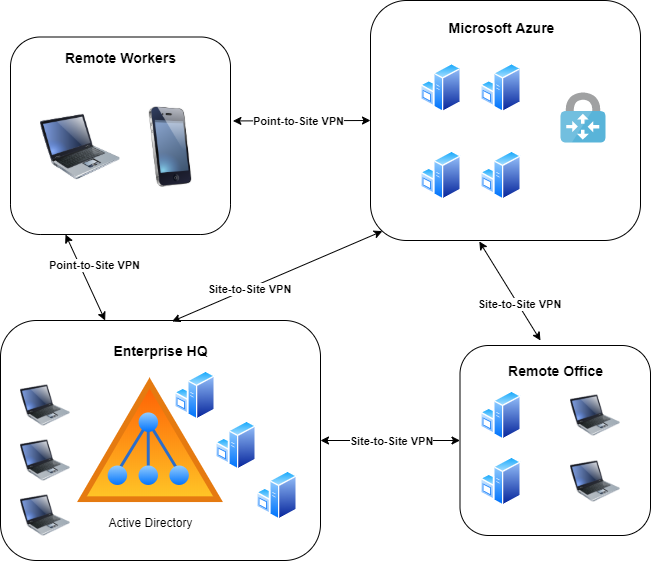
In this post we will walk though the steps of configuring a site-to-site VPN with Azure, using RRAS (Routing and Remote Access Services) on Windows Server 2019 as our on-premise client. The VPN can be further expanded to allow other office locations or remote workers to connect directly to the VPN.
Creating a Virtual Network
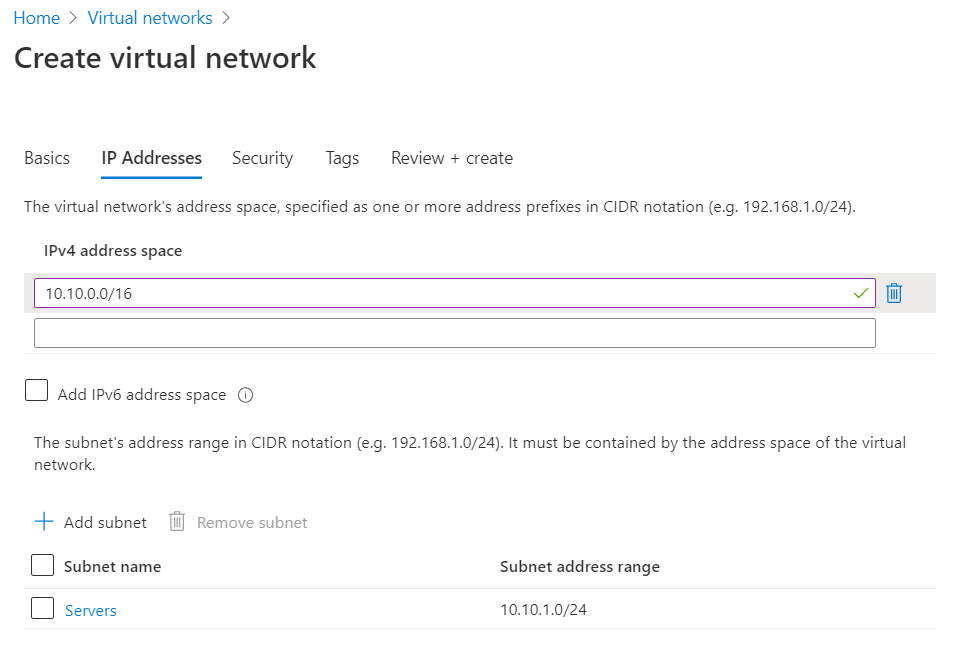
Firstly we need to create a virtual network to be used for our VPN Gateway. Make sure to create all these resources on the same resource group and in the same region. When creating virtual networks and subnets, it is a best practice to never use any overlapping ranges with other networks present in Azure or on-premise (even if you don’t intend to connect them).
As shown below, I will be creating a virtual network with the 10.10.0.0/16 address space and creating a 10.10.1.0/24 subnet within that virtual network. This subnet simply called Servers, will be used to deploy a virtual machine to verify VPN connectivity later.
In addition to the 10.10.1.0/24 (Servers) subnet we will need a Gateway Subnet where our VPN gateway will reside. The Gateway subnet can be created manually once the virtual network is created or later during the virtual gateway deployment, which is what we will be doing. The gateway subnet is recommended to be either /27 or /28 bit subnet or larger and thus we will keep things simple and use 10.10.0.0/24.
Deploy Azure Virtual Network Gateway
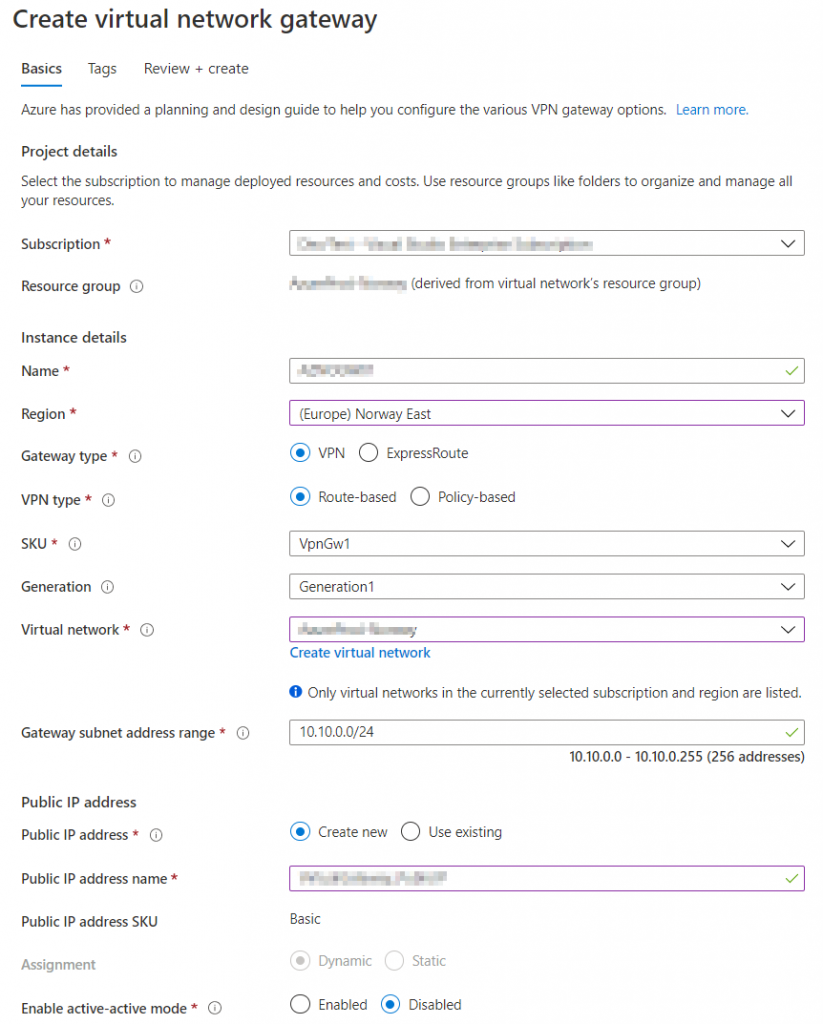
On the Virtual Network Gateway pages select the same resource group that was used for the virtual network and the same region. Select the SKU according to your needs but VpnGw1 should suffice for most test scenarios. Check Microsoft’s documentation on the different SKU’s. Note the the Virtual Network Gateway can take as long as 45 minutes to deploy.
Define Local Network Gateways
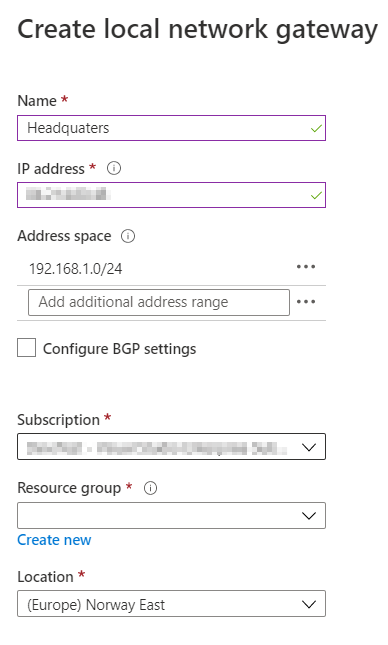
While our Virtual Network Gateway is deploying, we can start by defining our on-premise endpoint(s). Search for local network gateways in the Azure search bar and specify the WAN address of the on-premise gateway. Also make sure to define the IP range of your on-premise networks, in this case 192.168.1.0/24.
Configure Site-to-Site
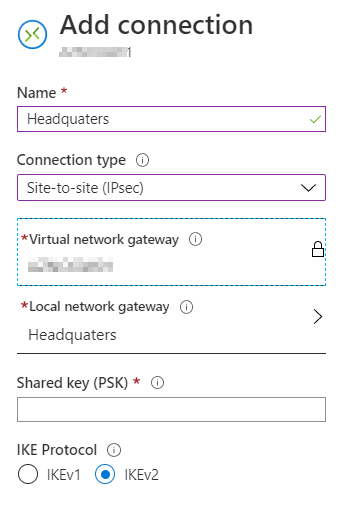
Once the Virtual Network Gateway has been deployed we need to define a Site-to-Site connection. Specify and note a random key that will be used to connect to the Virtual Network Gateway, you will need this key once we configure Routing and Remote Access in the next step.
Configure Routing and Remote Access
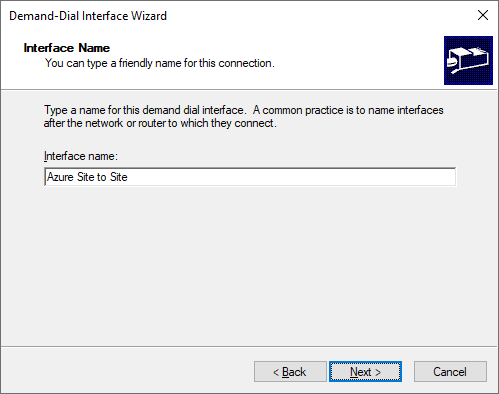
On your on-premise Windows 2019 server install Routing and Remote Access (RRAS) if you haven’t done so already. In the main RRAS window right click “Network Interfaces” and select “New Demand-dial Interface”. Give your new interface a name such as Azure Site-to-Site.
Note: Make sure that the appropriate ports for IKEv2 is configured in your environment. IKEv2 requires UDP ports 500 and 4500.
Select VPN as the connection type.

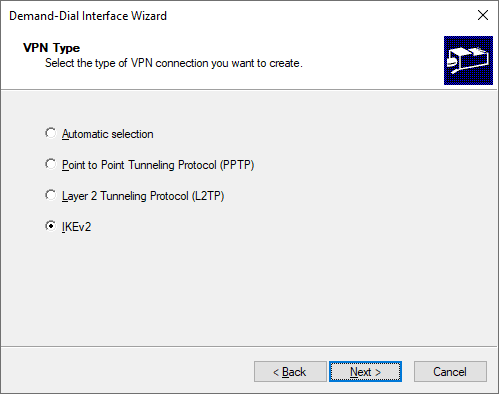
Select IKEv2 as the VPN type.
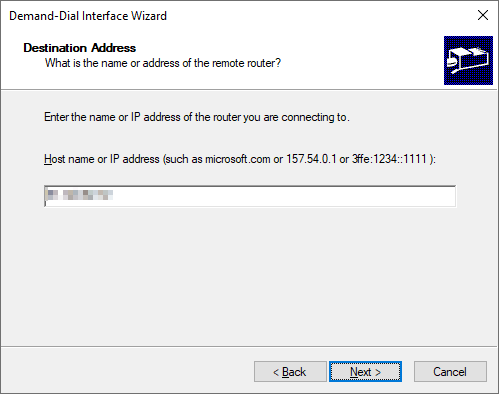
Specify the public address of the Virtual Network Gateway in Azure. This address can be found on the overview page on the Virtual Network Gateway.
Check the box to enable routing on the dial interface.

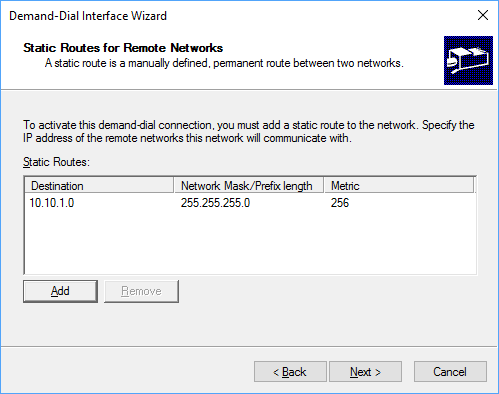
We need to add a route to our Virtual Network in Azure. Add any additional networks you need to reach. In this example I choose only to add the server subnet that we created earlier, but I could have added the entire range of the Virtual Network in Azure (10.10.0.0/16)
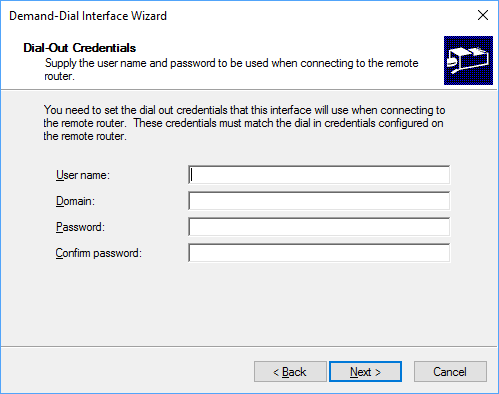
We will be using a pre-shared-key (PSK) to authenticate so just leave this section blank.
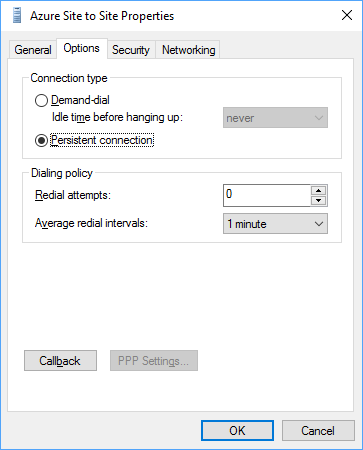
One your interface has been created, right click it and select Properties. On the “General” tab, verify that the correct IP/Hostname is set. Then on the “Options” tab select persistent connection to prevent the connection from automatically disconnecting.
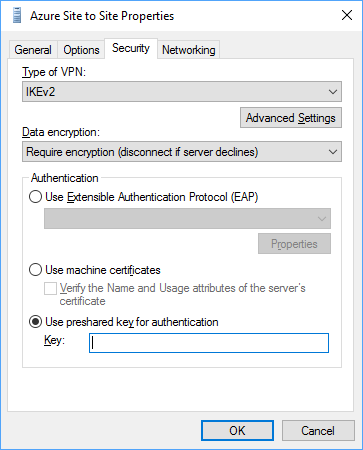
On the “Security” tab make sure that the the VPN type is set to IKEv2, data encryption is set to require encryption and the that the pre-shared-key that we created in Azure earlier is specified.
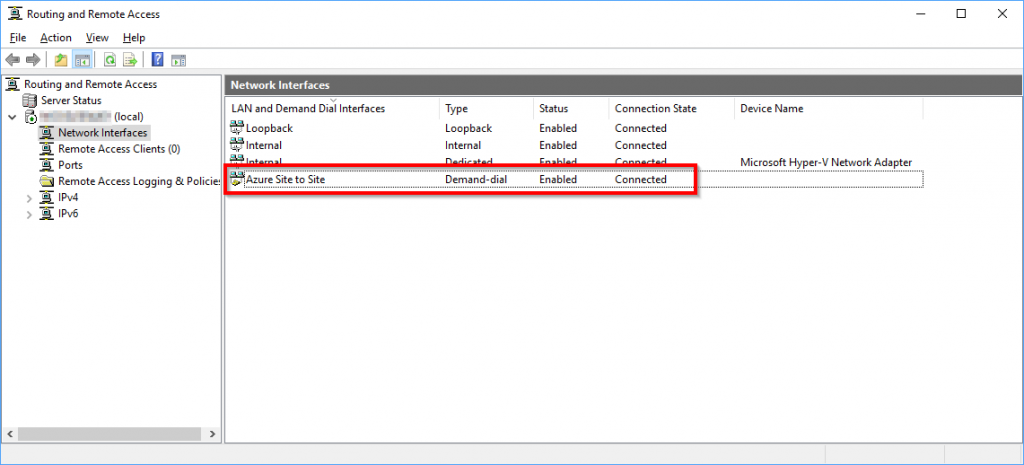
The final step is to right click our Site to Site interface and select Connect. The connection should say Connected after a few seconds. If you look back in the Azure Portal the “Headquarters” connection in the Azure Virtual Gateway should change to “Connected”, but it might take a minute or two to update.
Verifying Connectivity
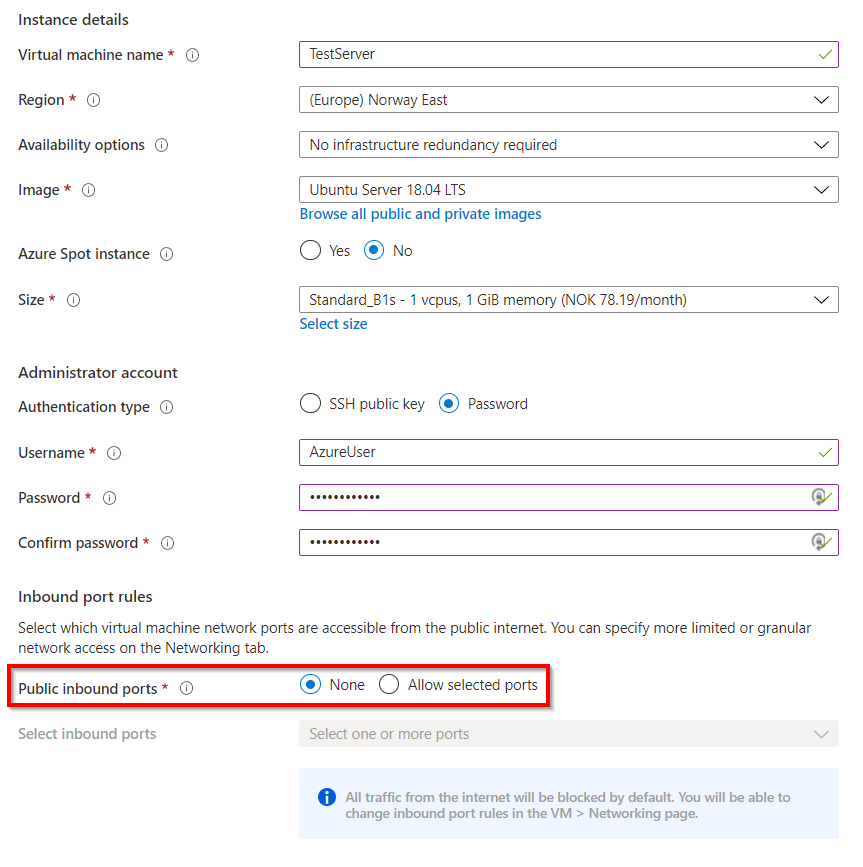
In order to verify connectivity between our Azure Virtual Network and the on-premise network, we will deploy a virtual machine in the server subnet that was created earlier. The virtual machine will not have any public IP addresses, so we will only be able to reach it through our VPN connection.
On the “Basics” page select “none” on the public inbound ports.
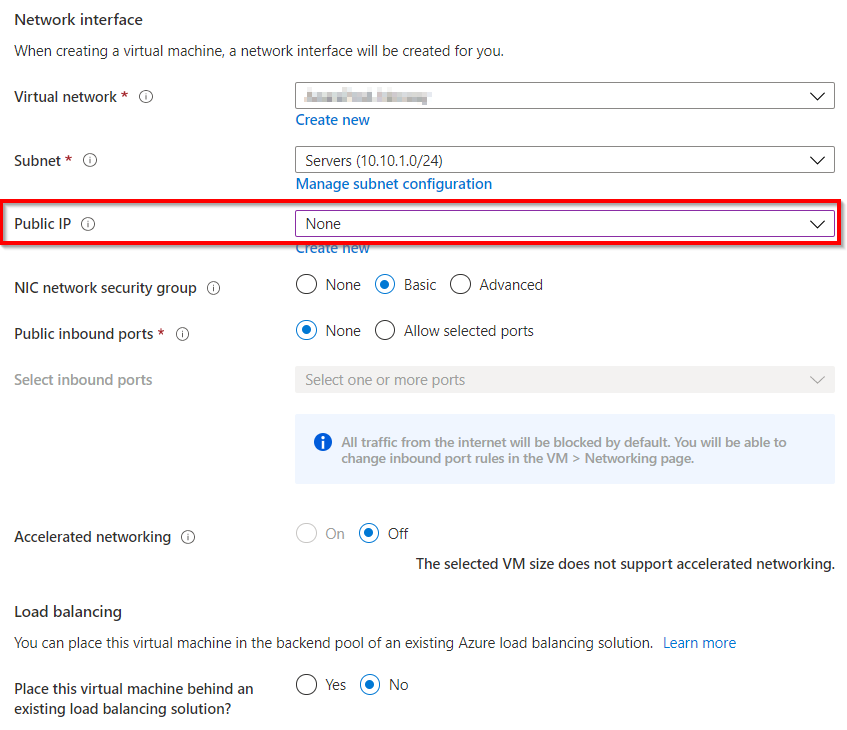
On the “Network” page set the public IP to “none”. You can add a public address later if you need it. Go through the rest of the wizard and deploy the Virtual Machine.
Once the Virtual Machine has been created, go to the overview page of the Virtual Machine to find it’s IP address.
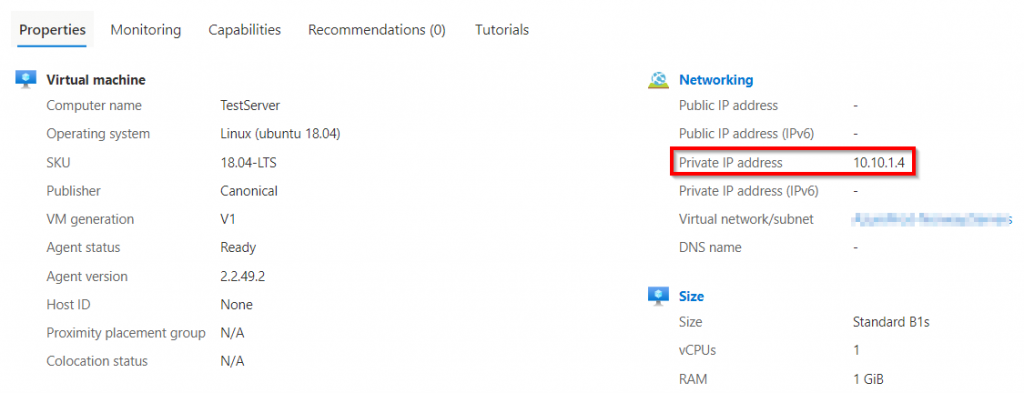
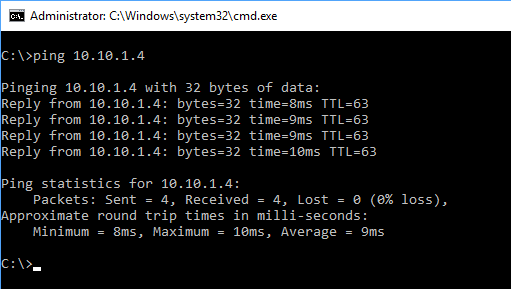
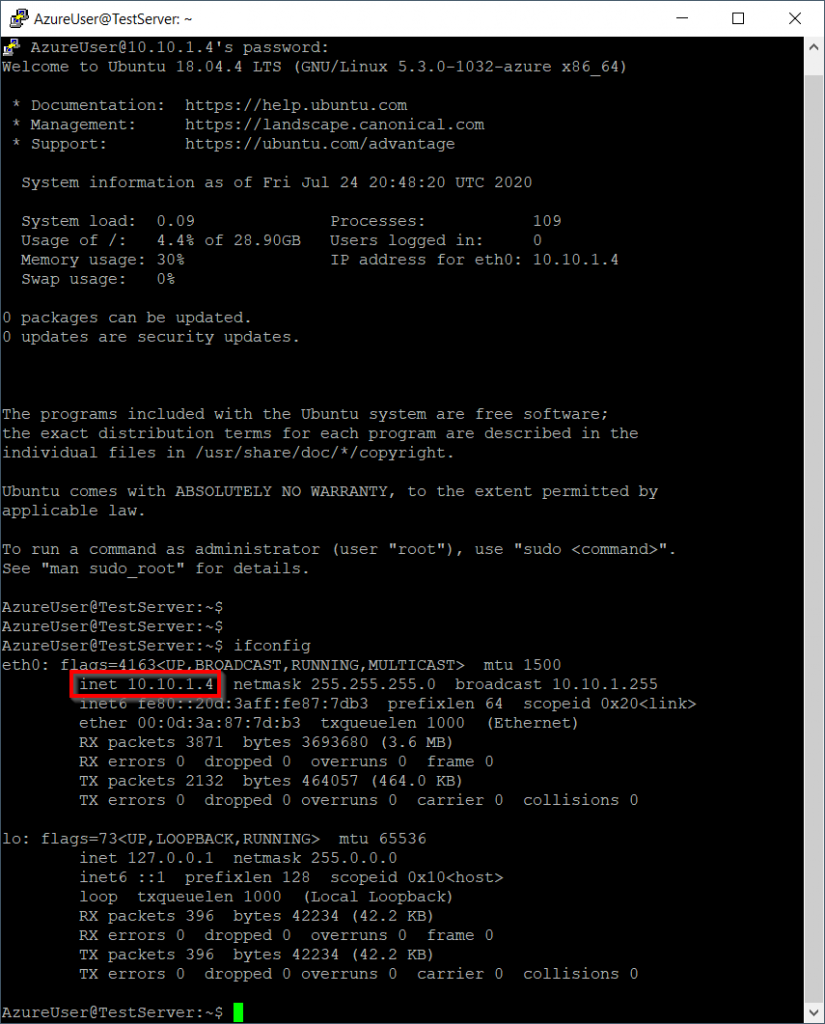
With our Site to Site VPN Connection connected try to ping the virtual machine from the on-premise server, it should respond. We can also verify connectivity by trying to establish an SSH connection to our virtual machine running in Azure.
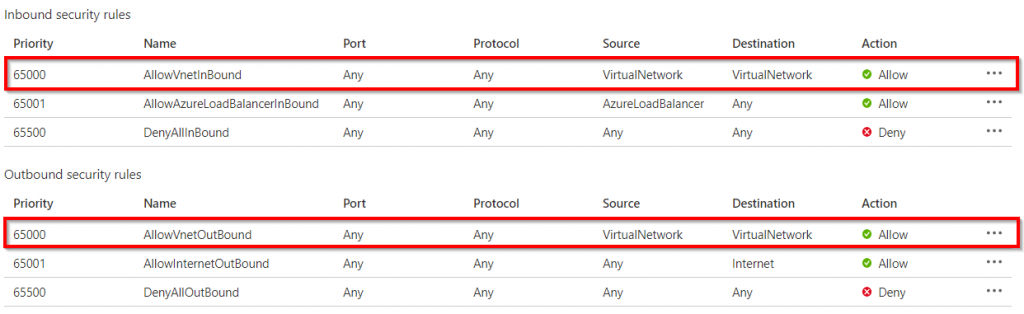
The reason this works is because the Network Security Group (NSG) that was deployed along with the virtual machine allows all inbound and outbound traffic to and from the Virtual Network by default. To allow connections from the internet, a public IP address must be added to the virtual machine and a rule in the network security group. To view the NSG search for “Network Security Group” in the Azure Portal.
Conclusion
In this post we demonstrated how you can connect your on-premise to Azure using Windows Server 2019 with Routing and Remote Access. To make the Azure Virtual Network available to all of your clients and servers you would need to add a route on your gateway/router. Most routers today can be configured to run VPN tunnels such as this one, reducing the amount of static routes needed. Some next steps could be: Add another Site to Site VPN connection for a branch office or configure point to site connections. Point to site (P2S) would allow remote workers (Windows, macOS, iOS and Android) to connect through the Azure VPN to reach on-premise and cloud resources.

