In this post we will discuss Patch Management and demonstrate how Ivanti Security Controls can be used to automatically and seamlessly patch Microsoft and third party products, that are installed on servers and end-user devices.
So what makes Ivanti Security Controls such a great product? In my opinion: Simplicity. The product is non-trivial for end-users (actually they should not even notice it is installed), yet powerful enough to comply with enterprise requirements. Combined with the cloud integration that allows patching of endpoints regardless where they are, makes this a perfect solution for all those organizations adopting a Modern Management strategy. There are plenty of alternative products in this space to choose from, a few examples: Patch My PC, Flexera Vulnerability Manager (Secunia), Patch Manager Plus, Solar Winds and Microsoft System Center Updates Publisher.
Disclaimer: I am not endorsed, affiliated or sponsored by Ivanti in any way, these thoughts and opinions are purely my own.
Contents
- What is Patch Management? Why Should You Care?
- Defining The Test Environment
- Obtaining Security Controls
- Installing Security Controls
- Creating an Agent Policy
- Integrating with Security Controls Cloud (Optional)
- Installing the Security Controls Client
- Verifying Our Setup
- Troubleshooting
What Is Patch Management? Why Should You Care?
A software update or patch is designed to resolve one or more issues with a particular piece of software. Examples include security vulnerabilities, stability fixes, performance enhancements or compatibility improvements to mention a few. Patching a single software from one specific vendor is simple, though this process becomes much more complex when dealing with multiple applications from multiple vendors. Patch Management is the process of maintaining software revisions, in a controlled way in accordance with a patch management plan.
For any organization that takes security seriously, patching any software that is used in the organization is critical. Attackers can leverage security vulnerabilities and gain access to corporate data that could have serious consequences. In the last few years there has been a huge increase in cyber attacks against organizations worldwide. It is not difficult to find recent examples from 2020, the Marriott data breach quickly comes to mind where 5.2 million hotel guest were impacted. In another recent attack, Magellan Health was the victim of ransomware and personal information of its users was leaked. No one is perfect, not even Microsoft who disclosed a data breach that took place in December 2019. It is important to mention that patch management alone wont prevent attacks on an organization. Consider it one of many actions that can be done to reduce the risk of exposure to such attacks.
If you have been following the news recently then you might recall that Microsoft Teams had a vulnerability that allowed attacks by guest users completely silently with no user interaction or indications of compromise. This vulnerability has been fixed by Microsoft in version 1.3.00.13xxx or higher, but being able to automatically patch these types of vulnerabilities quickly and keep users safe is where tools like Security Controls really shine.
There are many things to consider in a Patch Management strategy but here are a few tips:
- Only use software that is supported by the vendor
- Create a patch regime
- Create a patch plan
- Do adequate testing
- Auditing, Reporting and Compliance (Reporting)
- Automate with a tool
Defining The Test Environment
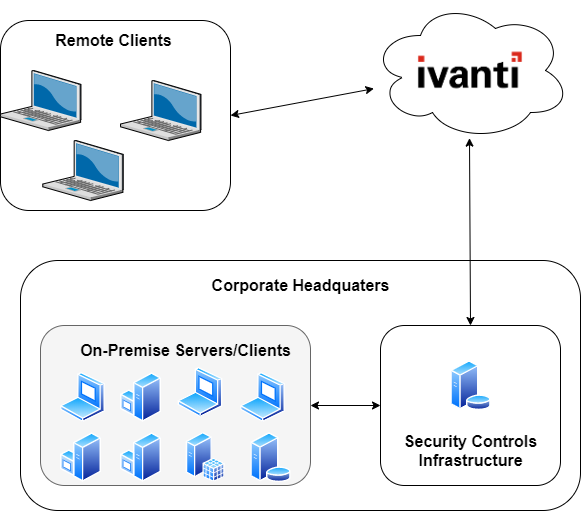
Our test environment will consist of several Windows 10 clients that are managed by Microsoft Intune (MDM), and several on-premise servers running Windows Server 2016/2019 that are joined to the same domain. In order to support clients that are outside of our corporate network we will leverage the Security Controls Cloud for reporting and policy assignments. For our on-premise environment the agent will be installed using Remote Push from the Security Controls Console.
It should be noted that Security Controls also supports agentless operations if there is network connectivity between the endpoint and Security Controls Server. However we will not be leveraging this feature in our test scenario.
Obtaining Security Controls Software
Ivanti lets you try Security Controls for 30 days with up to 100 devices. Here are a few useful links to get you started.
The Security Controls Product Page
Installing Security Controls
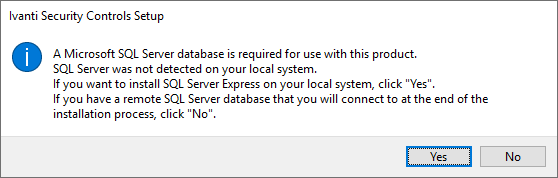
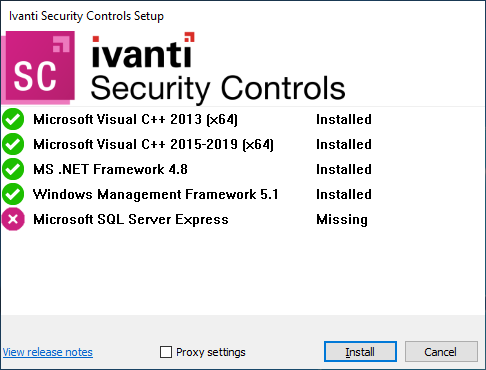
On a freshly installed Windows Server 2019 server, download the Ivanti Security Controls setup and run the executable. The product requires an SQL Database to install, if you have another SQL Server instance that you would like to use click No, else click Yes and SQL Server Express (free) will be installed automatically.
Next verify that all the prerequisites are installed, if any are missing Security Controls can install then automatically by pressing the Install button.
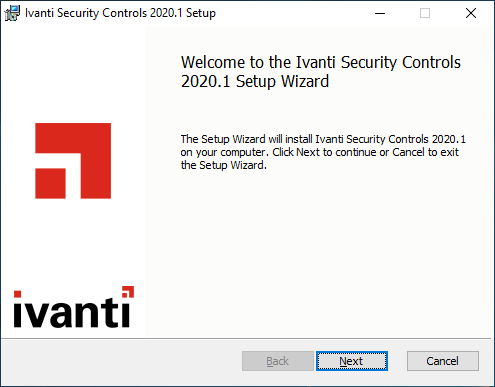
Once the prerequisites are installed the installation wizard will be displayed.
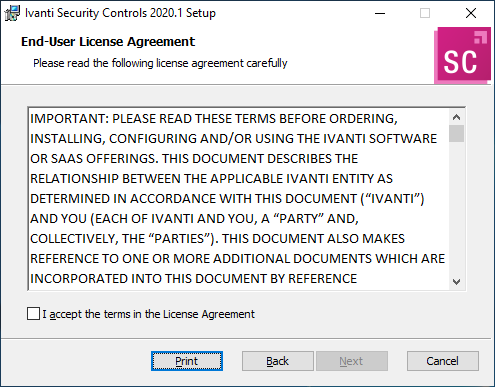
Read and accept the license agreement and click Next.
Specify the location to install Security Controls.
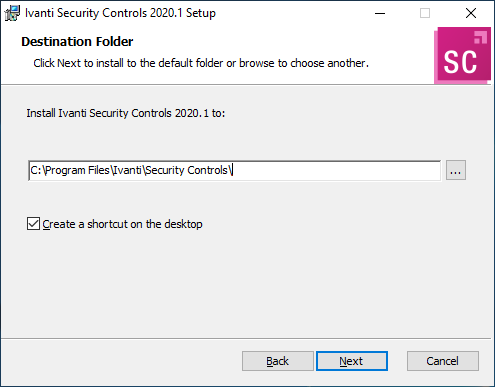
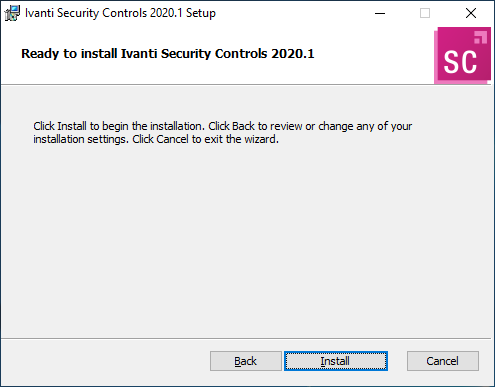
Click Install to start the installation.
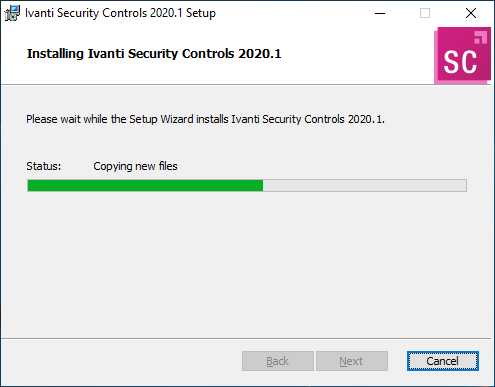
The installation should be quick on a decent system.
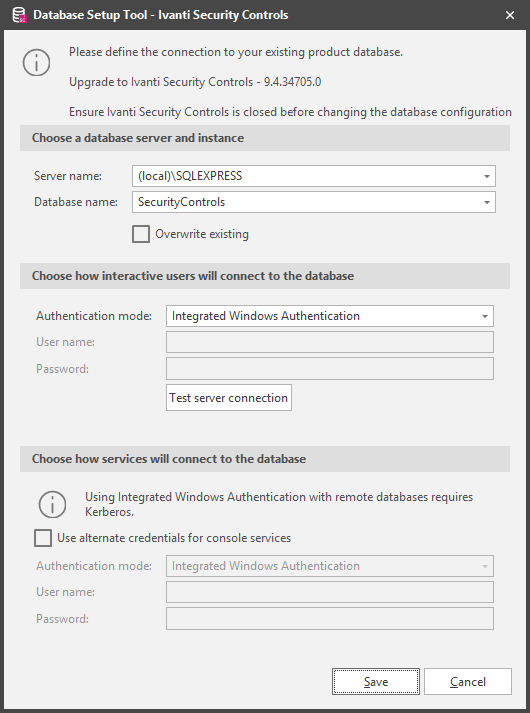
The Database Setup Tool will be displayed at the end of the installation. If you are using SQL Server Express (Yes was selected at the start) simply leave the defaults and click Save. If using a remote SQL Server then specify the appropriate settings.
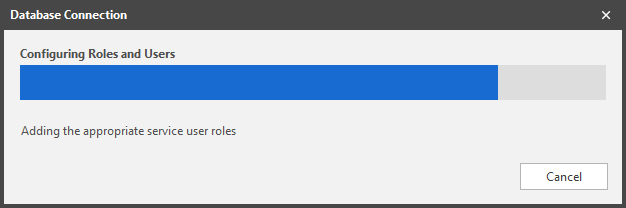
The Database Connection wizard will be displayed while SQL tasks are being executed. This should be quick and you might not notice the window at all.
Security Controls should now be installed. Launch the application and the activation window will appear. If you dont have a license select Trial.
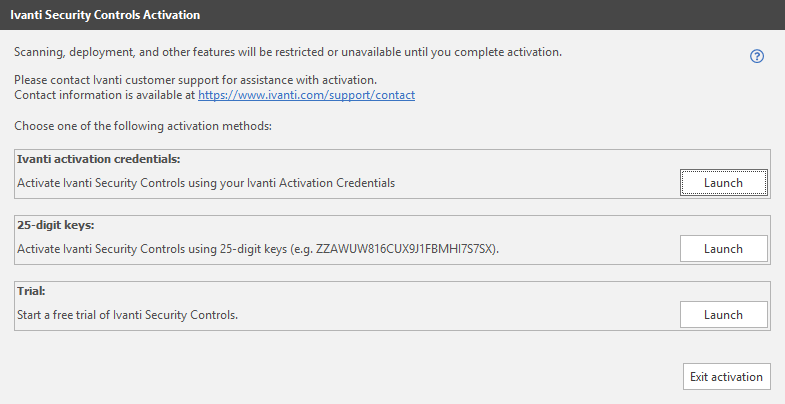
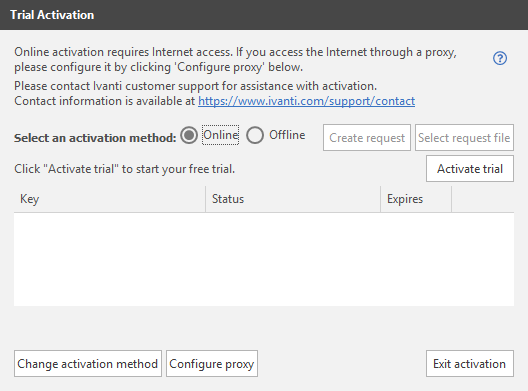
Security Controls can be automatically activated if the server has a connection to the internet. Simply select Activate Trial and a trial license supporting 100 seats/devices will be provided. Once a license has been obtained click Exit Activation to start the product.
If there are any problems retrieving a trial license or if the Security Controls server does not have an internet connection, then try the Offline Activation method by visiting the License Activation Portal.
Creating an Agent Policy
Security Controls should now be installed and the main window should be open. Our next task will be to create an Agent Policy. This policy specifies how the agent should behave and also specifies the tasks the Security Controls Agent should preform.
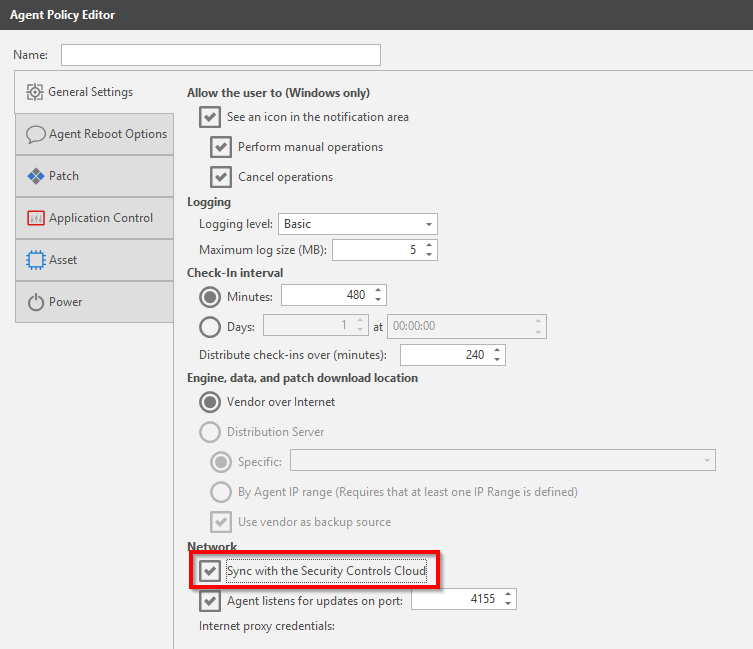
From the top menu choose New then select Agent Policy. Give the policy a name (LAB – Agent Policy) and make sure to tick the box next to Sync with the Security Controls Cloud. The remaining settings on the General Settings page can be kept to their default values. The policy settings can be changed later if required.
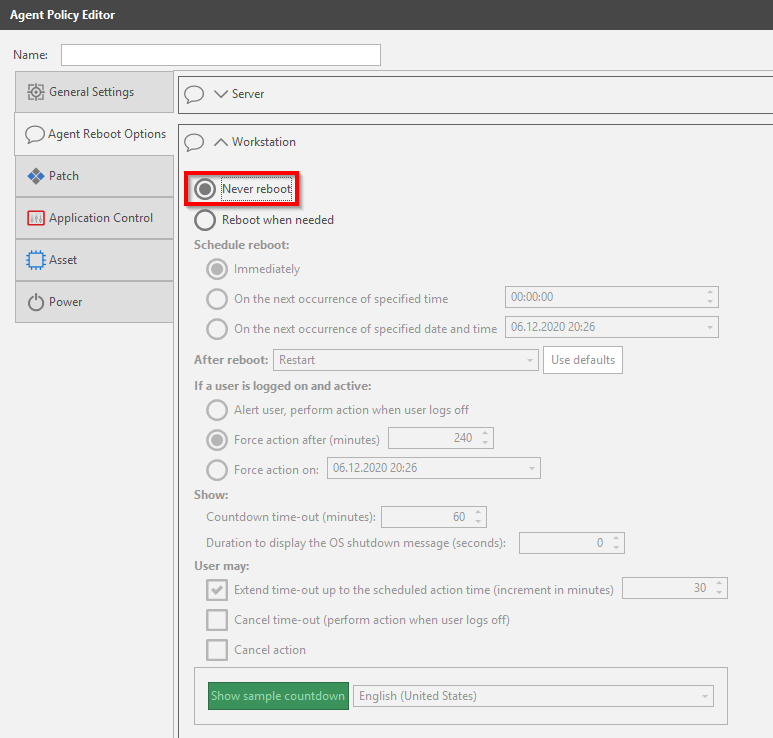
On the Agent Reboot Options page choose if the agent should restart the system. In my case I dont want to interrupt my users so all reboots will be disabled. Configure to your needs.
Note that these reboot options only apply to the install / reinstall of the agent itself. Controlling reboots that are required due to a patch deployment is specified in the Deployment Template for the specific patch task.
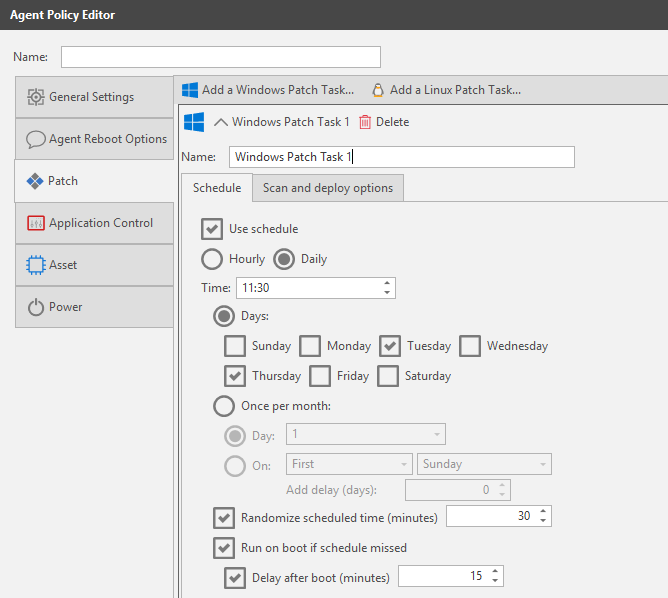
On the Patch page select Add a Windows Patch Task at the top, then specify when the task should run. It is possible to add multiple Patch Tasks to the policy, this gives us the flexibility of creating one task that simply scans for missing patches and vulnerabilities without making changes to the endpoint. We could then have another task that deploys the patches at the most convenient time for the organization. My two Patch Tasks will be called LAB – Scan Only and LAB – Scan and Deploy.
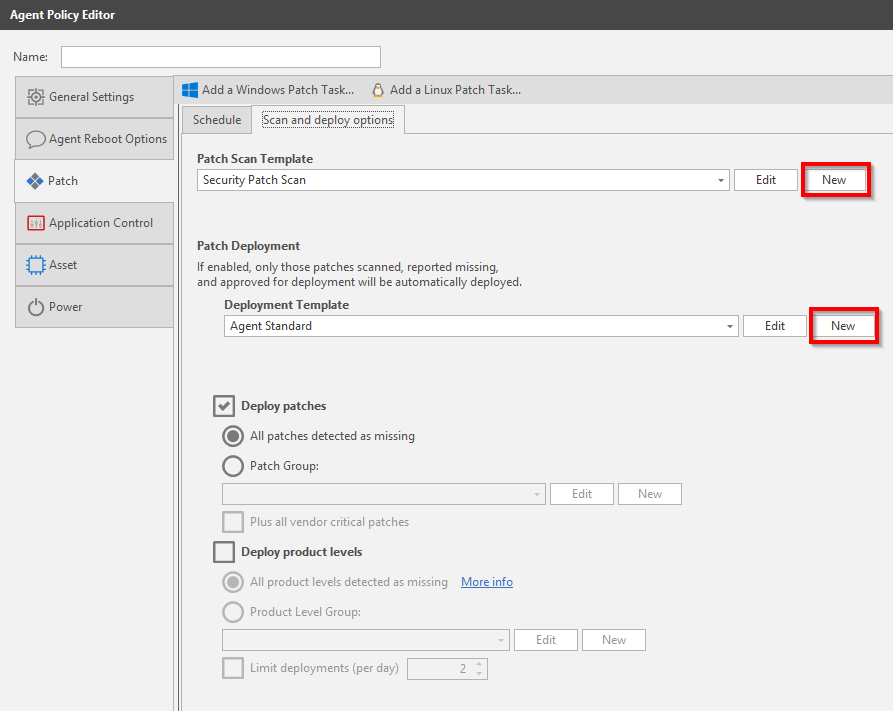
Switch to the Scan and Deploy Options. The Patch Scan Template defines what products we should scan for. The default templates cannot be modified so you will have to create your own template if modifications are needed. The Patch Deployment Template allows control of pre and post reboots, notifications, custom actions etc.. If creating a Scan Only task that was mentioned above, then remember to untick the Deploy Patches box.
Integrating with Security Controls Cloud
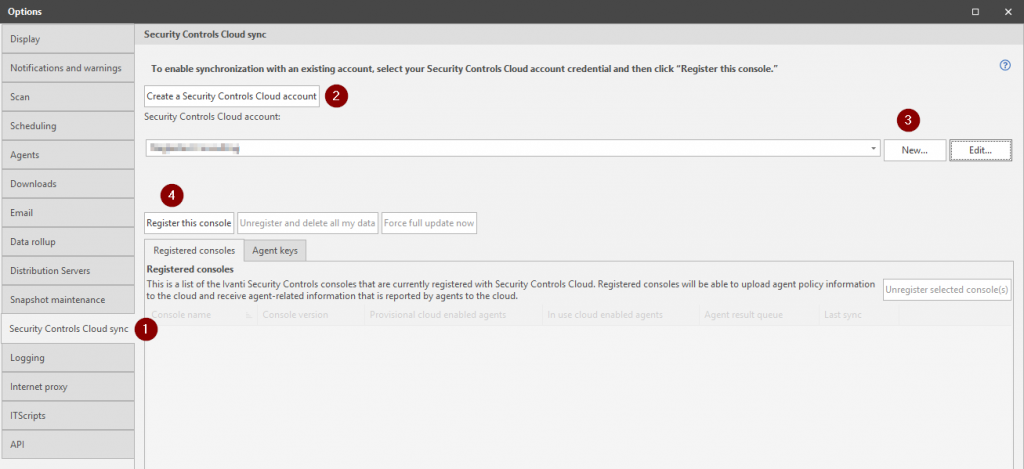
Cloud connectivity is optional but I would recommend enabling just due to the flexibility it provides. In the top menu choose Tools then select Options.
- Select the Security Controls Cloud Sync Page
- Press Create a Security Controls Cloud Account and register for a cloud account in the browser. Optionally register here.
- Add your cloud credentials
- Press Register the Console
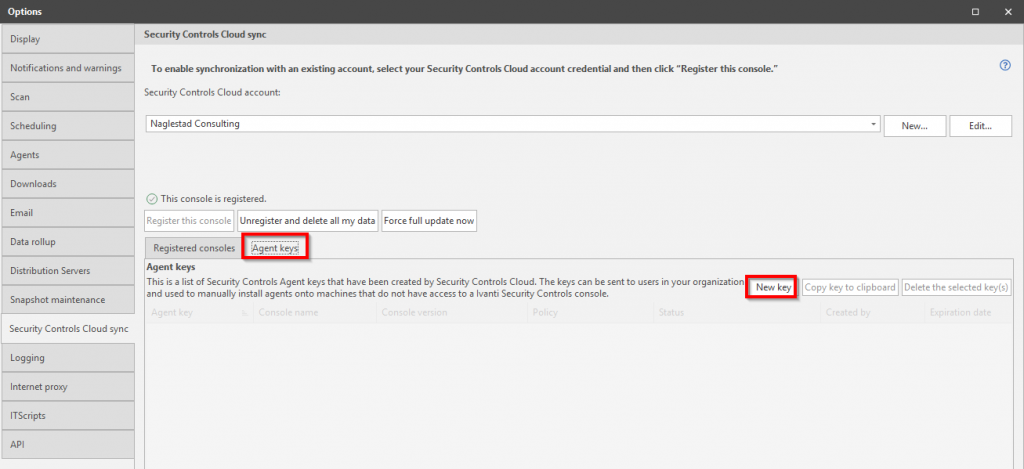
Next we need to create an Agent Key. This key will only be required to install the Security Controls Agent on cloud managed devices. This does not mean that the key needs to be valid for the Security Controls Agent to communicate with the cloud service. According to Ivanti, the validity period of the key is a security measure because anyone with the key can enroll devices into your Security Controls infrastructure.
Switch to the Agent Keys tab and select New Key. In the window that appears choose the policy that we created earlier, specify how long the key should be valid and how many clients to support for that particular key. Make a note of the key as we will need it in the next step.
Installing the Security Controls Agent
There are a couple of ways to install the Security Controls Agent but preferably this is done either through a client management system like Microsoft Endpoint Manager (Configuration Manager or Intune) or through the Remote Push feature in the console.
It can take up to 15 minutes before the client has received all its policies when using cloud based registration. In my experience the registration is a lot quicker when using a direct connection to the console, but that is to be expected.
Automated/Scripted Install
The Security Controls Agent on the end-user device will communicate directly with the cloud service, and the on-premise console will synchronize with the cloud service at intervals. However the cloud service is not able to install the agent on our endpoints automatically.
We need to create a scripted/automated installation that we can use to deploy the agent to all our endpoints. In this case Windows 10 clients are managed by Microsoft Intune but any management solution should work.
- Locate the following folder on the Security Controls Server:
C:\ProgramData\Ivanti\Security Controls\Console\DataFiles - Copy the following file:
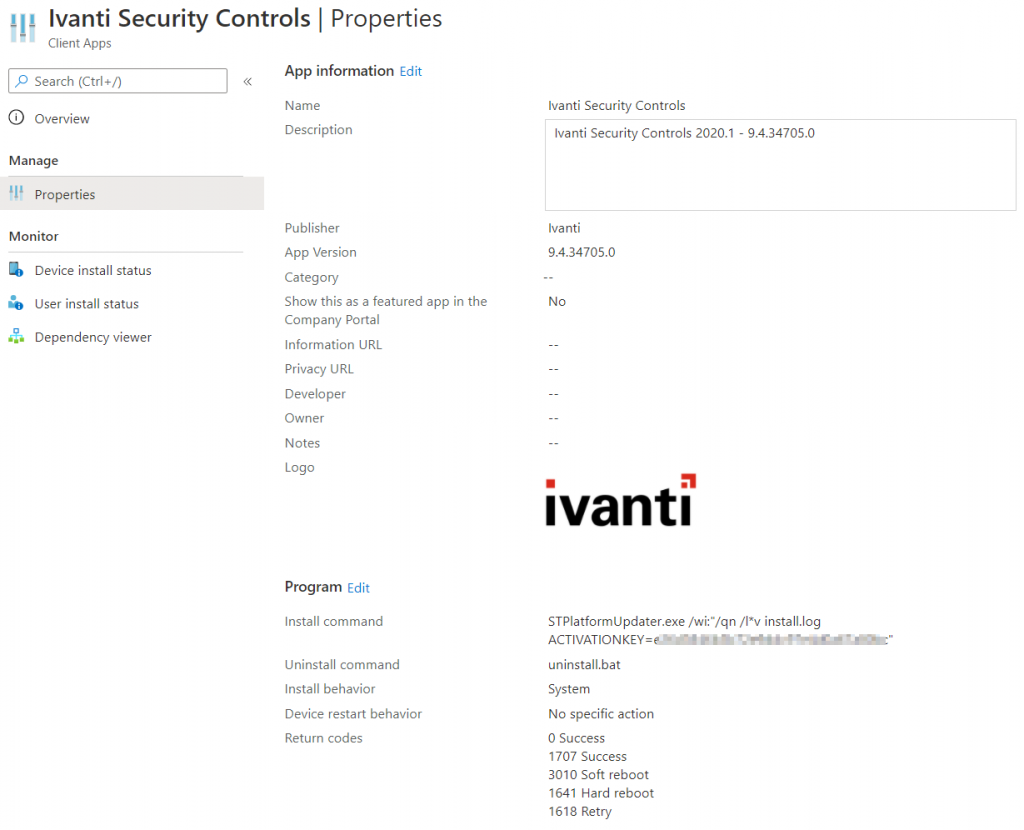
STPlatformUpdater.exe - Create a deployment package that executes the following command, where the activation key is the key that we created in the console earlier.
STPlatformUpdater.exe /wi:”/qn /l*v install.log ACTIVATIONKEY=12345abc-2abc-3abc-4abc-123456789abc“
Check the documentation for more information and examples how to script deployments. Below is an example of a package that has been created using Microsoft’s Win32 Content Prep Tool for Intune.
Remote Push from the Console
Remote Push can be a great way to install the Security Controls Agent if there is connectivity between the Security Controls Server and the endpoint (here are the Used Ports, also verify that the endpoints can resolve the server).
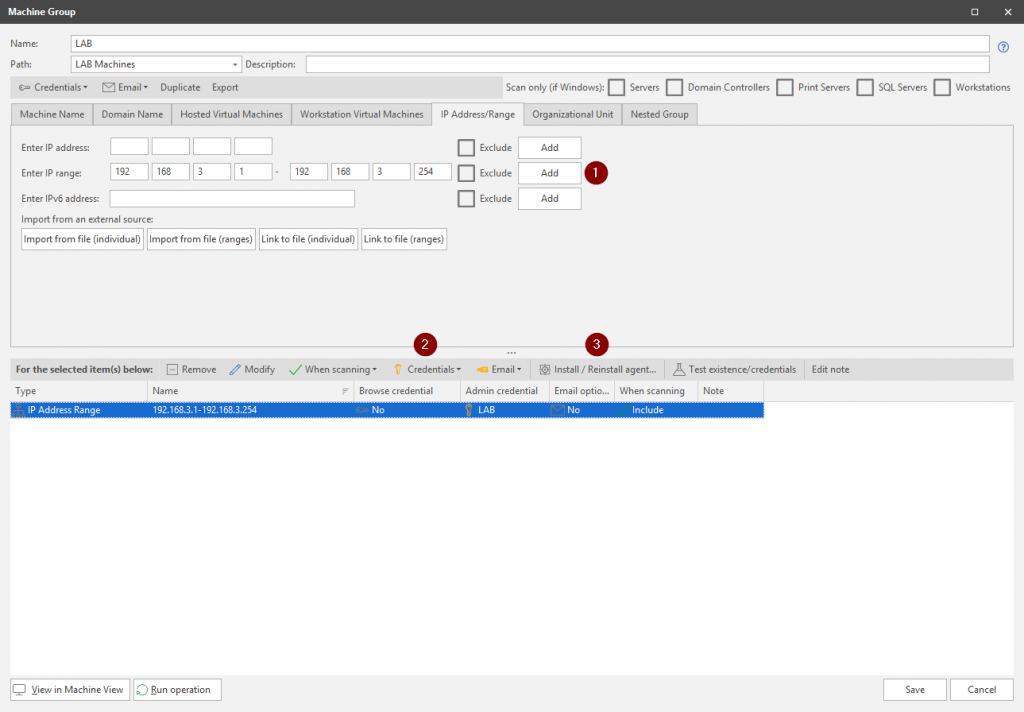
From the top menu select New, then choose Machine Group. Give the Machine Group a name then select one or more filters to scan / import endpoints. In our case all endpoints are joined to the same Active Directory domain, so we could simply browse/scan Active Directory for the machines we wish to install the agent on. However to keep things a little simple we will be specifying an IP address range to scan for endpoints.
- Specify the IP address range to scan
- Specify the credentials that have administrative rights on the endpoints.
- Select Install / Reinstall Agent
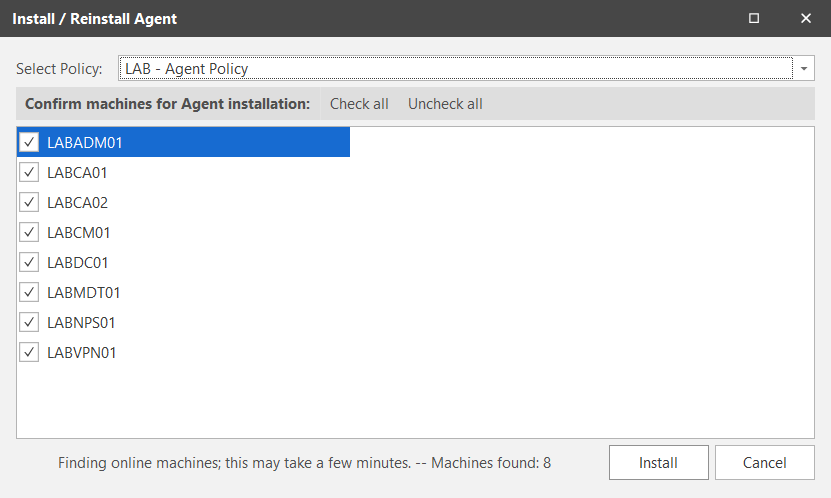
In the Install / Reinstall Agent window, select the Agent Policy that we created earlier and select the devices to install the agent on before clicking Install.
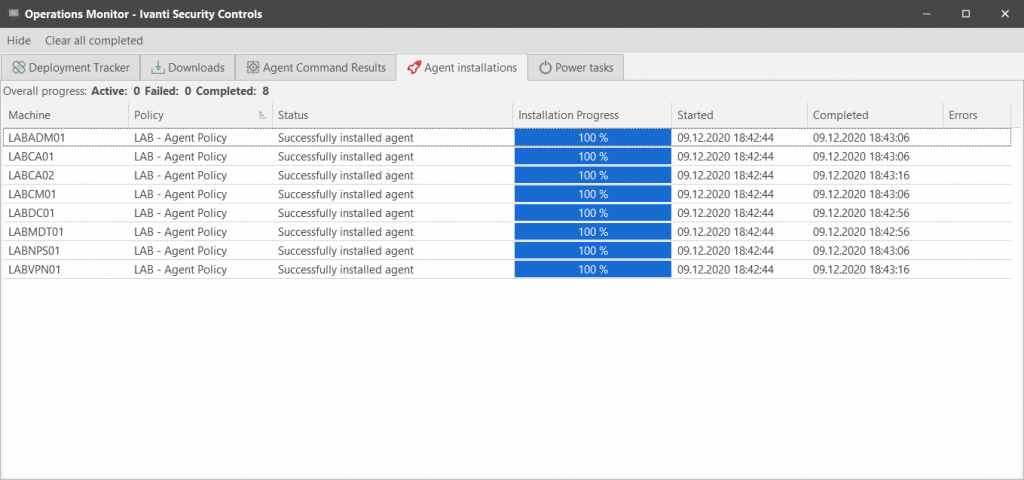
Security Controls will then display the installation progress and any errors encountered.
Manual Install
On the Ivanti Security Controls Server locate the STPlatformUpdater.exe file located in the C:\ProgramData\Ivanti\Security Controls\Console\DataFiles directory. Copy and execute this file on the client or server that should have the agent installed.
Once the installation is complete (there is no installation wizard), the agent will need to be registered to a console using either cloud or a direct connection.
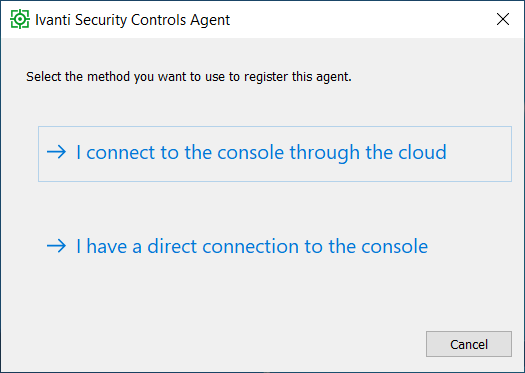
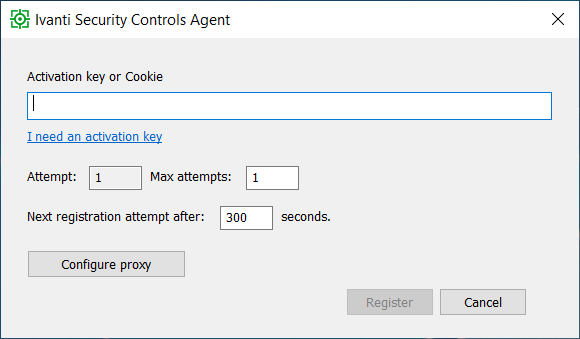
If the cloud method was selected then type in the appropriate activation key.
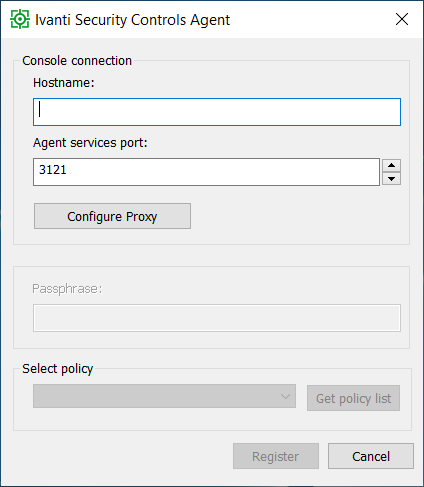
If a direct connection was chosen then type the name / IP of the Security Controls Server. Note that a passphrase must be defined in order to register clients manually with the console, this can be set in the Options menu under Agents on the Security Controls Server.
Verifying Our Setup
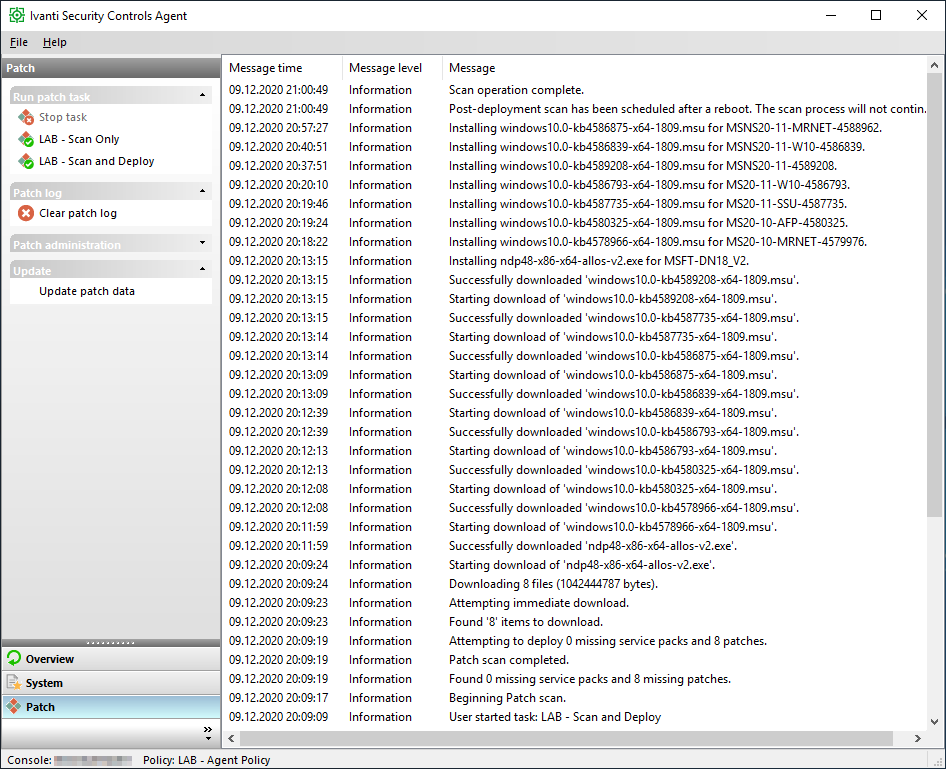
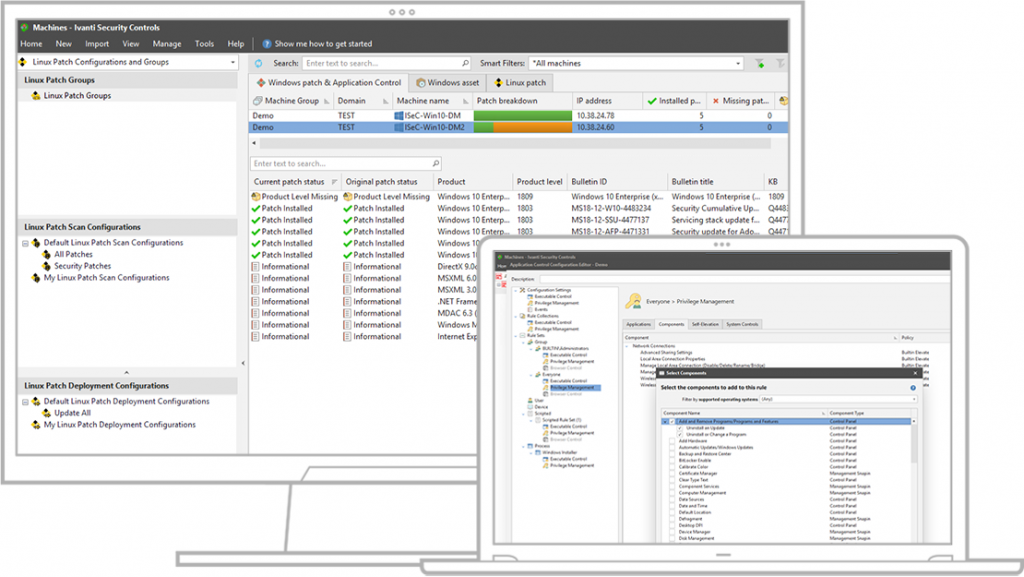
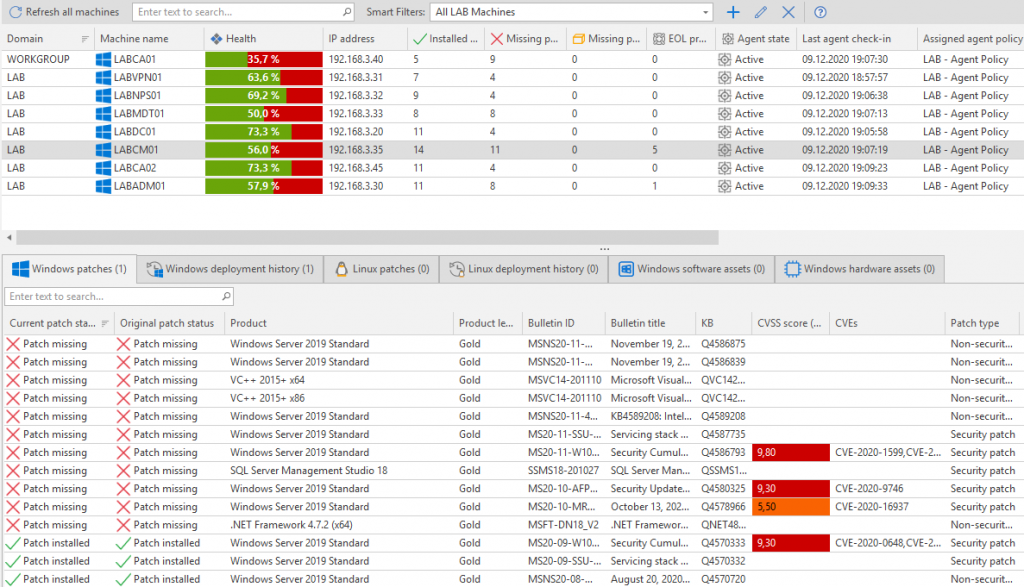
After all of the agents have done a scan and reported that information back to the console (check-in), we get health status and information on what patches are missing. There are lots and lots of patches missing in this environment, not surprising as this LAB environment has been powered off for some time. It took several reboots/patch cycles but all serveres were all successfully updated and now show 100%.
Troubleshooting
Initial troubleshooting can be done from the client itself as it actually provides quite a lot of information. For example if there is no data in the console or you are expecting different results, make sure that at least one scan has been run and that the agent has checked in with these results. Manual trigger of a scan and check-in can be done directly from the agent.
The agent has detailed logs located at C:\ProgramData\LANDESK\Shavlik Protect\Logs. Alternatively Ivanti can be contacted through their website.