
Identity is the central component in any cloud strategy. Synchronizing your existing Active Directory identities (users) to the cloud will allow your end-users to leverage the same credentials on-premise and the cloud. In this post we will walk through the process of installing Azure AD Connect and optionally enable the AD Connect V2 endpoint that supports much larger groups and should give larger organizations a performance boost.
Contents
- Licensing and Limitations
- Required Connectivity
- Verifying Universal Principle Names (UPN)
- Proxy Configuration
- Installing AD Connect
- Verifying Synchronization
- Enabling V2 Endpoint API (Optional)

Licensing and Limitations
Azure AD Connect is free and does not require additional licensing, however there might be optional features such as allowing users to reset their on-premise passwords through Self-Service Password Reset (SSPR) that requires an Azure AD Premium license. Additionally there are some limitations to be aware of:
- Global Administrator rights in Azure Active Directory
- Enterprise Administrator rights in Active Directory
- Azure AD Connect must be running on Windows Server 2012 or later.
- Windows Server Core is not supported, GUI is required.
- The Active Directory schema version and forest functional level must be Windows Server 2003 or later.
- Password Writeback requires that domain controllers are running Windows Server 2012 or later.
- Read-Only Domain Controllers (RODC) are not supported
Depending on the options that is chosen during the AD Connect setup, there could be many additional requirements. If considering
Required Connectivity
Make sure that all required ports are open in your firewall per Microsofts documentation. Below are the absolute minimum required ports and endpoints in order for AD Connect to work, however review the Office 365 URL and IP Ranges documentation as this could change.
| URL | Port | Description |
|---|---|---|
| mscrl.microsoft.com | HTTP/80 | Used to download CRL lists. |
| *.verisign.com | HTTP/80 | Used to download CRL lists. |
| *.entrust.net | HTTP/80 | Used to download CRL lists for MFA. |
| *.windows.net | HTTPS/443 | Used to sign in to Azure AD. |
| secure.aadcdn.microsoftonline-p.com | HTTPS/443 | Used for MFA. |
| *.microsoftonline.com | HTTPS/443 | Used to configure your Azure AD directory and import/export data. |
| *.crl3.digicert.com | HTTP/80 | Used to verify certificates. |
| *.crl4.digicert.com | HTTP/80 | Used to verify certificates. |
| *.ocsp.digicert.com | HTTP/80 | Used to verify certificates. |
| *.www.d-trust.net | HTTP/80 | Used to verify certificates. |
| *.root-c3-ca2-2009.ocsp.d-trust.net | HTTP/80 | Used to verify certificates. |
| *.crl.microsoft.com | HTTP/80 | Used to verify certificates. |
| *.oneocsp.microsoft.com | HTTP/80 | Used to verify certificates. |
| *.ocsp.msocsp.com | HTTP/80 | Used to verify certificates. |
Verifying UPN’s
When users authenticate against Azure AD, the Universal Principle Name (UPN) is used. The UPN follows the same format as an email address, and to make it easier for end-users it is considered good practice for the UPN and e-mail to match. Microsoft has a great tool called IDfix that can help discover and remediate problems with UPN’s that could cause synchronization errors down the road. Before attempting any synchronization with AD Connect use IDfix to verify that there are no UPN issues.
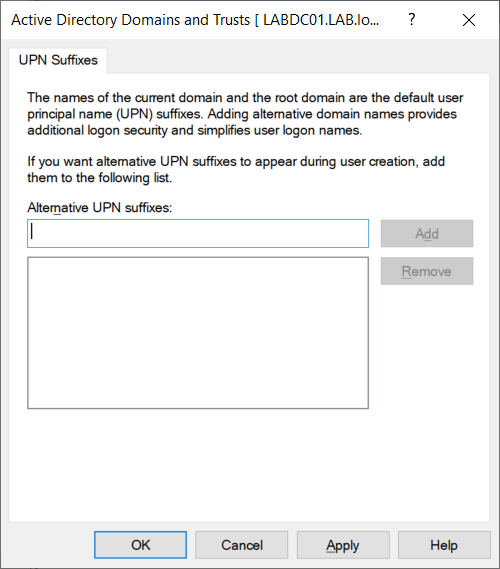
If your Active Directory was created with a non-routable domain name such as lab.local, or you simply want to use another domain, we can add a routable domain name to our Active Directory. The same domain name must also be added and verified in Azure Active Directory or the Microsoft 365 Admin Portal on the cloud side.
On a Domain Controller open Active Directory Domains and Trust and add any domain names you would like to use with Microsoft 365.
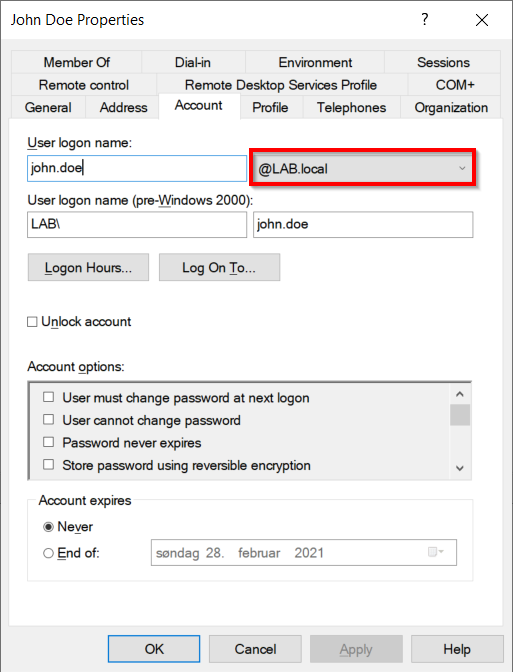
Once the additional domain has been added we need to change the Universal Principle Name (UPN) of our users. This can be done manually with Active Directory Users and Computers by changing the domain in the Account tab as indicated bellow, or by leveraging PowerShell.
Proxy Configuration
Microsoft recommends that proxy servers be avoided if possible for Microsoft 365 services. If traffic cannot be excluded and needs to go through an outbound proxy add the following at the bottom of: C:\Windows\Microsoft.NET\Framework64\v4.0.30319\Config\machine.config on the AD Connect server. Make sure to restart the system after making changes to this file.
    <system.net>
        <defaultProxy>
            <proxy
            usesystemdefault="true"
            proxyaddress="http://PROXYADDRESS:PROXYPORT"
            bypassonlocal="true"
            />
        </defaultProxy>
    </system.net>
If the proxy requires user based authentication then make sure to add the useDefaultCredentials setting like below. Also note that the service used by AD Connect, needs to exist in Active Directory for user based authentication to work.
    <system.net>
        <defaultProxy enabled="true" useDefaultCredentials="true">
            <proxy
            usesystemdefault="true"
            proxyaddress="http://PROXYADDRESS:PROXYPORT"
            bypassonlocal="true"
            />
        </defaultProxy>
    </system.net>
Installing AD Connect
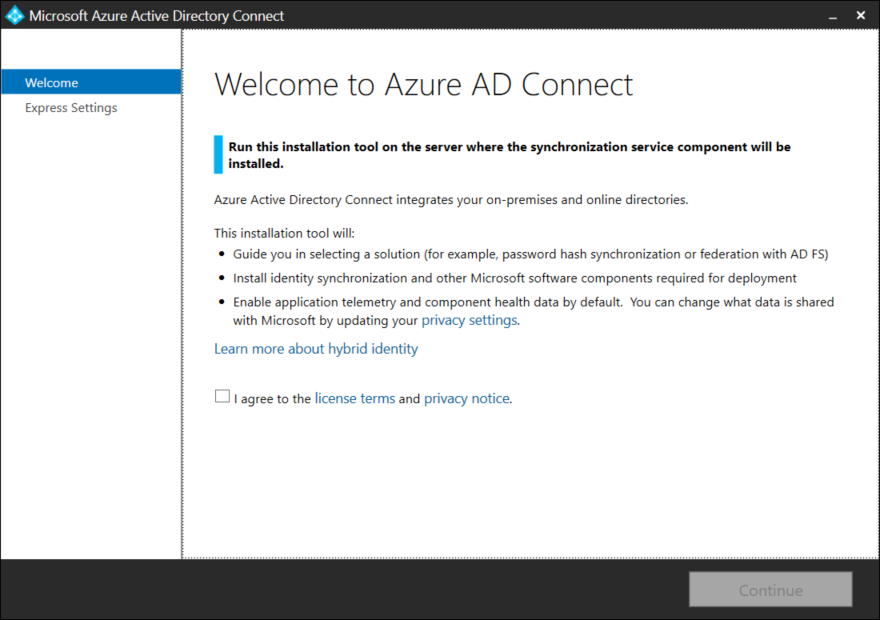
On a clean and fully patched server (using the the latest version of Windows Server is recommended) download the latest version of Azure AD Connect and run the MSI file.
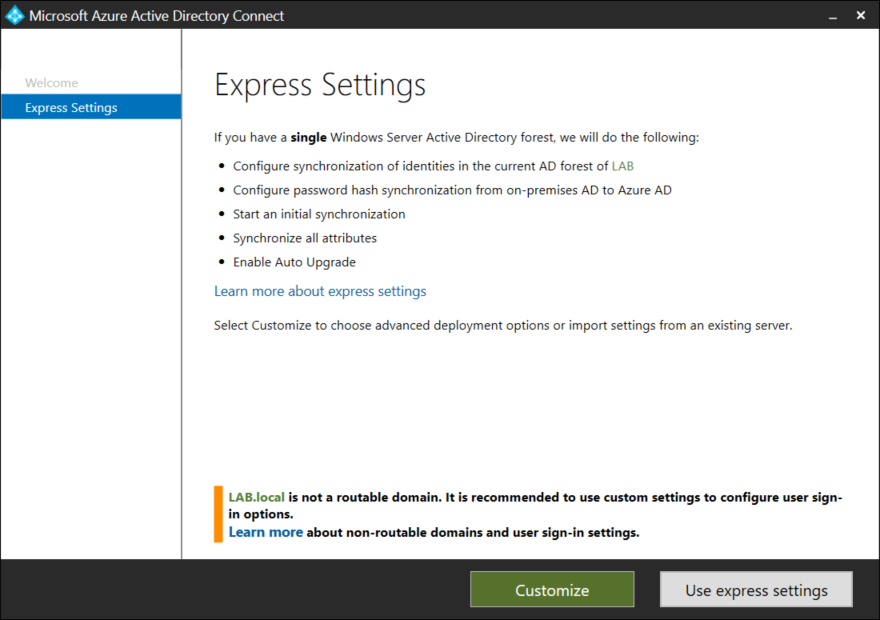
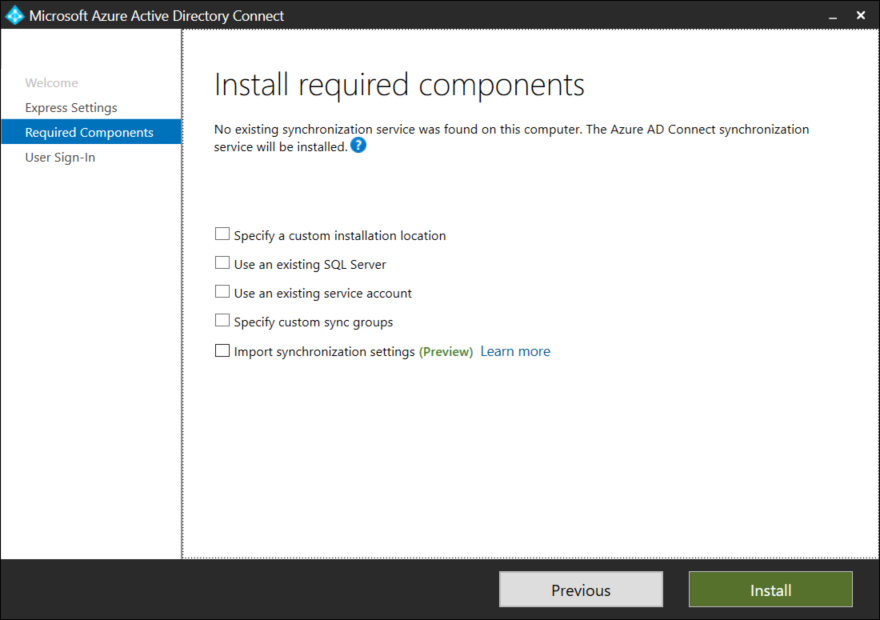
Notice the warning that reminds us that lab.local is not a routable domain. Select Customize.
Unless you have specific needs leave all the boxes unchecked and click Install. Large enterprises (those that are synchronizing more than 100,000 objects) might need to use a dedicated SQL instance instead of the built in SQL Express instance.
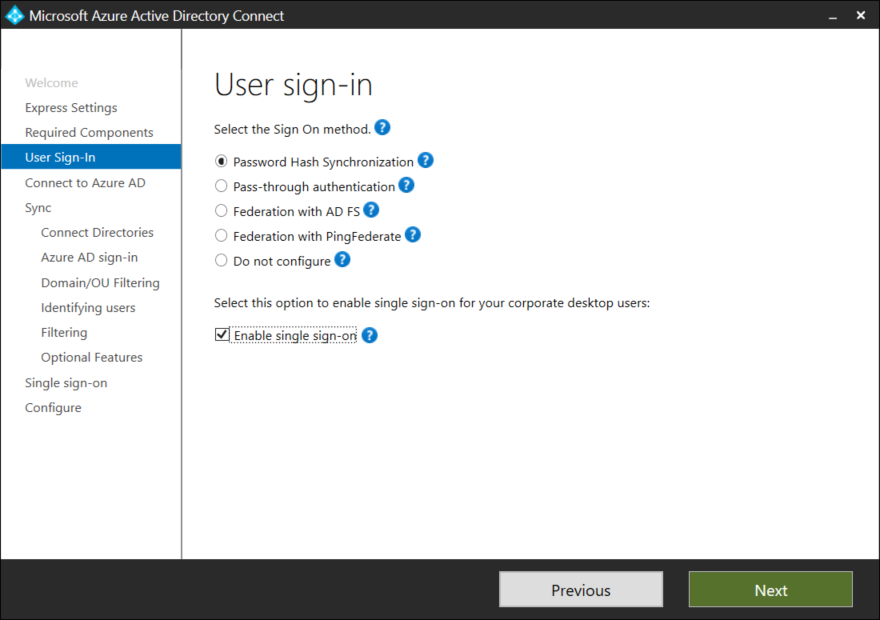
Select Password Hash Synchronization and tick the box for Single Sign on.
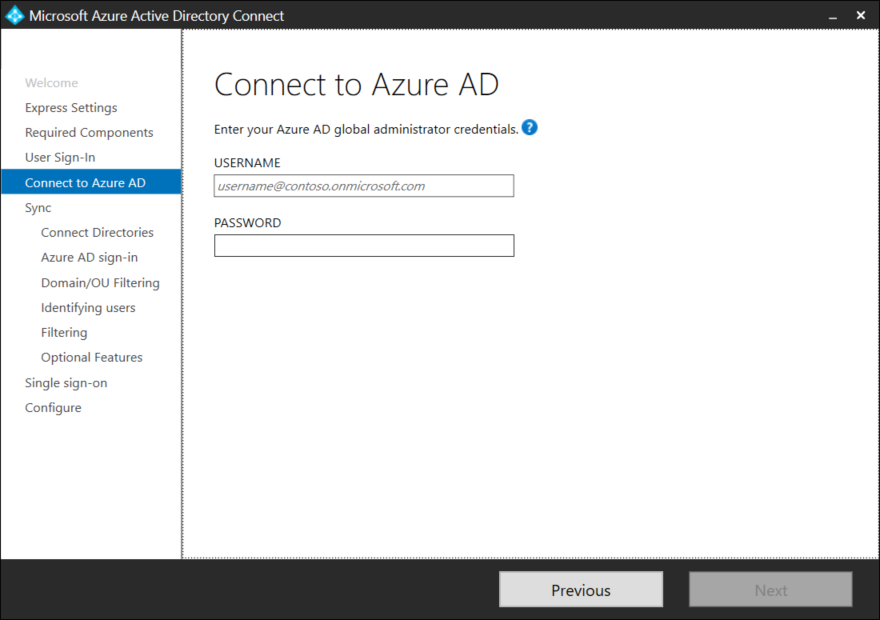
Login with a user that has Global Administrator permissions in Azure AD.
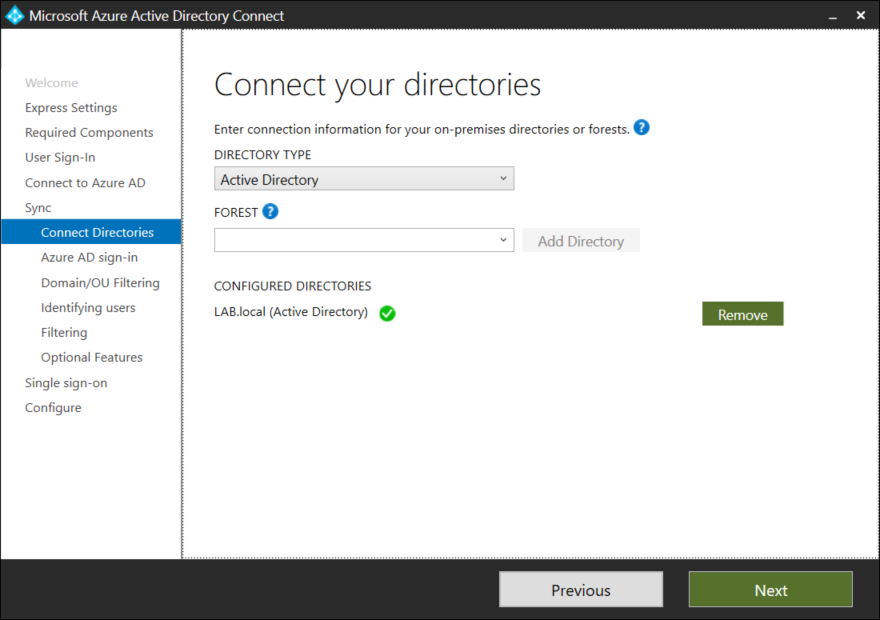
Select one or more domains in you active directory forrest that should be synchronized to Azure AD, and press the green Add Directory button.
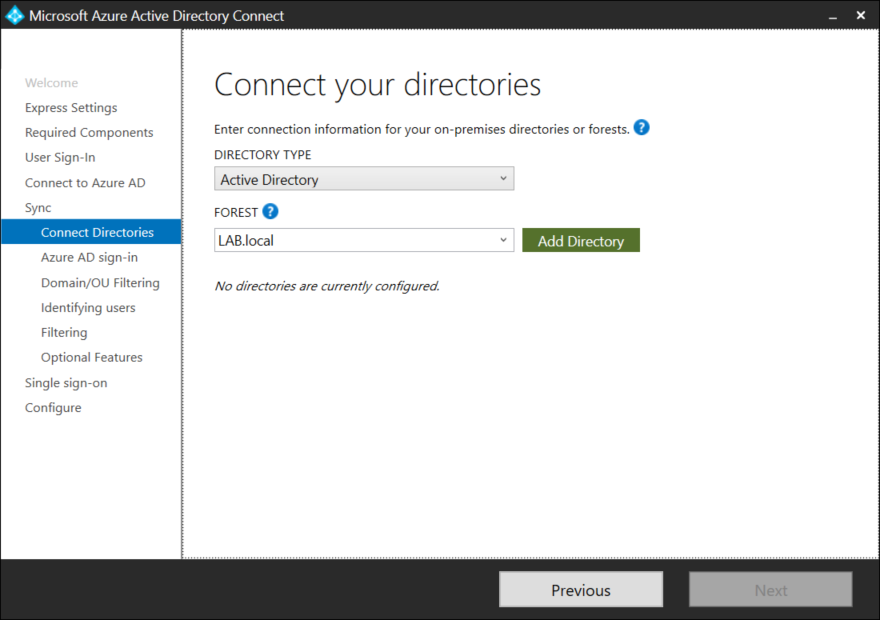
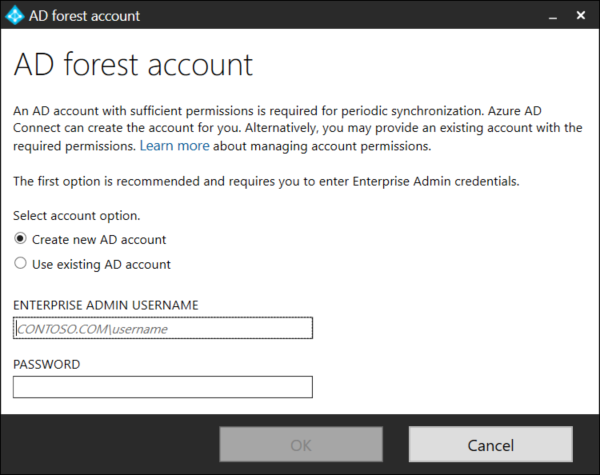
AD Connect will automatically create a service user and make the required changes to the on-premise Active Directory. Enter a user that has Enterprise Administrator rights (Domain Admin is not sufficient) in Active Directory.
Once all domains have been added press Next to continue.
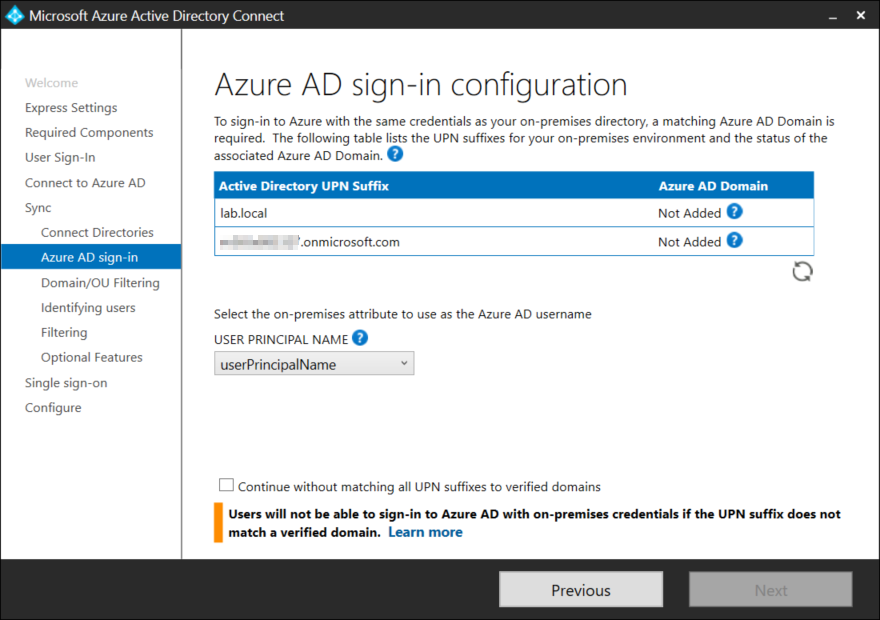
AD Connect will now examine any domains in the Active Directory environment. Make sure that the the same domain (UPN Suffix) is added both in Active Directory and Azure AD. It is not a requirement to have all your on-premise domains in Azure AD, as long as one is present on both sides.
Notice that it is possible to change the attribute that will be used for the Azure AD usernam, however leave the default unless there is a very specific reason that the user principal name cannot be used.
Once all domains have been added the green Next button lights up. If you only want to configure a single domain check the box at the bottom to continue without matching all UPN Suffixes and click Next.
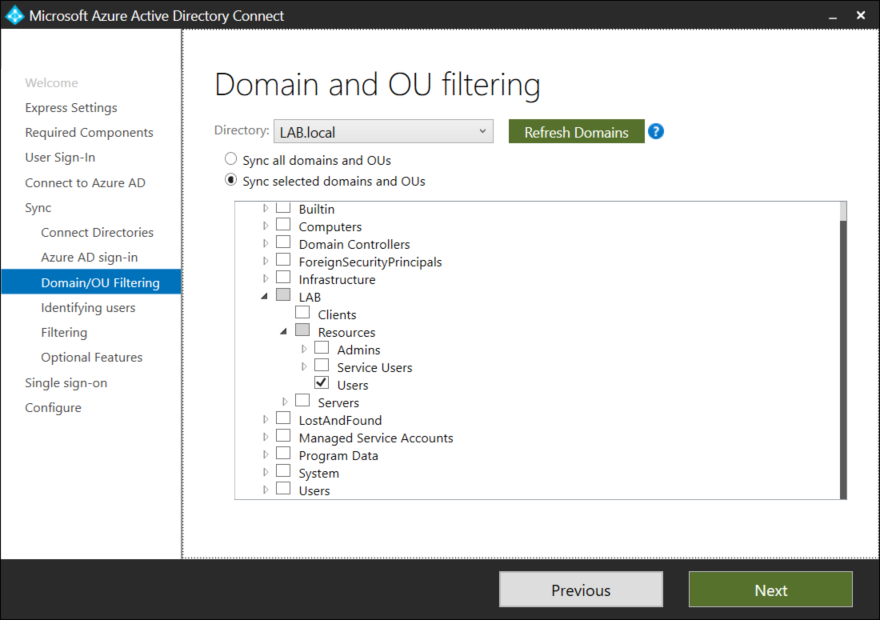
By default all domains and OU’s in Active Directory will be synchronized. In my opinion synchronize only what you need, if you simply choose to sync the entire Active Directory there is a chance that you will synch old and forgotten objects into Azure AD creating clutter. It is possible to further filter objects using a security group later.
In this example we will only be synchronizing specific users and groups (changes can be done later). Select the OU’s that should be synchronized and press Next.
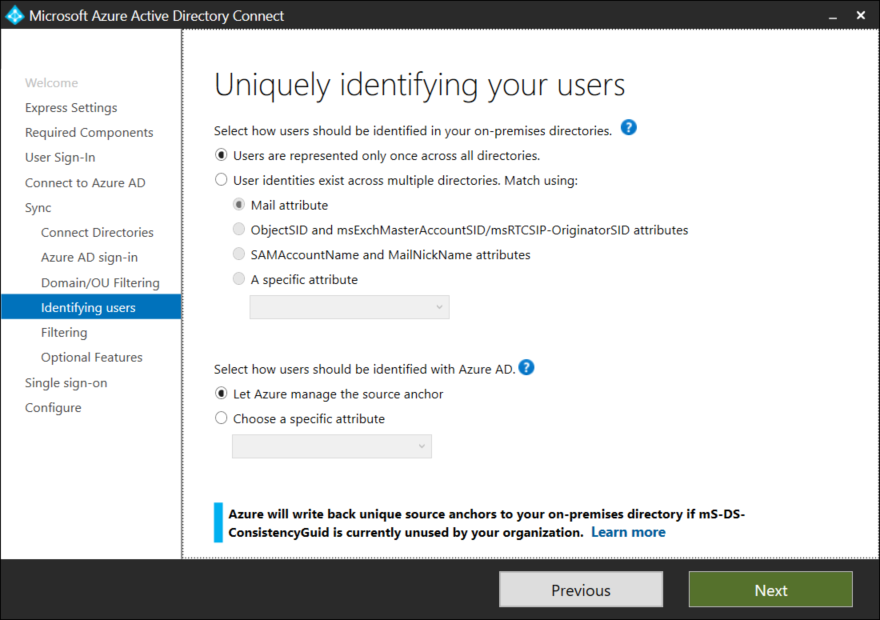
Most organizations will only have users in a single domain/directory. Identities across multiple directories is beyond the scope of this post, but if this is the case for your organization select an attribute to use for user matching. If you are unsure, users are most likely only represented once across domains/directories.
At the bottom of the page it is possible to select the source anchor. The source anchor is also sometimes called the immutableID and uniquely identifies an object between on-premise and Azure AD. Leave the default setting to let Azure mange the source anchor and click Next.
If you are piloting AD Connect and wish only to synchronize specific objects, a filter group can be created. Personally i prefer filtering at the OU level instead of using groups, Click Next to continue.

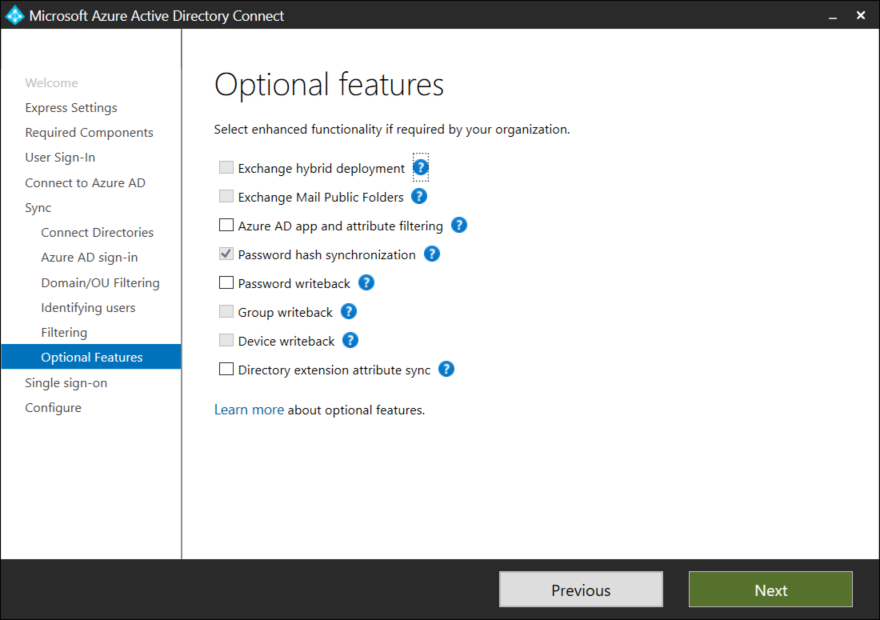
AD Connect comes with a couple of optional features such as Password Writeback among others. For simplicity sake these options wont be covered in this post. Select Next to continue.
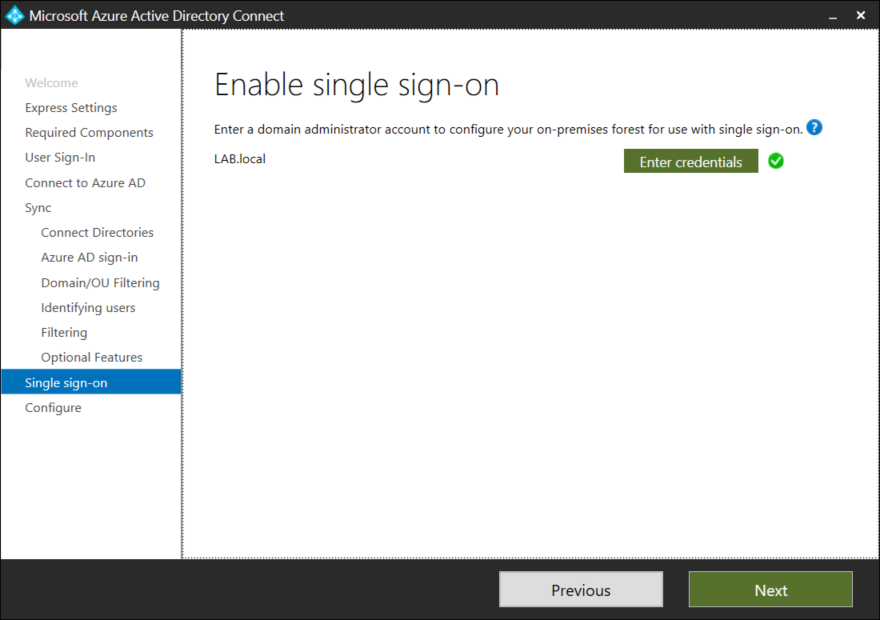
To enable Single Sign On (SSO) a Domain Administrator account is required, press the green Enter Credentials button, specify a Domain Administrator and click Next to continue.
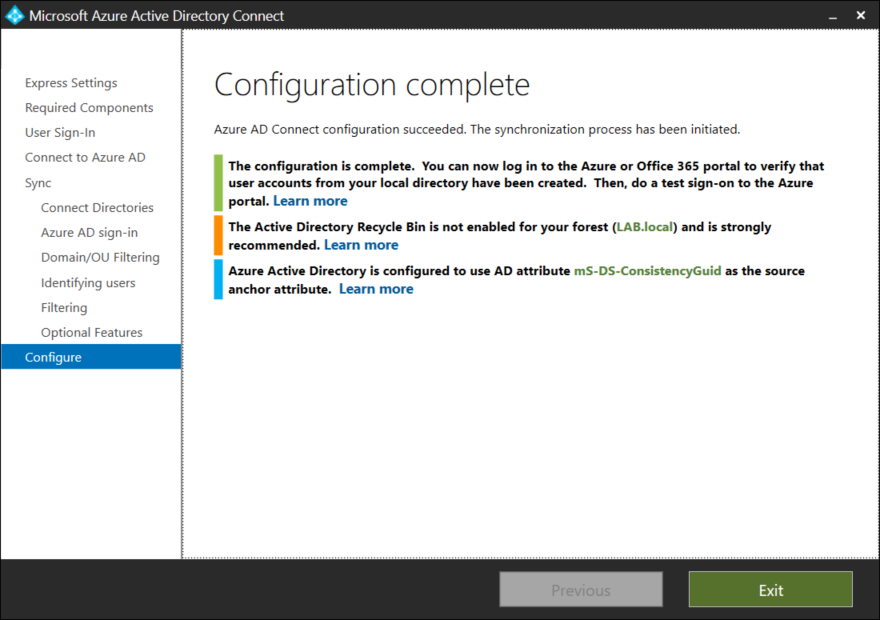
Finally we are ready to Configure. If this is the only Azure AD Connect in your environment leave the checkboxes as is. Staging mode is a method that can be used for high availability or replacing an existing Azure AD Connect server. Click Install to continue.
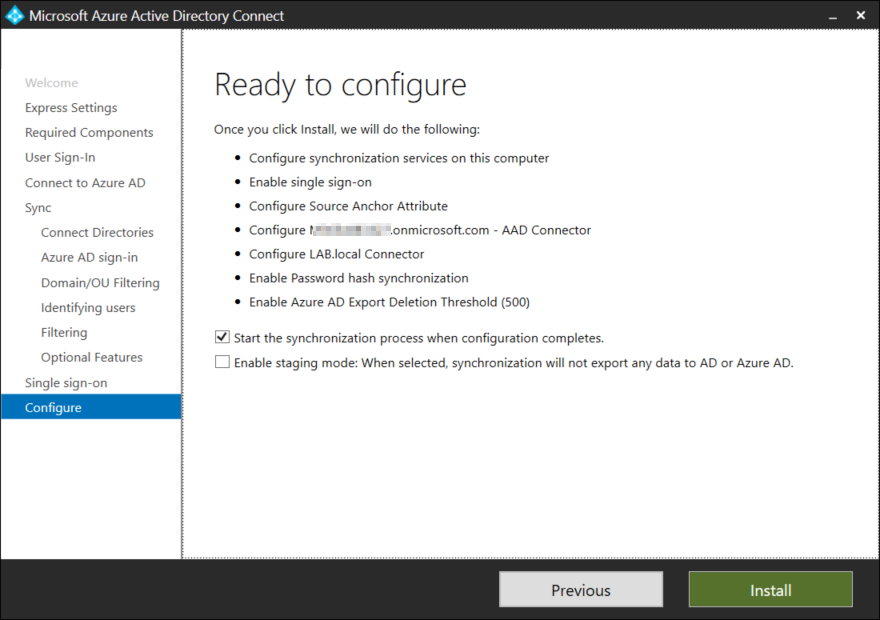
The time the configuration takes varies from environment to environment and how many objects are present in the directory. AD Connect will use the ms-DS-ConsistancyGuid as the source anchor if this attribute has not been used for anything else in the environment.
Verifying Synchronization
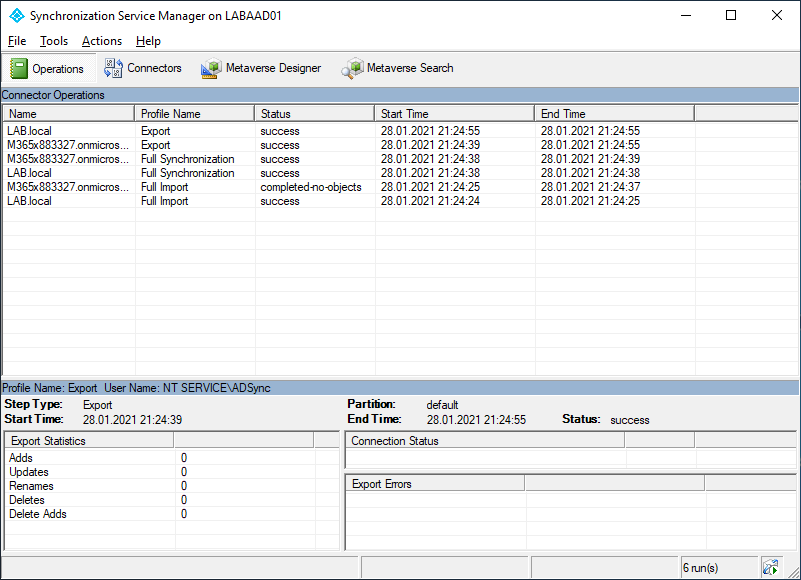
Now that we have Azure AD Connect up and running lets verify that there are no problems. Launch the Synchronization Service Manager from the start menu.
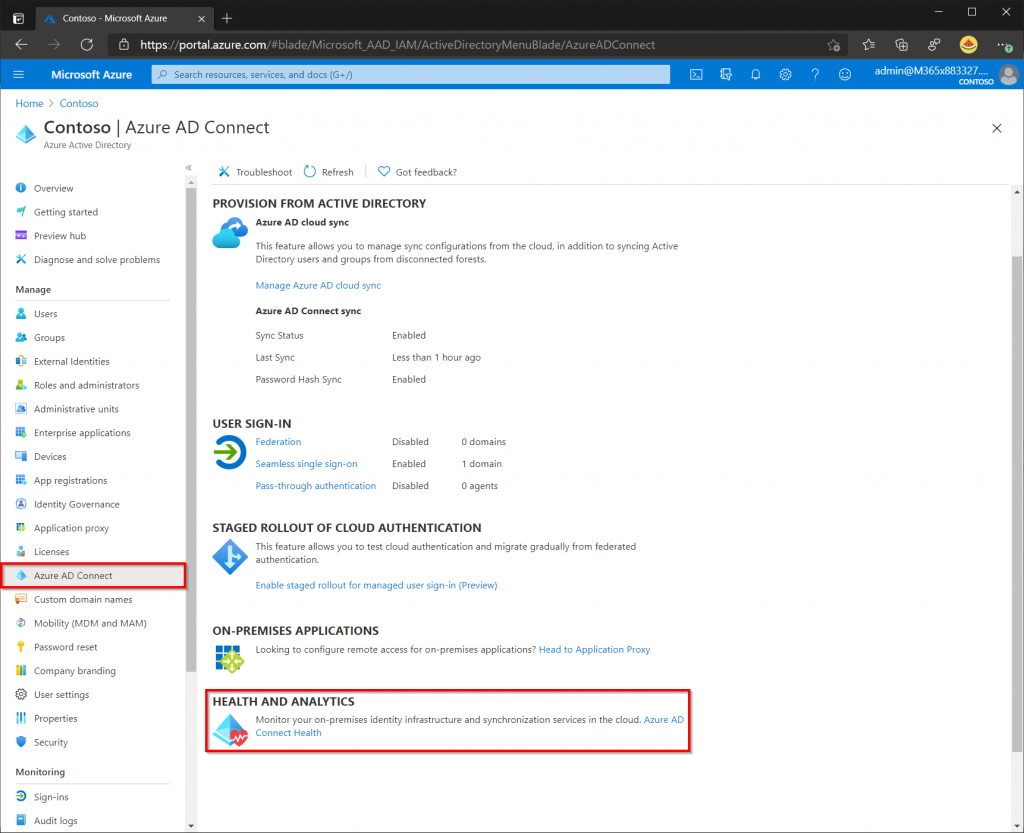
We can also view the status in Azure Active Directory, by selecting AD Connect from the left hand menu. Notice that under User Sign-In that seamless SSO is enabled. To view more information select Azure AD Connect Health.
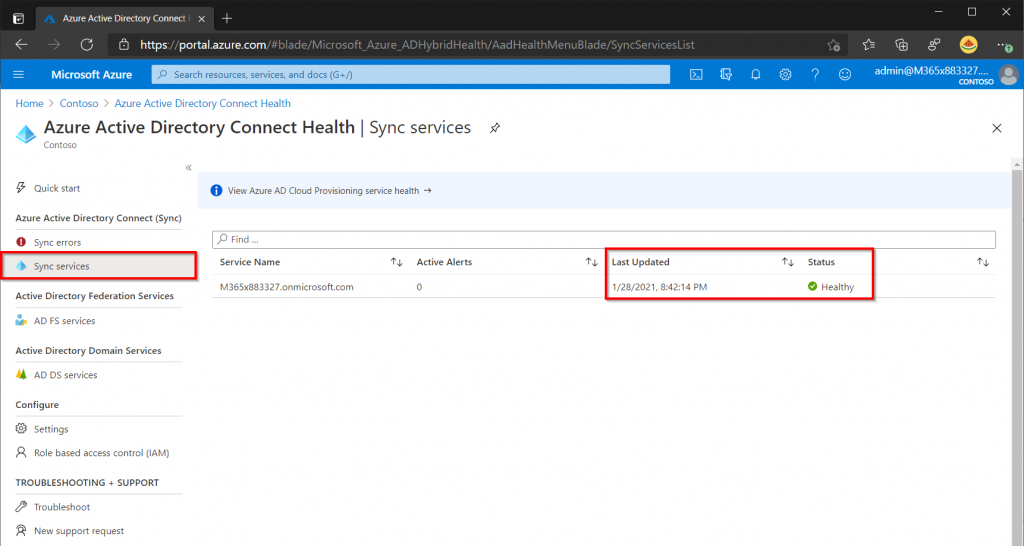
The AD Connect Health page will display if there are any errors and an alerts will be sent to the tenant administrator. A Great tip is also to install the Active Directory Domain Service Health agent on your domain controllers. If there are any errors with your on-premise domain the tenant administrator will receive an alert.
Enabling V2 Endpoint API (Optional)
Microsoft has recently deployed a new endpoint API that allows for larger group support (up to 250,000 members) and also provides a performance boost. The new endpoint is available with AD Connect version 1.5.30.0 and later but must be manually enabled as of now. If your AD Connect version is below 1.5.30.0 upgrade and verify that AD Connect is running smoothly before attempting to enable the V2 endpoint API. It is expected that the new V2 Endpoint will become default sometime in February 2021.
To activate the new V2 Endpoint API open PowerShell as an administrator and run the following commands.
Set-ADSyncScheduler -SyncCycleEnabled $false
Import-Module 'C:\Program Files\Microsoft Azure AD Sync\Extensions\AADConnector.psm1'
Set-ADSyncAADConnectorExportApiVersion 2
Set-ADSyncAADConnectorImportApiVersion 2
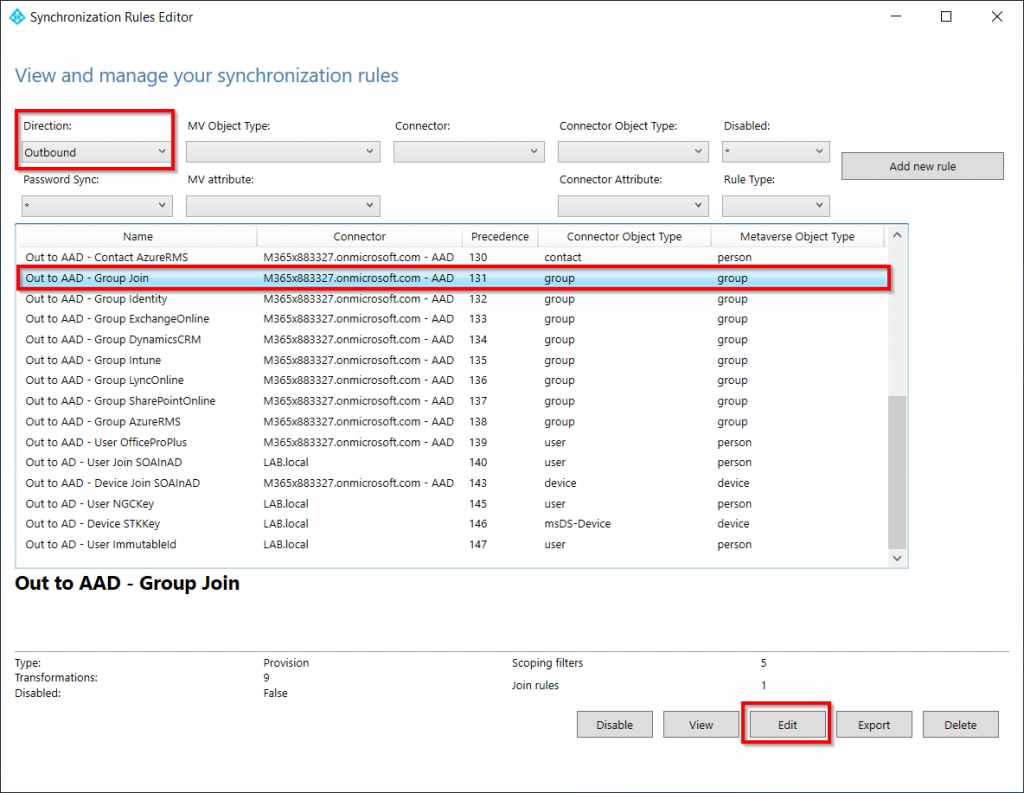
Before we enable the Synchronization again we will increase the amount of members a group can have from 50,000 to 100,000 (250,000 is maximum). Open the Synchronization Rules Editor from the start menu and set the Direction to Outbound. Now find the Out to AAD – Group Join rule and click edit.
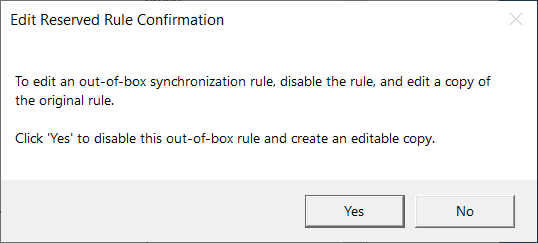
Select Yes to disable the default rule and make an editable copy.
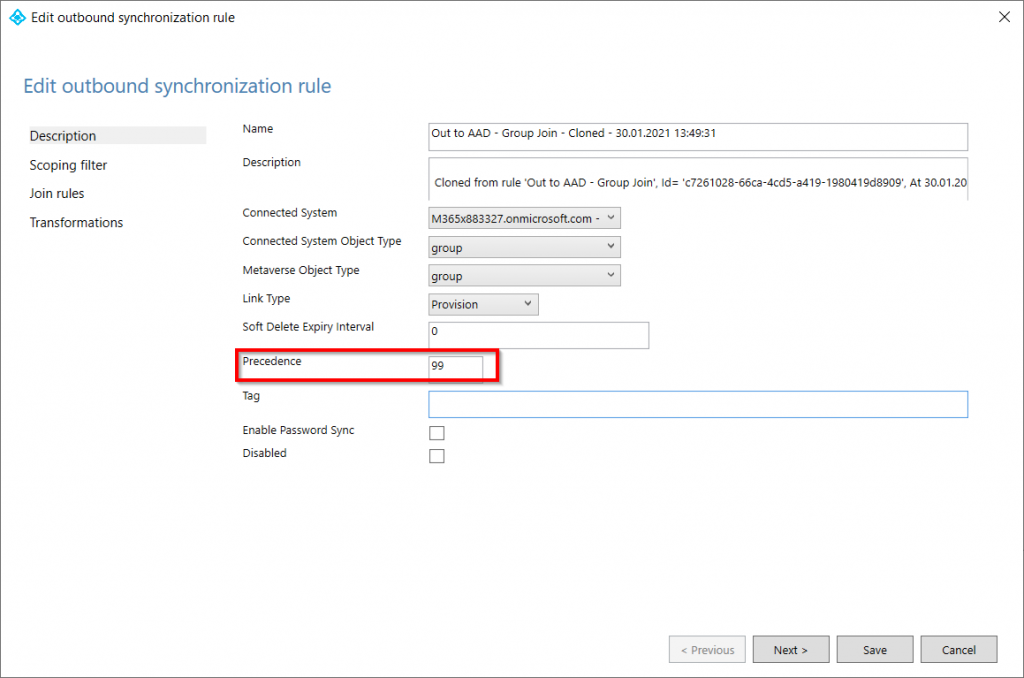
By default the Precedence of the rule is set to -1, which is invalid. Change the number to anything between 1 and 99.
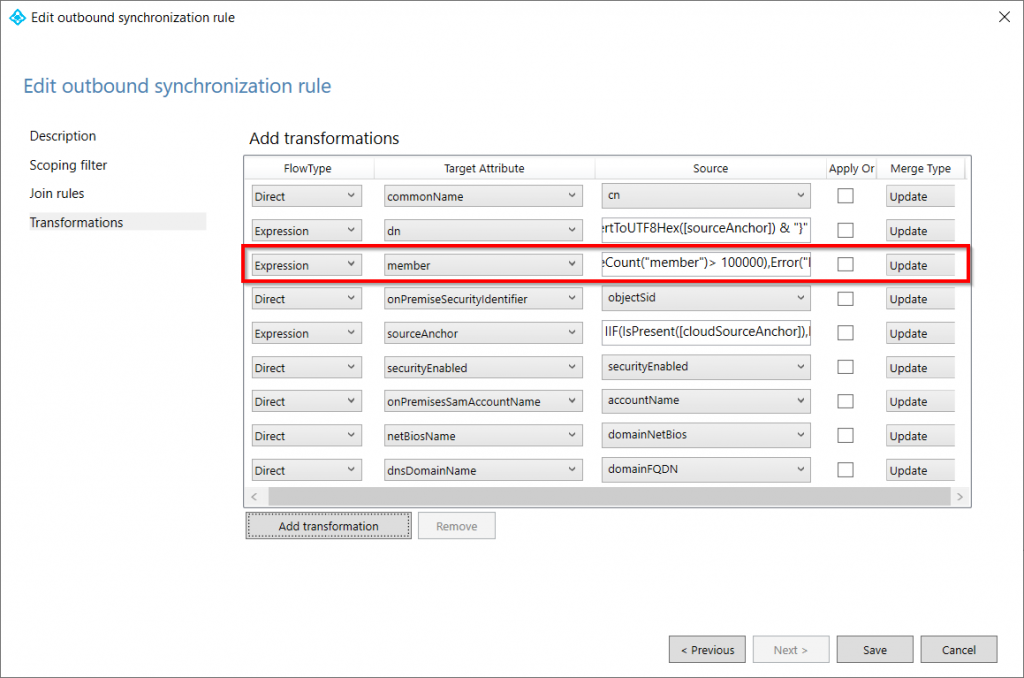
Switch to the Transformations page and look for the expression that evaluates member count. The original value will be 50,000 but lets increase this to 100,000. Microsofts recommends making small increments to the configuration and 100,000 is a good place to start. Click Save and a prompt saying that a full synchronization is needed.
Now that we have updated the configuration, we need to activate the Synchronization Scheduler again. From an elevated PowerShell prompt run the following command:
Set-ADSyncScheduler -SyncCycleEnabled $true
We can also a trigger a full synchronization from PowerShell by issuing the following command, however the scheduler will handle this on its own.
Start-ADSyncSyncCycle -PolicyType Initial
We have now increased our group limitations from 50,000 to 100,000 members. Use the Synchronization Service to verify that everything is running smoothly and make any additional adjustments if needed.

