
In this three part series, we will be expanding our lab environment with a Public Key Infrastructure using Active Directory Certificate Services. We will be installing two new servers, the first being our Root Certification Authority (LABCA01) and the second will be an Issuing Certification Authority (LABCA02) that will issue certificates to our servers and clients.
In the first part we discussed what a PKI is, some of the terminology and then installed and configured a new Root Certification Authority (CA). In this second part we will install our Issuing CA and using the same server to host our CRL (Certificate Revocation List). In the third part we will use Group Policies to configure several enrollment settings and test our setup on a server/client.
Disclaimer: I am in no way a PKI or PowerShell expert and there might be best practice elements for production environments missing. This guide is intended for LAB purposes only. For production workloads consult a PKI expert that can make key design recommendations. The PowerShell scripts are intended for clean lab systems only.
Quick Jump
Part 1 – Installing Root Certification Authority
Part 2 – Installing Issuing Certification Authority (this post)
Part 3 – Auto Enrollment and GPO Settings
Basic Server Configuration
Use the PowerShell script below to complete the following tasks:
– Change the Computer name
– Disable IE Enhanced Security Configuration
– Enable Remote Desktop
– Configure Networking
Rename-Computer -NewName LABCA02
Write-Host "Computer Name Changed"
$AdminKey = "HKLM:\SOFTWARE\Microsoft\Active Setup\Installed Components\{A509B1A7-37EF-4b3f-8CFC-4F3A74704073}"
$UserKey = "HKLM:\SOFTWARE\Microsoft\Active Setup\Installed Components\{A509B1A8-37EF-4b3f-8CFC-4F3A74704073}"
Set-ItemProperty -Path $AdminKey -Name "IsInstalled" -Value 0
Set-ItemProperty -Path $UserKey -Name "IsInstalled" -Value 0
Write-Host "Disabled IE Enhanced Security Configuration"
New-NetIPAddress -InterfaceAlias "Ethernet" -AddressFamily IPv4 -IPAddress 192.168.3.45 -PrefixLength 24 -DefaultGateway 192.168.3.1
Set-DnsClientServerAddress -InterfaceAlias "Ethernet" -ServerAddresses 192.168.3.20
Write-Host "IP address and DNS set"
Set-ItemProperty -Path "HKLM:\System\CurrentControlSet\Control\Terminal Server" -Name "fDenyTSConnections" –Value 0
Enable-NetFirewallRule -DisplayGroup "Remote Desktop"
Write-Host "Enabled Remote Desktop"
Restart-Computer
Next add the Computer to the Domain
Add-Computer -DomainName "lab.local" -Restart
Install Certificate Services
Once we have added our Issuing CA to the domain, we need to install the required roles. Either use the PowerShell commands below or use Server Manager. Make sure you are logged-on with a domain user from now on (LAB\Administrator).
Add-WindowsFeature ADCS-Cert-Authority -IncludeManagementTools -Verbose
Add-WindowsFeature ADCS-Web-Enrollment -Verbose
Add-WindowsFeature Web-Mgmt-Console, Web-Mgmt-Compat, Web-Metabase -Verbose
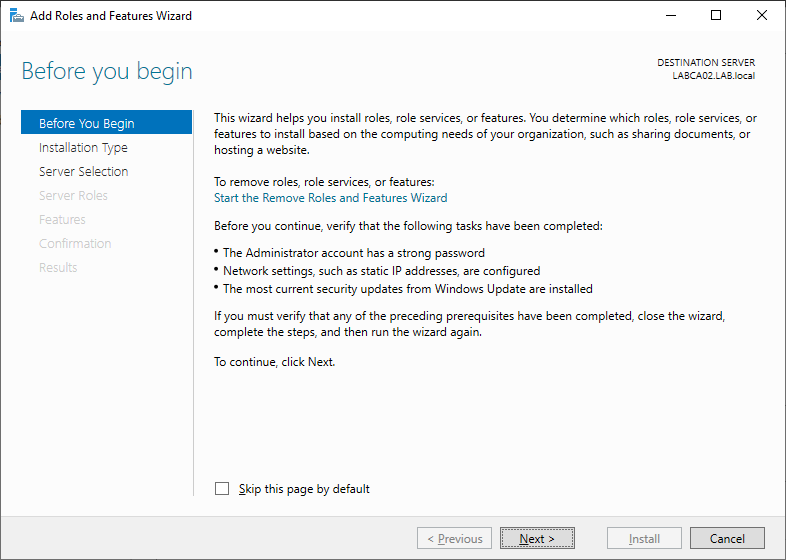
Open Server Manager and select Add Remove Roles.
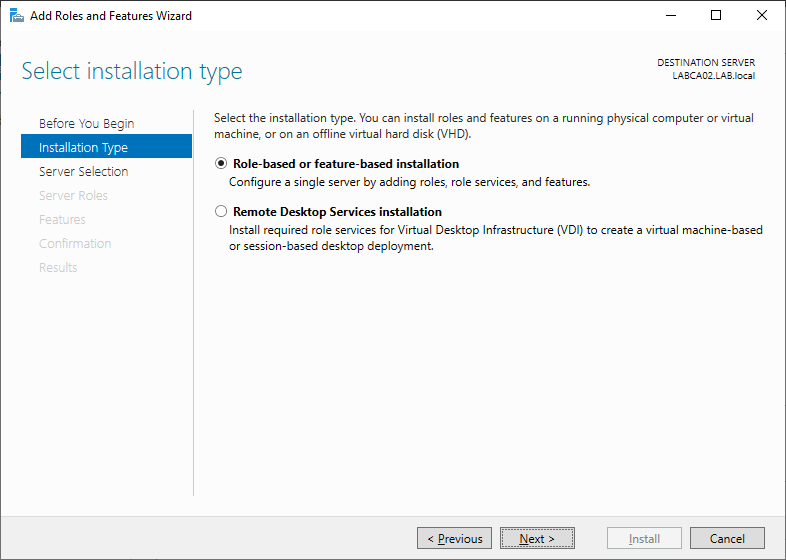
Select Roles-Based or Feature based installation.
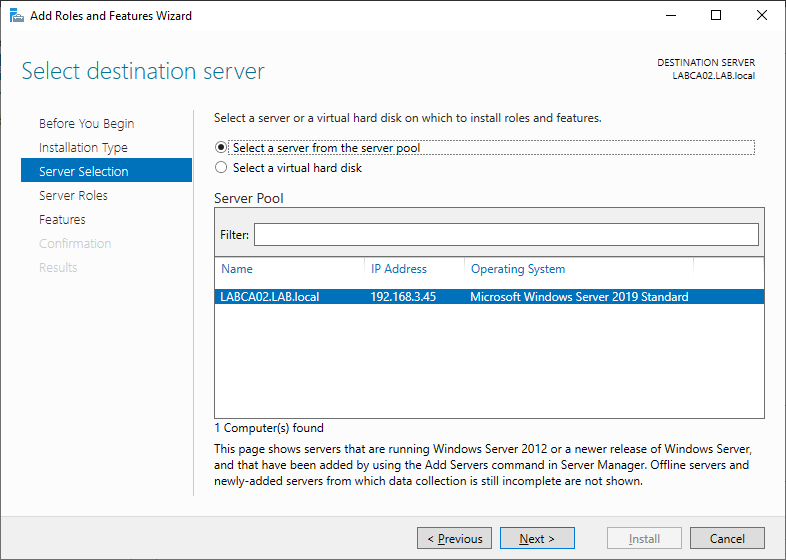
Select the Issuing CA (LABCA02).
Select Active Directory Certificate Serves (ADCS).
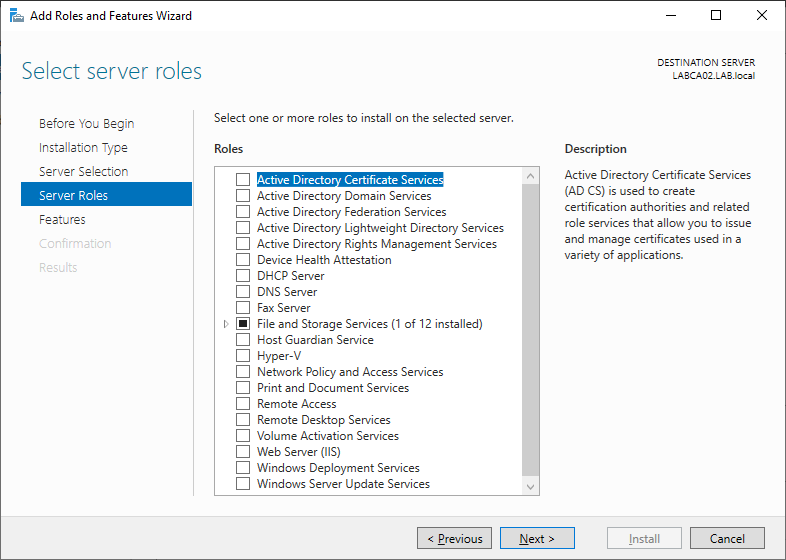
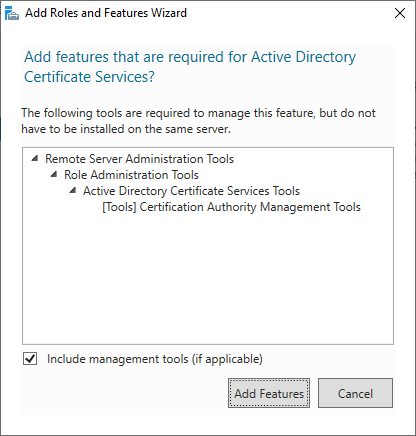
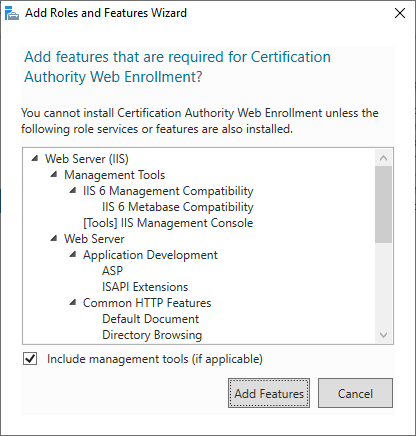
Click Add Features to also install the Management Tools.
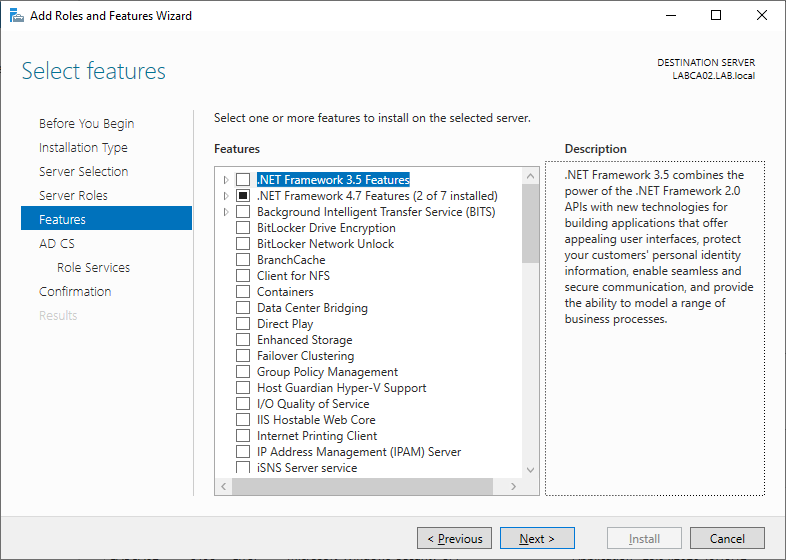
On the Features page select Next.
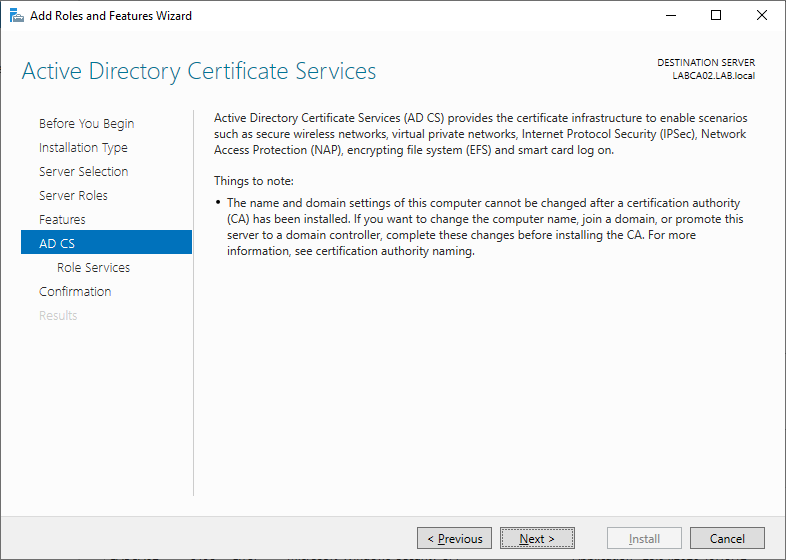
Review the information on the the ADCS page.
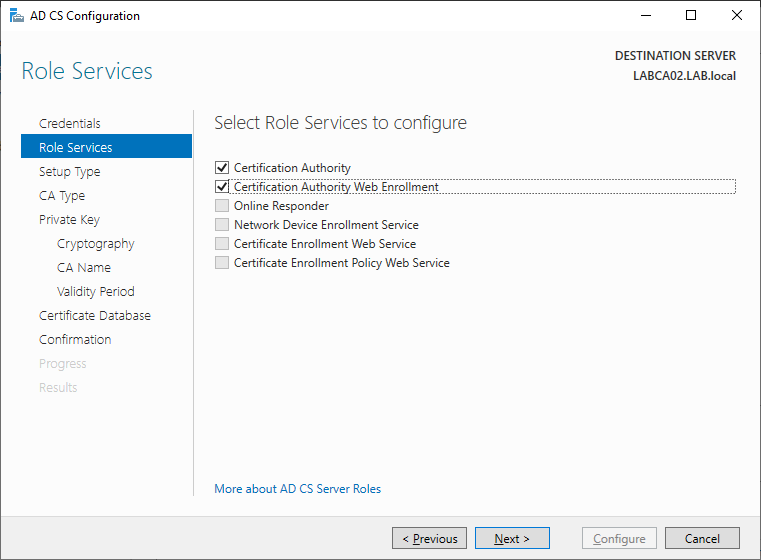
Select Certification Authority and Certification Authority Web Enrollment.
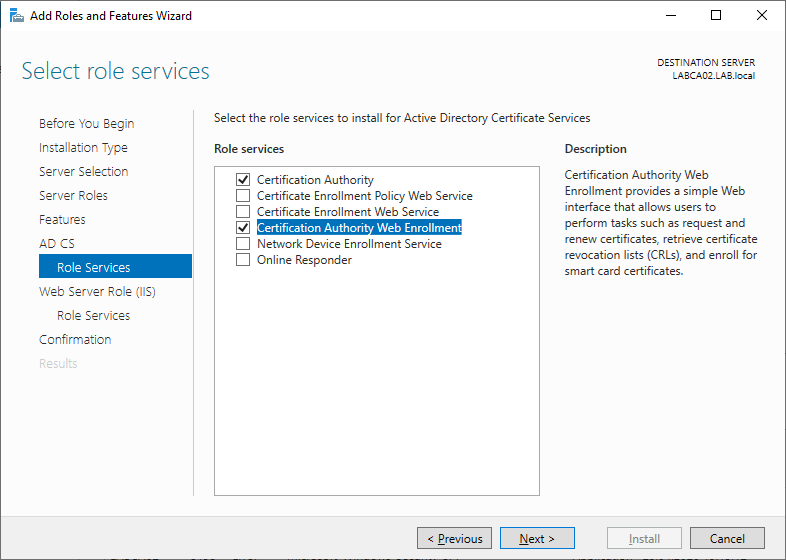
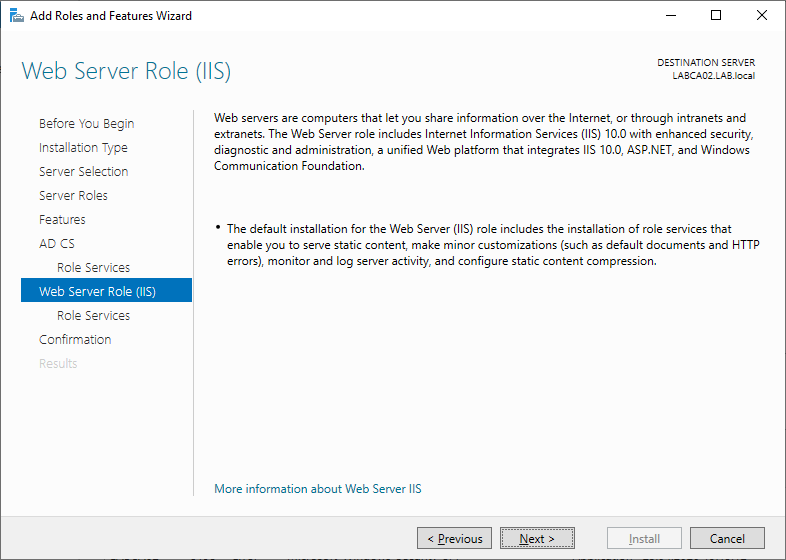
Just like before accept the web server roles, as these are required for the Web Enrollment feature.
Review the IIS web server information.
On the Roles Service for IIS make sure to select the management tools at the bottom. Optionally this can also be installed using the PowerShell command above.

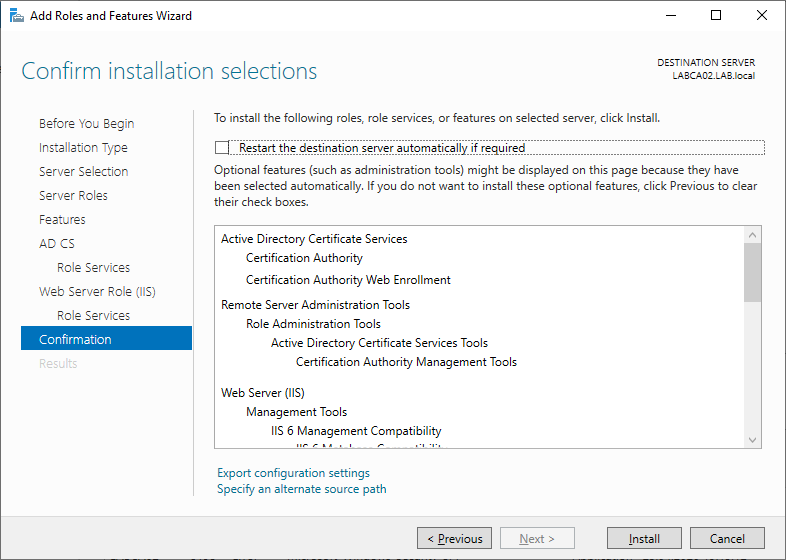
Review your choices and click Install.
Configure Certificate Services
Next we need to configure Active Directory Certificate Services (ADCS). If you used Server Manager to complete installation of the roles above click the “Configure Active Directory Certificate Services on the destination server” link in the Results pane to continue the configuration. Use to PowerShell command below to speed up the process.
Install-ADCSCertificationAuthority -CACommonName "LAB Issuing CA" -CAType EnterpriseSubordinateCA -CryptoProviderName "RSA#Microsoft Software Key Storage Provider" -HashAlgorithmName SHA256 -KeyLength 2048
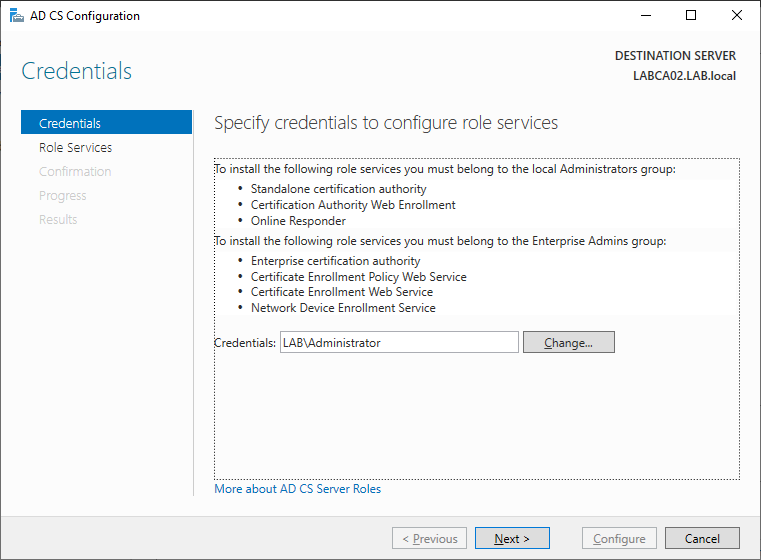
Enter the credentials of a user that is part of the Enterprise Admins group, the LAB\Administrator is this by default.
Select Certification Authority and Certification Authority Web Enrollment.
As this server is joined to our Active Directory select Enterprise CA.

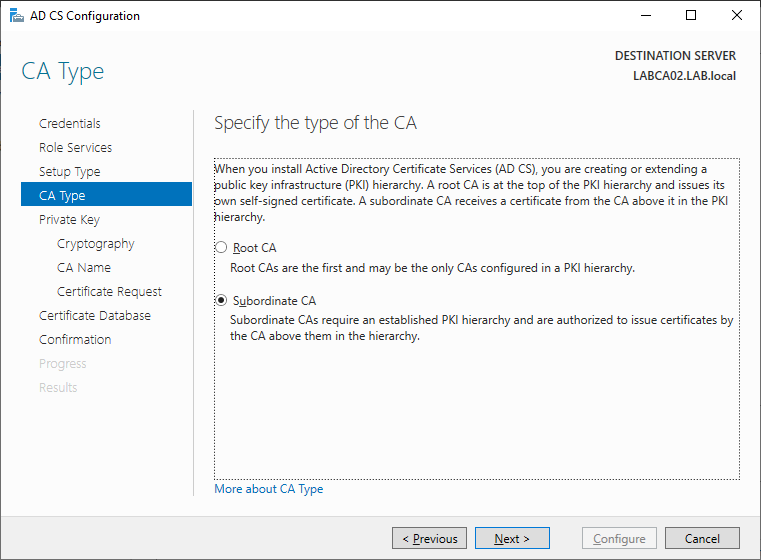
The Issuing CA will be the second level in our trust-chain so select Subordinate CA.
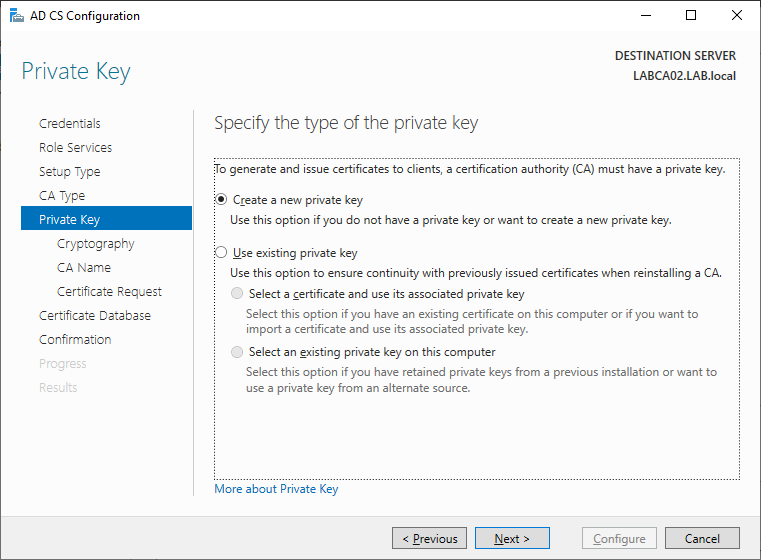
Select Create a new private key
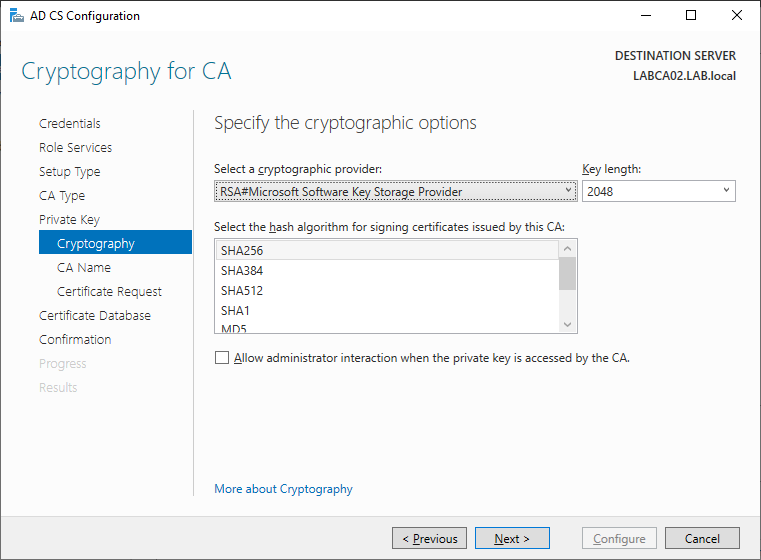
As before select the hash algorithm and key length that is required. Unless you need to increas this keep the defaults.
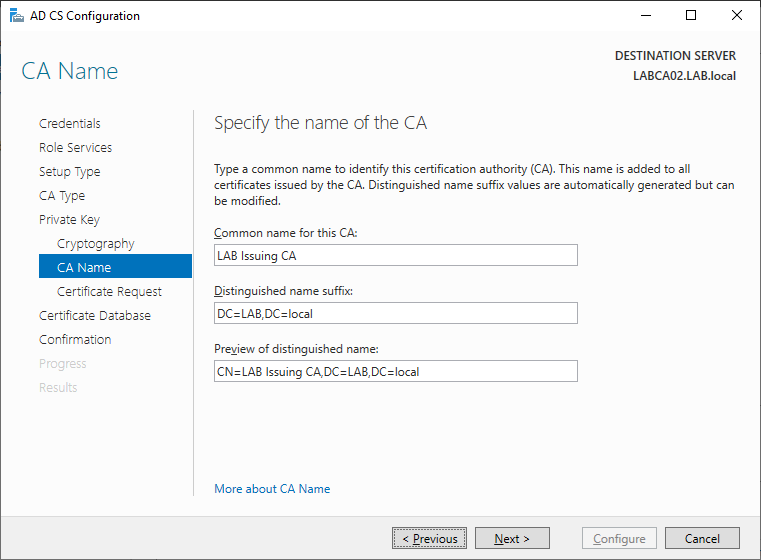
Give the CA a name
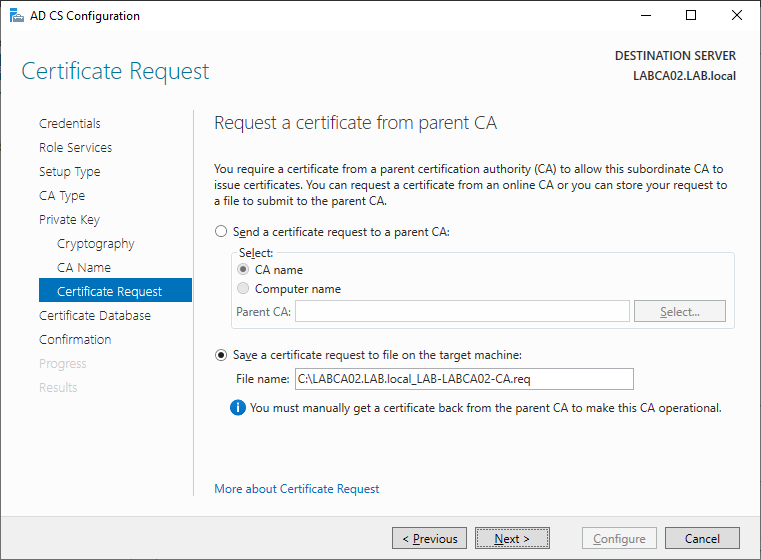
On the Certificate Request page, select save the request to a file. We will import this file on our Root CA later to create the certificate for the Issuing CA.
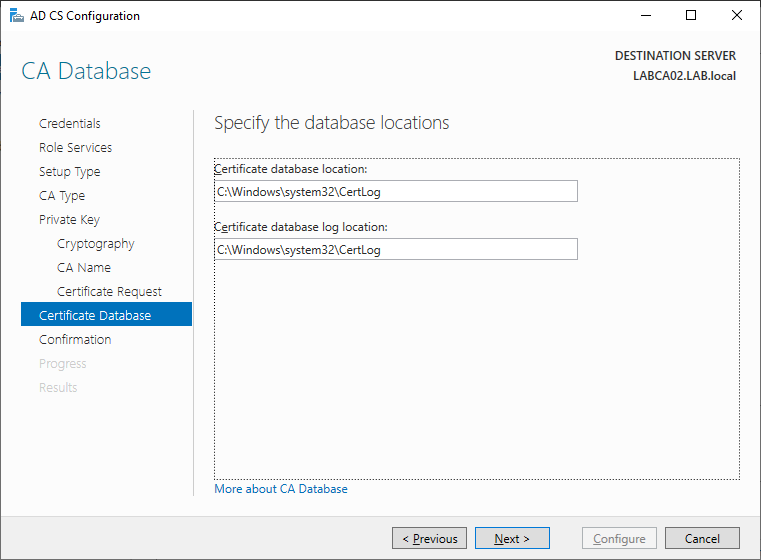
Specify the database locations, just keep the defaults unless there is a specific requirement to change this.
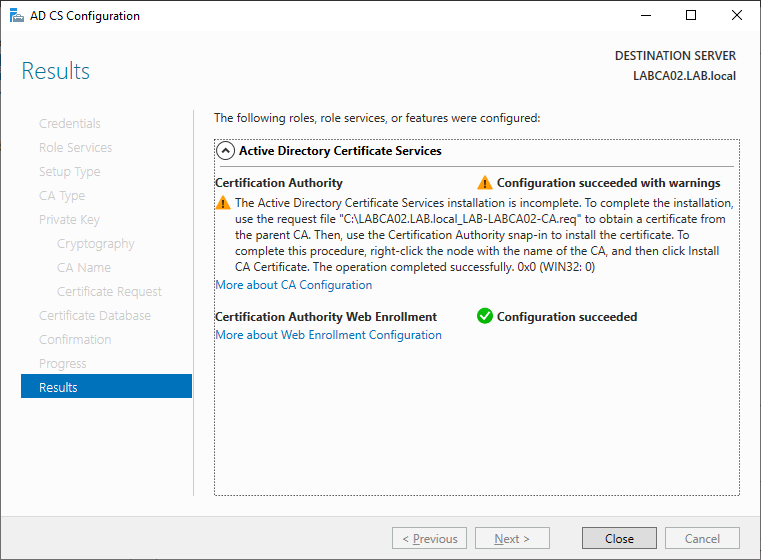
Once our Issuing CA is configured the installation wizard will remind us to import the request file on the Root CA. Just click close for now.
Disable Delta CRLs
Before we continue lets go ahead and Disable Delta CRLs. Delta CRLs contain the revoked certificates that have occurred between CRL publishing. If a certificate is revoked, the CRL wont have this information until it is updated and the certificate could still be used until the update occurs. This is often a security concern for larger organizations but in our lab we will keep things simple.
$IssuingCAName = "LAB Issuing CA"

Set-ItemProperty -Path "HKLM:\SYSTEM\CurrentControlSet\Services\CertSvc\Configuration\$IssuingCAName" -Name CRLDeltaPeriodUnits -Value 0
Set-ItemProperty -Path "HKLM:\SYSTEM\CurrentControlSet\Services\CertSvc\Configuration\$IssuingCAName" -Name CRLDeltaPeriod -Value "Days"
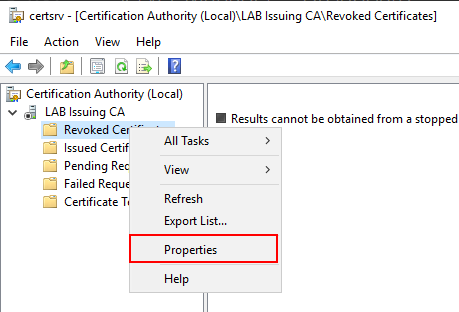
Open the Certificate Authority snap-in, you might notice that the service is not started but don’t worry about that just yet. Expand LAB Issuing Ca and right click Revoked Certificates and select Properties.
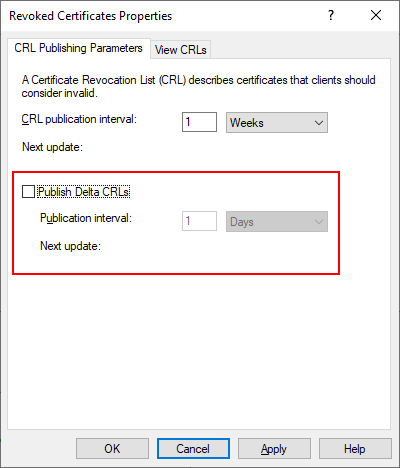
Now uncheck the Publish Delta CRLs checkbox, click Apply then OK before closing the Certificate Authority snap-in.
Updating DNS
When we setup our Root CA we specified the URL http://pki.lab.local for our CDP but wee need to ensure this record exists in DNS. So on the Administration Server (LABADM01) or Domain Controller (LABDC01) open the DNS Manager.
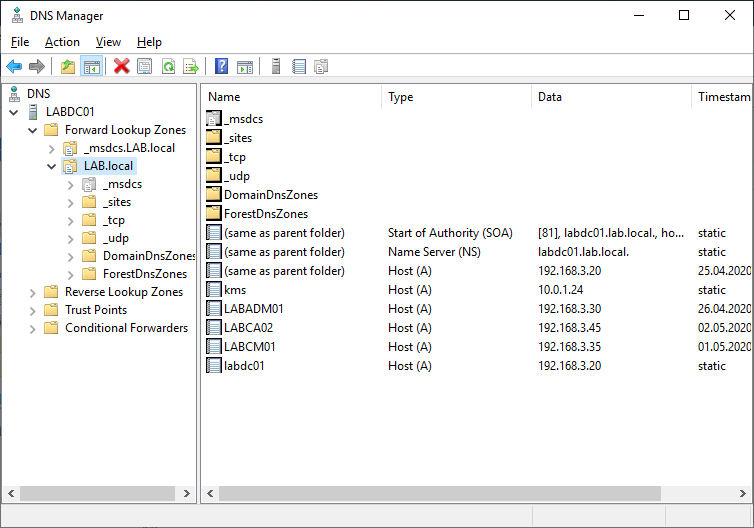
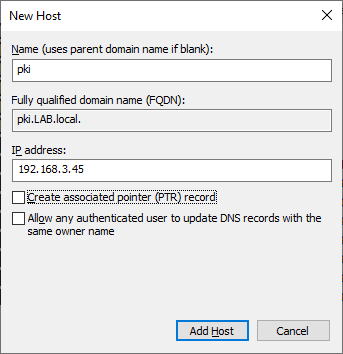
Right click the domain name (LAB.local) and select “New host (A or AAA)”. Add the IP address of your Issuing Server and click Add. Once complete close DNS manager.
Submitting the Issuing CA Request
We need to get a certificate for our Issuing CA that is issued by our Root CA. The following steps should be done on the Root CA (LABCA01).
- Copy the request file from our Issuing CA (default on the C:\ drive) to the Root CA (LABCA01)
- Open the Certification Authority snap-in on the Root CA
- Right click LAB Root CA -> All Tasks -> Submit New Request
- Specify the request file that we copied from the Issuing CA (LABCA02).
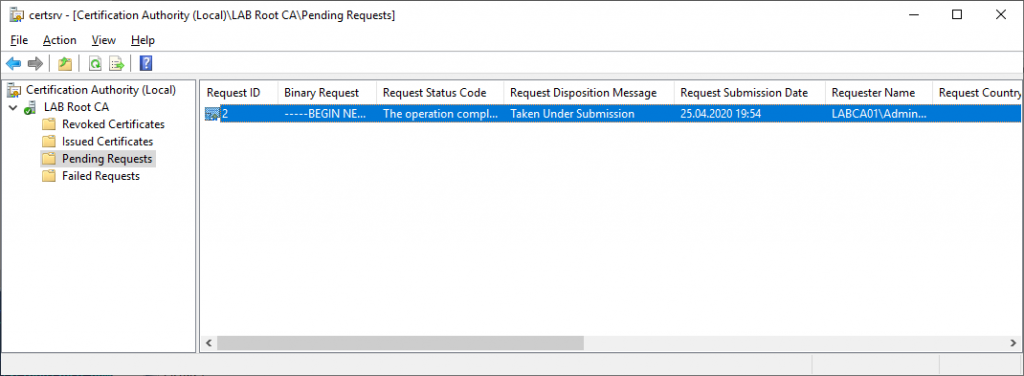
- Click on “Pending Requests”
- Right click on the certificate and select Issue. The certificate should now be moved to “Issued Certificates”.
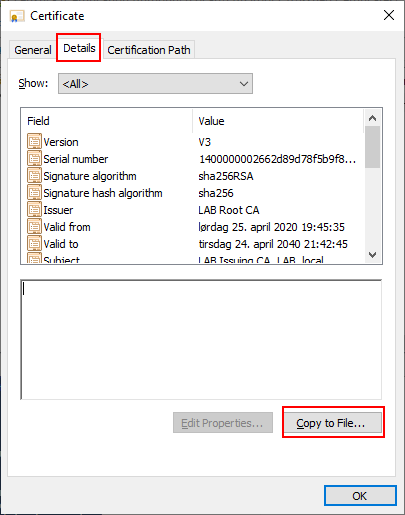
Double click on the issued certificate and change to the Details tab. Export this certificate to the desktop so that we can import it on our Issuing CA (LABCA02).
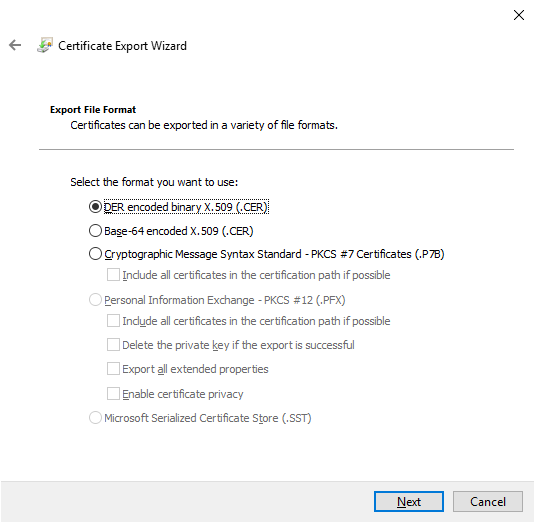
Select DER encoded and export the file to the desktop as LABSubordinate
Exporting the Root Certificate
The Issuing Certificate that we exported in the previous step will not be valid on the Issuing CA unless the Root Certificate is also present. Hence we need to export the Root Certificate also. These steps should be done on the Root CA (LABCA01).
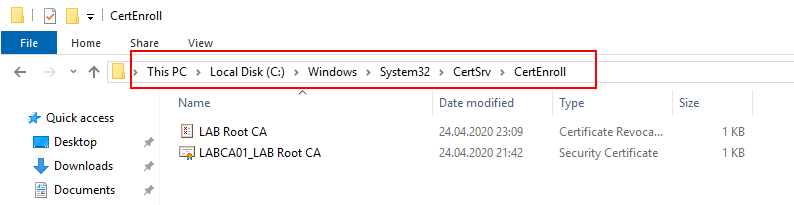
Navigate to C:\Windows\System32\CertSrv\CertEnroll and copy the Root Certificate and the CRL file to the desktop.
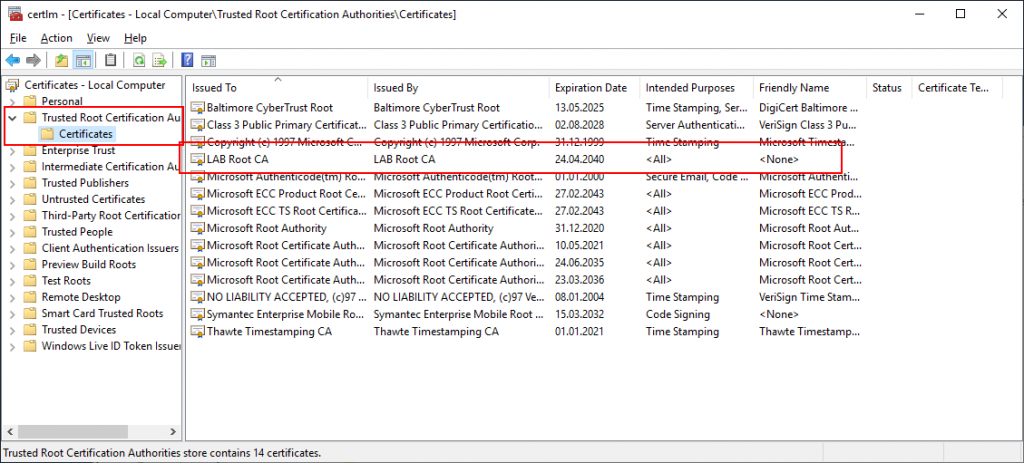
A secondary option would be to use the Certificates snap-in (certlm.msc) to export the certificate, however you would still need to copy the CRL file from the CertEnroll folder. The Certificates snap-in is something we will use in the future.
Importing the Issuing CA Certificate
On the Root CA (LABCA01) there should be 3 files on the desktop:
- Issuing CA Certificate (LABSubordinate.crt)
- Root Certificate (LAB Root CA.crt)
- Root CA CRL file (LAB Root CA.crl)
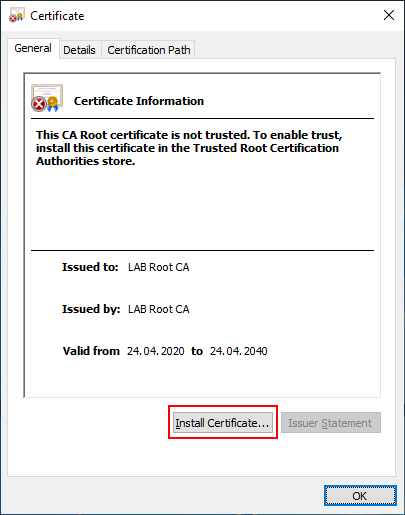
Copy these files to the Issuing CA, for example the desktop (LABCA02). Once the files have been copied, import the Root Certificate by opening the certificate and press “Install Certificate”.
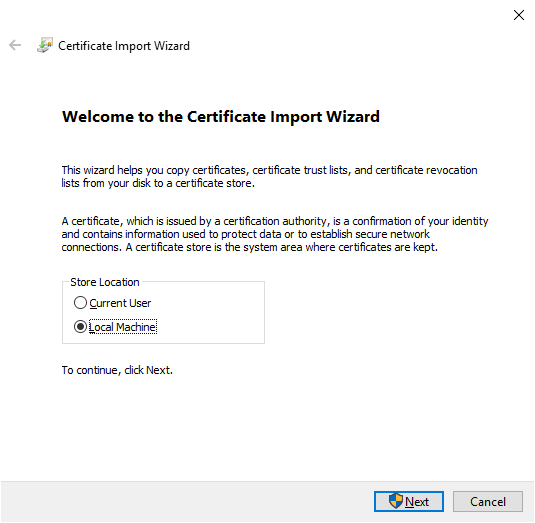
Select “Local Machine”.
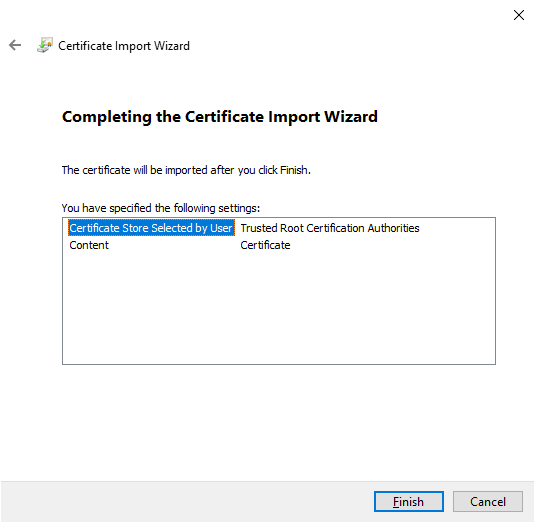
Hit “Browse” and select “Trusted Root Certification Authorities”.

Review your settings and press Finish.
Importing the Issuing CA Certificate
Open the Certification Authority snap-in on the Issuing CA (LABCA02).
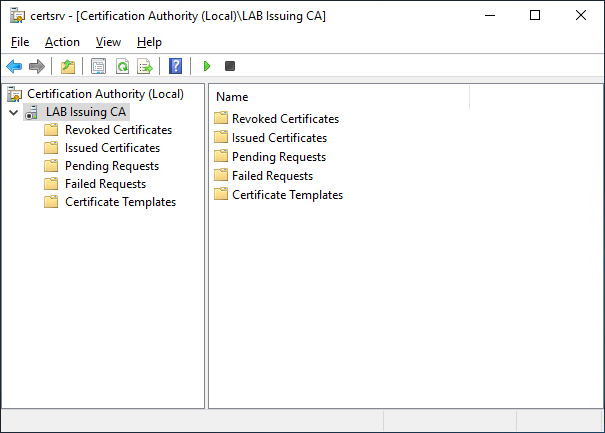
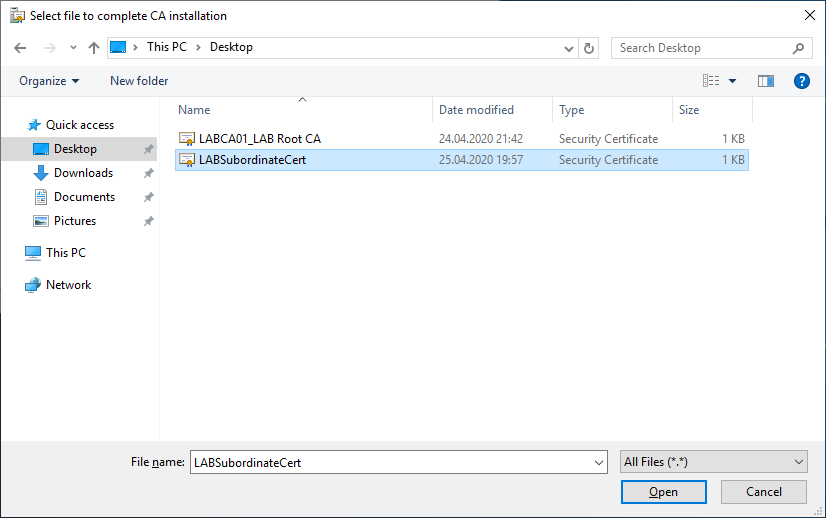
Right Click LAB Issuing CA -> All Tasks -> Install CA Certificate, then specify the Issuing Certificate that we copied from our Root CA.
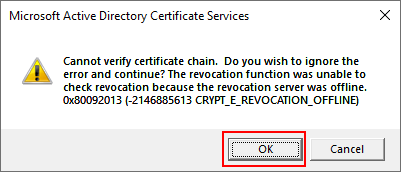
The following warning might appear because the certificate is unable to be validated. This is normal since our CDP (web server) is not configured yet. The Issuing Certification Authority will not be able to start until we resolve this issue, in the next step.
Configuring the CDL and CRL
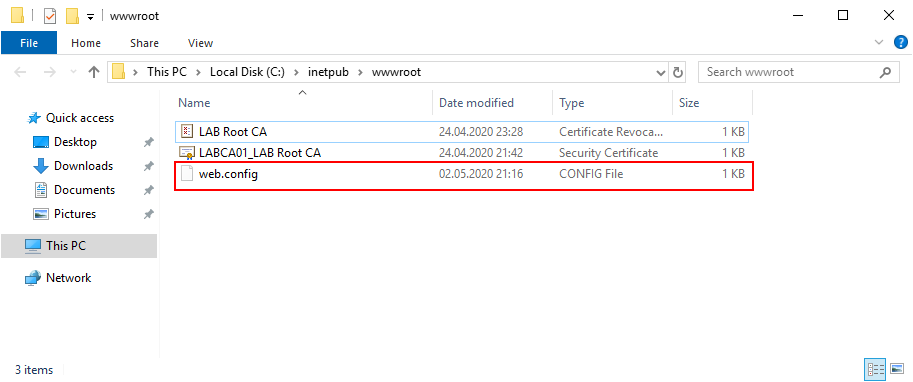
On the Issuing Server (LABCA02) navigate to C:\inetpub\wwwroot. There might be two files called iisstart.png and iistart.html remove these if present and copy the LAB Root CA CRL file and Certificate into the directory. In my example the Certificate is called LABCA01_LAB Root CA, this needs to be renamed to just LAB Root CA but we will clean up this later.

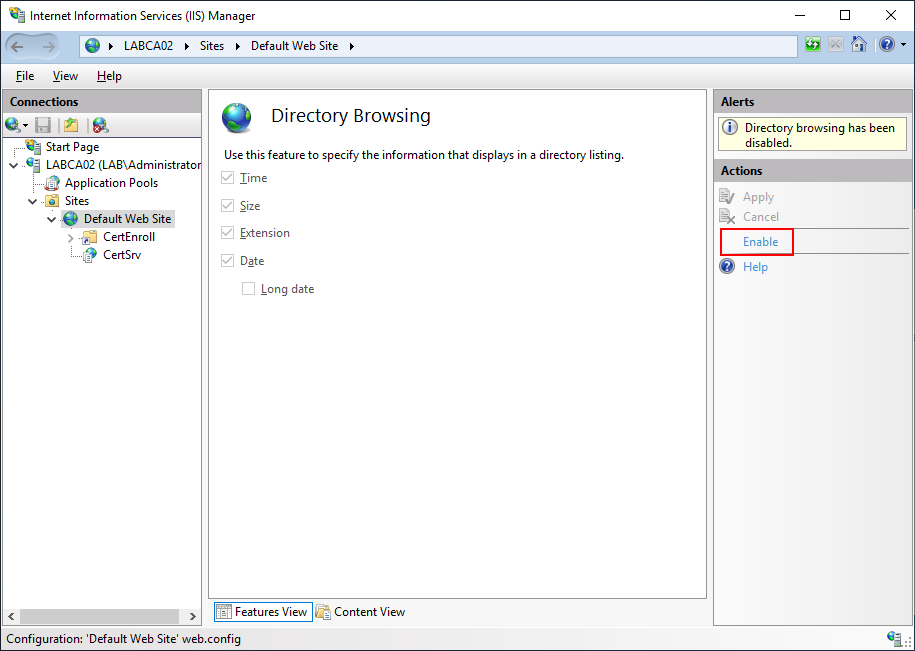
Next Open the Internet Information Services (IIS) Manager from Administrative Tools or the Start Menu. Select the “Default Web Site” and double click on “Directory Browsing”. If you cant find the IIS Management Tools check that they are installed in Server Manager, alternatively use the PowerShell Command below.
Add-WindowsFeature ADCS-Web-Enrollment, Web-Mgmt-Console, Web-Mgmt-Compat, Web-Metabase -Verbose

Select “Enable” on the right hand side.
If you go back to C:\inwtpub\wwwroot, you should now see a web.config file in the folder.
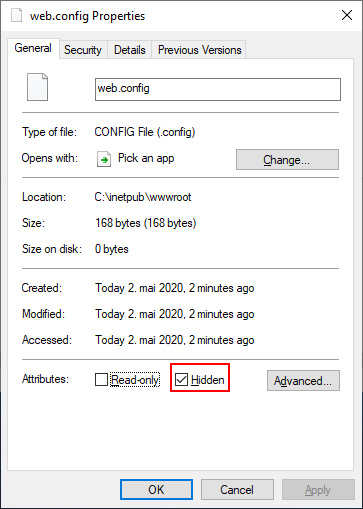
Right click “web.config” and select Hidden, then press Apply.
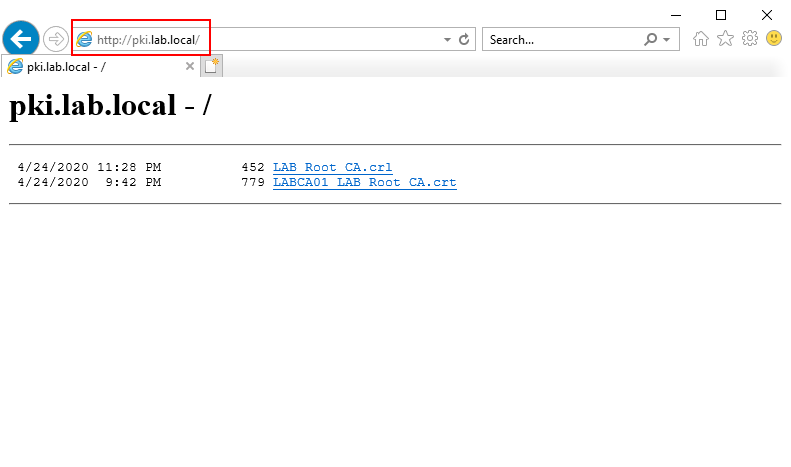
If you open http://pki.lab.local the contents of the folder should be displayed, if it does not work try http://localhost. If it works with localhost but not pki.lab.local check your DNS record and try again.
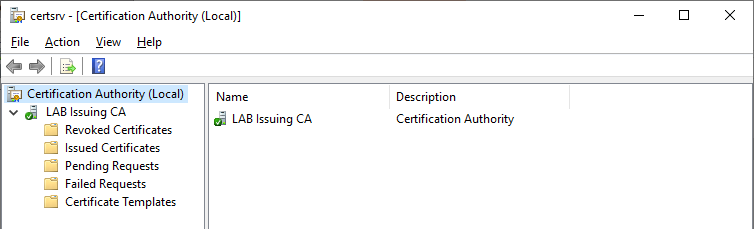
If the DNS and Web Server is working correctly the Issuing CA should now be able to start. Open the Certification Authority snap-in, right click LAB Issuing CA -> All Tasks -> Start Service.
Setting the CDP and AIA Locations
Just like we did on the Root CA, we need to specify the CDP and AIA locations for our Issuing CA. In the Certification Authority snap-in, right click LAB Issuing CA and select Properties then click the Extensions tab. Add the following entries:
- http://pki.lab.local/<CaName><CertificateName>.crl
- C:\inetpub\wwwroot\<CaName><CertificateName>.crl
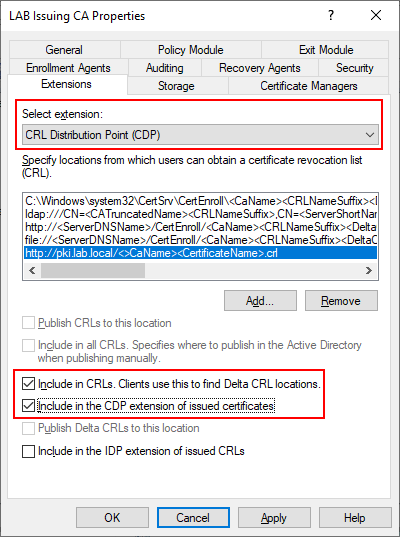

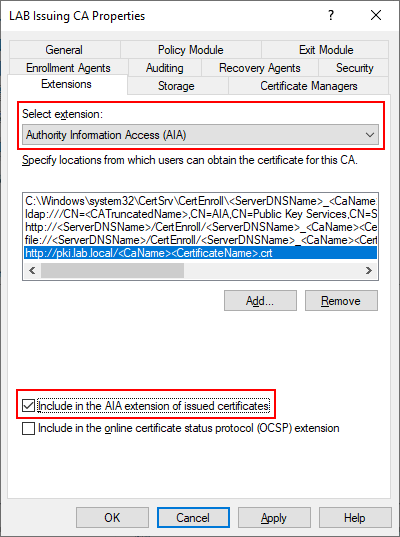
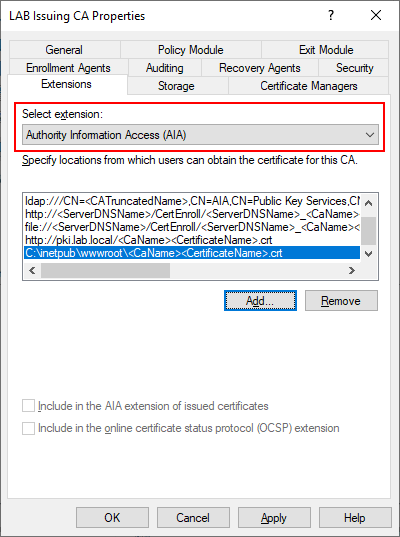
Next change from CDP to AIA and add the values there as well. Notice that the extension for CDP will end in .crl but for AIA it will be .crt.
- http://pki.lab.local/<CaName><CertificateName>.crt
- C:\inetpub\wwwroot\<CaName><CertificateName>.crt
Make sure you double check these, as this is usually where mistakes are made. Once completed select Apply and select Yes to restart the service now. Close the Certificate Authority snap-in.
Adding Issuing Certificate and CRL to CDP
Open the C:\Windows\System32\CertSrv\CertEnroll folder and make sure that the Issuing CA CRL and Issuing Certificate is Present.
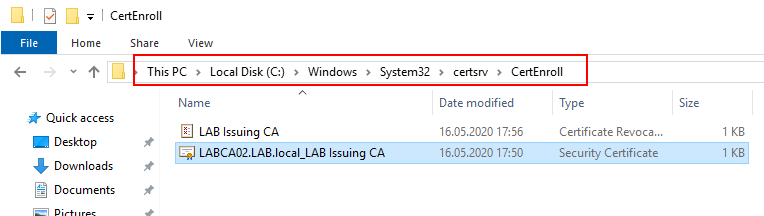
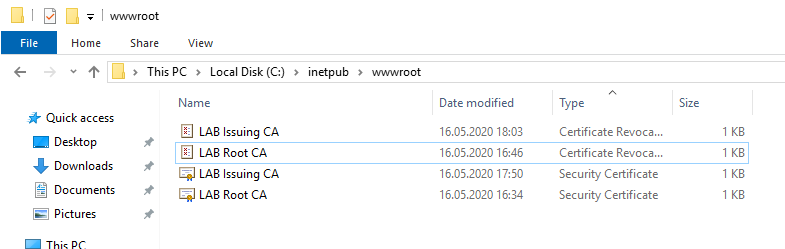
Copy the LAB Issuing CA CRL and Certificate to the C:\inetpub\wwwroot folder, then rename the files so that LABCA02.lab.local prefix is removed. The Result should be something like this:
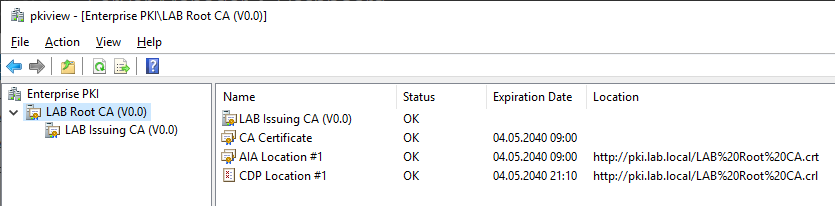
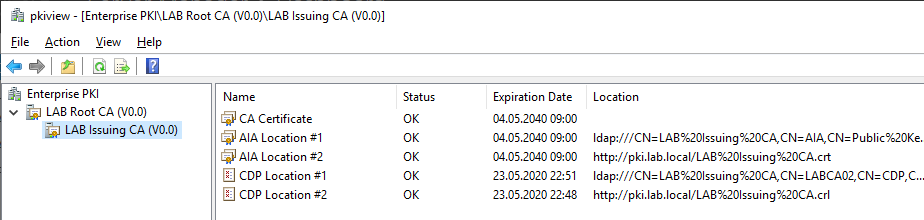
Verifying Our Deployment
To verify our deployment right click the start menu and select Run. Enter pkiview.msc and click OK. If there are any errors on the Issuing CA, especially with LDAP (CDP Location 1 and AIA Location 1) restart the server and check again.
Conclusion
At this point the Root CA can be shutdown as our Issuing CA will provide certificates to our endpoints (users, servers and clients). We will only need the Root CA powered on if we need to make CRL/AIA adjustments, to renew the CA (not required for 20 years) or to add an additional Issuing or Subordinate CA. Now that we have our PKI infrastructure working, the next steps would be to setup some Group Policies to automatically issue certificates to our clients and servers. In addition we will configure autoenrollment so that expiring certificates are renewed automatically.
Complete Script
Here is the complete PowerShell script to automatically install and configure the Issuing CA. Make sure that the server is domain joined and logged on with a user in the Enterprise Admins group before executing. Note that this script also includes some extra PowerShell switches that will overwrite any existing keys and deployments without warning.
#################################
#                               #
#                               #
# Issuing CA Configuration      #
#                               #
#                               #
#################################

# VARIABLES #
$IssuingCAName = "LAB Issuing CA"
$RootCAName = "LAB Root CA"
$DomainDN = "DC=lab,DC=local"
$HTTPUrl = "pki.lab.local"
$RootCAIP = "192.168.3.40"
$RootCreds = Get-Credential -Message "Enter Administrator Credentials for the Root CA - LABCA01"

Add-WindowsFeature ADCS-Cert-Authority -IncludeManagementTools -Verbose
Add-WindowsFeature ADCS-Web-Enrollment, Web-Mgmt-Console, Web-Mgmt-Compat, Web-Metabase -Verbose
Add-WindowsFeature ADCS-Cert-Authority -IncludeManagementTools -Verbose

Install-ADCSCertificationAuthority -CACommonName $IssuingCAName -CAType EnterpriseSubordinateCA -CryptoProviderName "RSA#Microsoft Software Key Storage Provider" -HashAlgorithmName SHA256 -KeyLength 2048 -Verbose -OverwriteExistingKey -OverwriteExistingCAinDS -Force

Set-ItemProperty -Path "HKLM:\SYSTEM\CurrentControlSet\Services\CertSvc\Configuration\$IssuingCAName" -Name CRLDeltaPeriodUnits -Value 0
Set-ItemProperty -Path "HKLM:\SYSTEM\CurrentControlSet\Services\CertSvc\Configuration\$IssuingCAName" -Name CRLDeltaPeriod -Value "Days"

#AIA
certutil -setreg CA\CACertPublicationURLs "1:C:\Windows\system32\CertSrv\CertEnroll\%1_%3%4.crt\n3:ldap:///CN=%7,CN=AIA,CN=Public Key Services,CN=Services,%6%11\n0:http://%1/CertEnroll/%1_%3%4.crt\n0:file://%1/CertEnroll/%1_%3%4.crt\n2:http://$HTTPUrl/%3%4.crt"

#CDP
certutil -setreg CA\CRLPublicationURLs "65:C:\Windows\system32\CertSrv\CertEnroll\%3%8%9.crl\n79:ldap:///CN=%7%8,CN=%2,CN=CDP,CN=Public Key Services,CN=Services,%6%10\n0:http://%1/CertEnroll/%3%8%9.crl\n0:file://%1/CertEnroll/%3%8%9.crl\n6:http://$HTTPUrl/%3%8.crl"

#Audit
Certutil -setreg CA\AuditFilter 127

#Get Root CA and CRL
Remove-Item -Path C:\inetpub\wwwroot\*
New-PSDrive -Name "RootCA" -PSProvider FileSystem -Root "\\$RootCAIP\C$" -Credential $RootCreds
Copy-Item RootCA:\Windows\System32\CertSrv\CertEnroll\* C:\inetpub\wwwroot\ -Force -Verbose
$RootCert = (Get-Item -Path C:\inetpub\wwwroot\*.crt).Name
Rename-Item -Path "C:\inetpub\wwwroot\$RootCert" -NewName "$RootCAName.crt"
$RootCert = (Get-Item -Path C:\inetpub\wwwroot\*.crt).Name
certutil -addstore "Root" "C:\inetpub\wwwroot\$RootCert"

#Configure IIS
C:\Windows\System32\inetsrv\appcmd.exe set config /section:requestfiltering /allowdoubleescaping:true
C:\Windows\System32\inetsrv\appcmd.exe set config /section:system.webServer/directoryBrowse /enabled:"True" /showFlags:"Date, Time, Size, Extension"
iisreset

#Issue Certificate to Issuing CA
New-Item -ItemType Directory -Path RootCA:\Temp -Force -ErrorAction SilentlyContinue
New-Item -ItemType Directory -Path C:\Temp -Force -ErrorAction SilentlyContinue
$RequestFile = (Get-Item -Path C:\\*.req).Name
certreq -submit -f -config "$RootCAIP\$RootCAName" "C:\$RequestFile" C:\Temp\IssuingCA.cer
Write-Host "
******************************************************************

1. On the Root CA issue the Certificate Under 'Pending Requests'
2. Export the Certificate to C:\Temp\IssuingCA.cer
3. Create the DNS record for $HTTPUrl

Press Enter when completed...

******************************************************************
" -ForegroundColor Red
Pause

#Copy Issuing Cert and Install Issuing CA Certificate
Copy-Item -Path RootCA:\Temp\IssuingCA.cer C:\Temp\ -Force -Verbose
certutil -installcert C:\Temp\IssuingCA.cer

#Copy CRL and Cert to CDP
Start-Service -Name CertSvc
certutil -crl
Sleep 3
Copy-Item C:\Windows\System32\certsrv\CertEnroll\* C:\inetpub\wwwroot\ -Verbose -Force
$IssuingCert = (Get-Item -Path C:\inetpub\wwwroot\*Issuing*.crt).Name
Rename-Item -Path "C:\inetpub\wwwroot\$IssuingCert" -NewName "$IssuingCAName.crt"

#Cleanup
Remove-Item -Path RootCA:\Temp\* -Recurse -ErrorAction SilentlyContinue
Remove-Item -Path C:\Temp -Recurse -ErrorAction SilentlyContinue
Remove-Item -Path C:\*.req -ErrorAction SilentlyContinue
Restart-Computer

