
In this three part series, we will be expanding our lab environment with a Public Key Infrastructure using Active Directory Certificate Services. We will be installing two new servers, the first being our Root Certification Authority (LABCA01) and the second will be an Issuing Certification Authority (LABCA02) that will issue certificates to our servers and clients.
In the first part we discussed what a PKI is, some of the terminology and then installed and configured a new Root Certification Authority (CA). In the second part we installed our Issuing CA and used the same server to host our CRL (Certificate Revocation List). In this part we will use Group Policies to configure several enrollment settings and test our setup on a sever/client.
Disclaimer: I am in no way a PKI or PowerShell expert and there might be best practice elements for production environments missing. This guide is intended for LAB purposes only. For production workloads consult a PKI expert that can make key design recommendations. The PowerShell scripts are intended for clean lab systems only.
Quick Jump
Part 1 – Installing Root Certification Authority
Part 2 – Installing Issuing Certification Authority
Part 3 – Auto Enrollment and GPO Settings (this post)
Auto Enrollment and GPO Settings
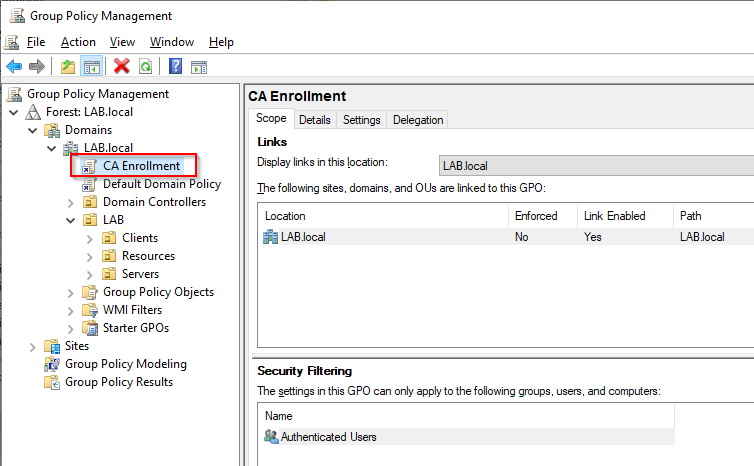
In this example we will be creating a domain wide policy as we want our certificate policy to apply to all domain joined computers. Start by opening the Group Policy Management console, right click the top domain (LAB.local) and select “Create a GPO in this domain, and link it here” and give the policy an appropriate name (CA Enrollment).
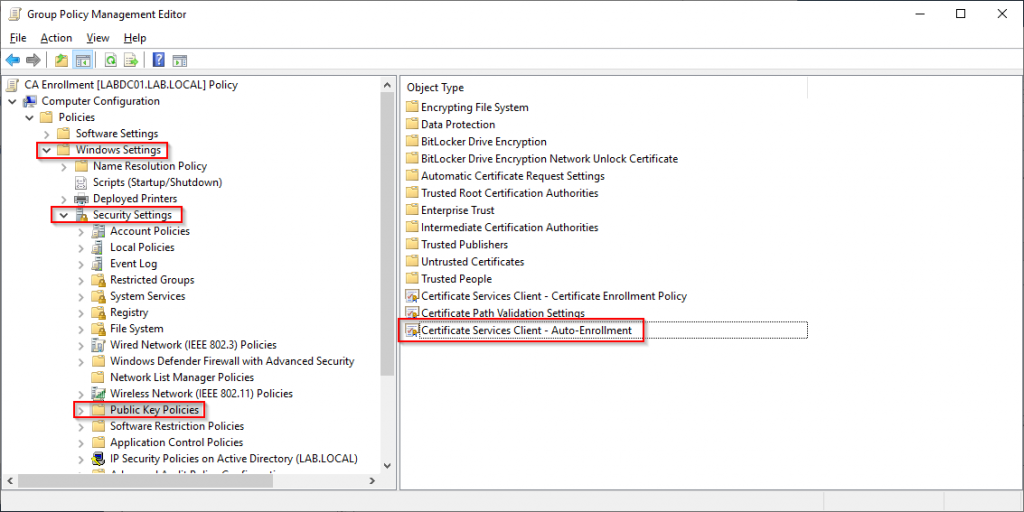
Now that we have our Group Policy object created we can set our desired settings. Under Computer Configuration navigate to Windows Settings -> Security Settings -> Public Key Policies, then open up “Certificate Services Client – Auto-Enrollment”.
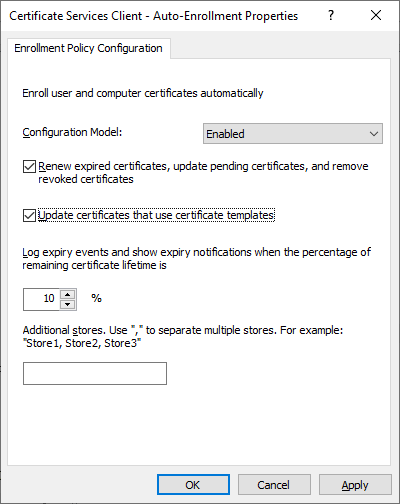
Change the setting to “Enabled”, tick both of the boxes and leave the lifetime percentage at 10%.
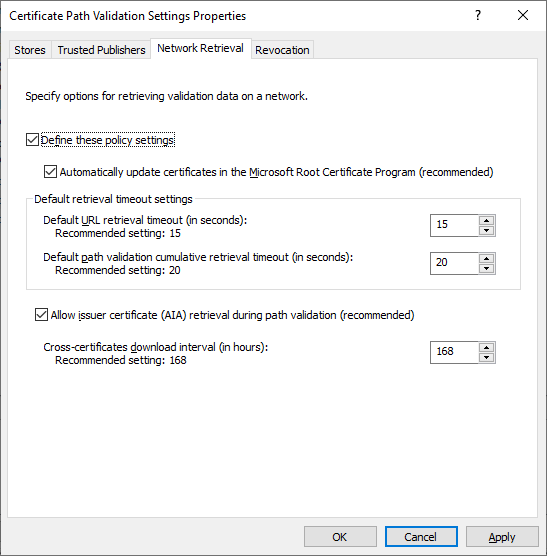
Next open “Certificate Path Validation Settings” and navigate to the Network Retrieval tab. Check the box at the top and leave the default settings.
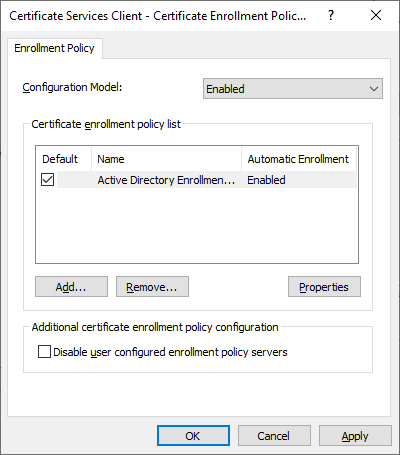
Next open “Certificate Services Client – Certificate Enrollment Policy”. Set the “Configuration Model” to “enabled” and leave the default settings.
Our final task is to import the Root Certificate so that all our domain joined clients and servers receive the root certificate. If the Root Certificate is not distributed to our endpoints none of the certificates issued will be trusted by the endpoint.
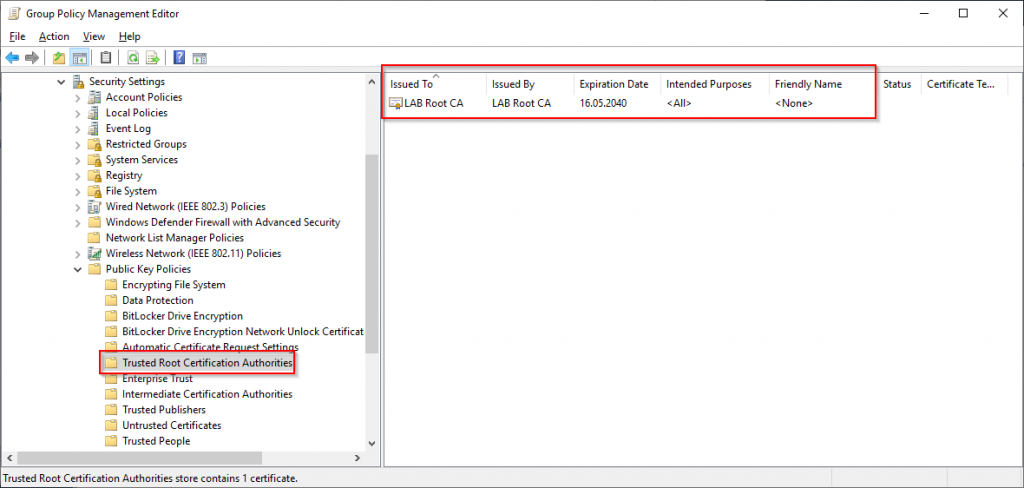
In the Group Policy Management Console right click the “Trusted Root Certification Authorities” folder and select “Import”. Specify the Root CA Certificate that we created earlier and make sure that the “Trusted Root Certification Authorities” store is selected on the final page of the import wizard.
Automatic Computer Certificate Enrollment
There are many services that rely on certificates and therefore it is a good idea for each device in the environment to have their own device certificate. The certificate can be used to authenticate to a corporate wireless network or VPN service.
The easy way of distributing a computer certificate to our domain joined clients is simply to use an “Automatic Certificate Request” in Group Policy. Here its possible to specify the “Computer” template and clients will then request a certificate the next time group policy is updated. However to keep things tidy and to give us the flexibility of customizing our template we wont be doing this in Group Policy, instead we will create a new template for this purpose on the Issuing CA.
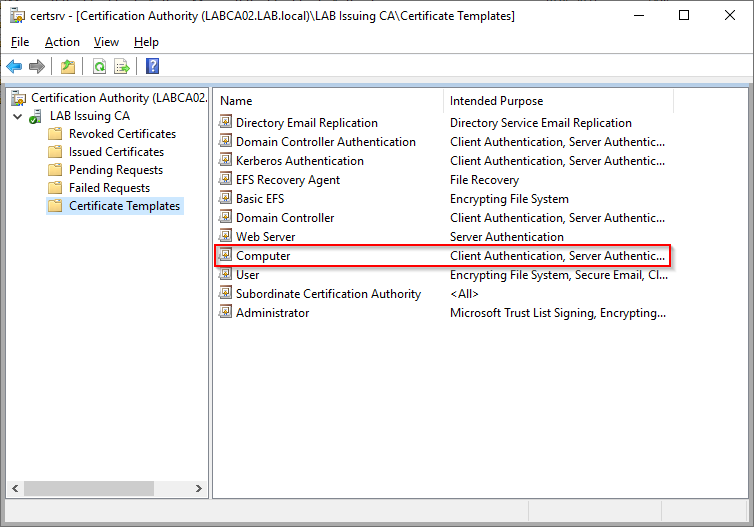
On the Issuing CA open the “Certification Authority” snap-in and selecting “Certificate Templates”. This will list all the certificates that can be requested by users or devices from the Certificate Authority. As we wont be using the default Computer template it can be removed, we can always add it to the list of available certificates later. Select the “Computer” certificate and select “Delete”
Next right click “Certificate Templates” folder on the left hand side and select “Manage”. This will open the Certificates Template Console where we can create our custom template. Right click on “Computer” and select “Duplicate Template”.
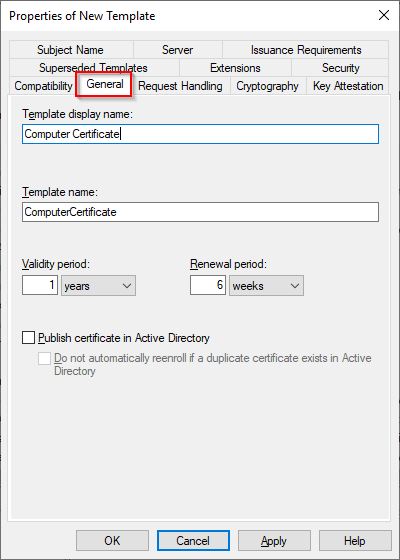
Switch to the “General” tab and provide a Template Display Name. Notice that the Template Name below should be the same as the display name but without spaces. These settings cannot be changed later.
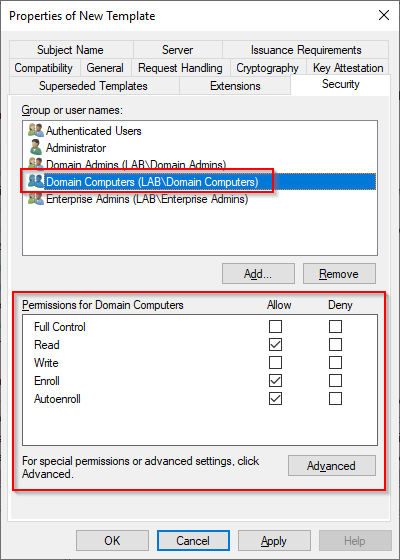
Under the “Security” tab select “Domain Computers” and make sure that “Read”, “Enroll” and “AutoEnroll” permissions are granted. Press “Apply” and “OK” to create the certificate template then close the “Certificate Templates Console”.
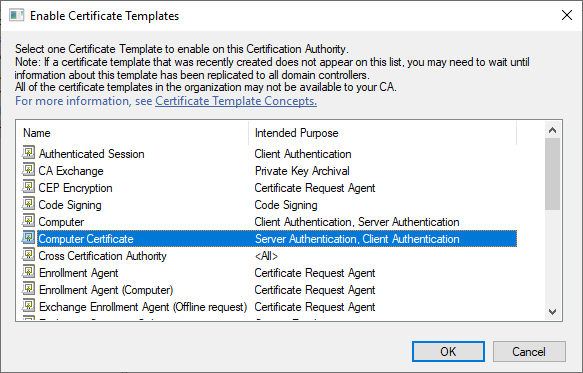
Now that we have created our custom computer certificate template we need to make it available to our clients and servers. In the Certification Authority snap-in right click “Certificate Templates”, select “New” -> “Certificate Template to issue”. Select our “Computer Certificate” template from the list and click OK.
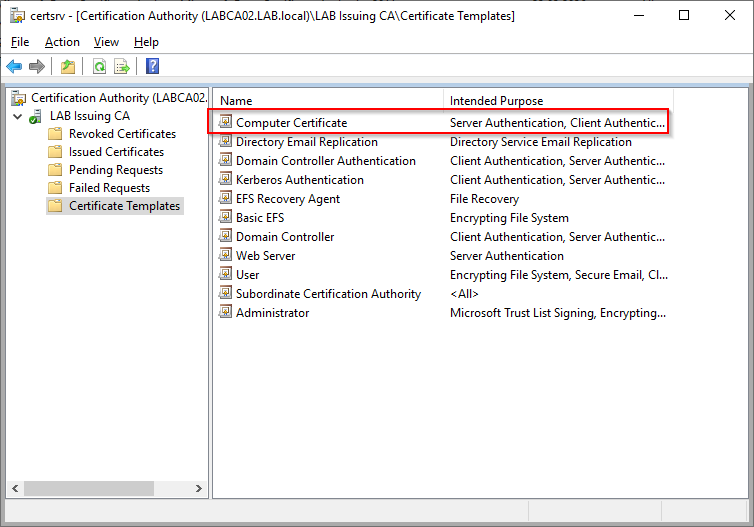
We can now see our “Computer Certificate” template in the list of available templates.
Verifying Auto Enrollment
It can take a while before certificates are issued to all domain computers. On your test client or server run a gpupdate /force or simply restart the machine.
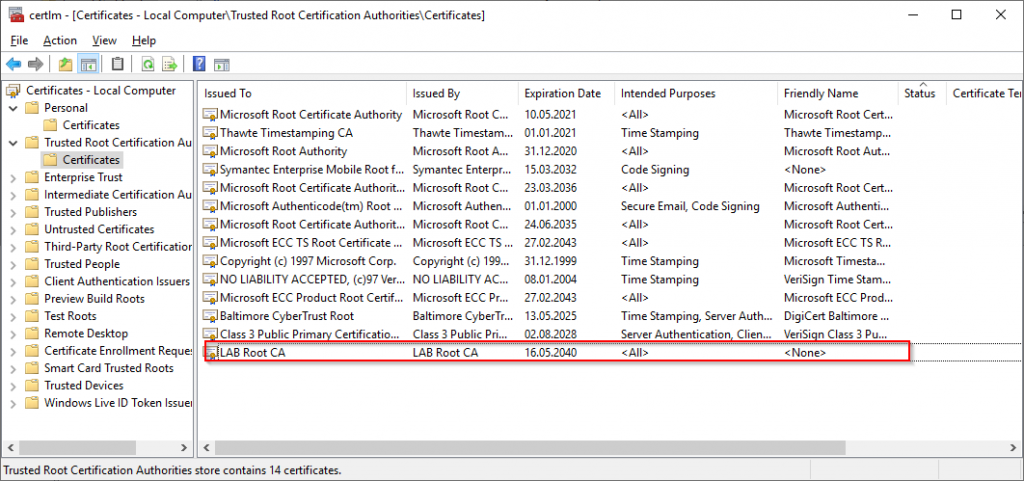
On the server/client open computer certificates snap-in (certlm.msc). The first thing to check is that our Root Certificate is present in the “Trusted Root Certification Authorities” store.
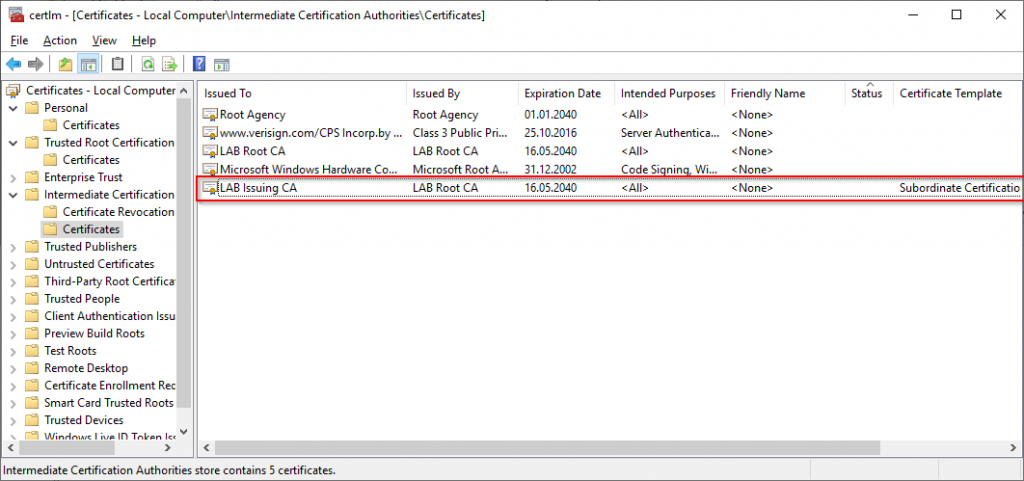
Next we need to verify that the Issuing CA is present. This should be under “Intermediate Certification Authorities”.
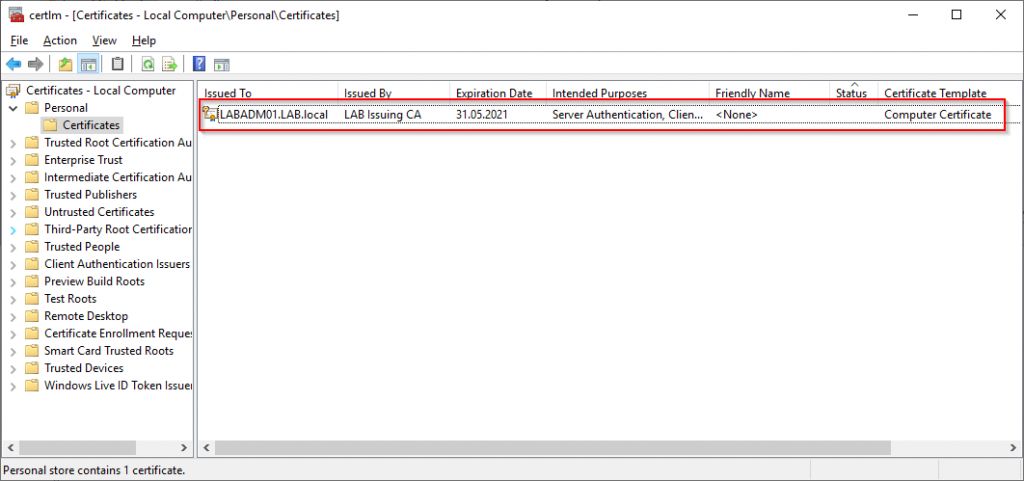
The Computer Certificate for the machine itself should be in the Personal store.
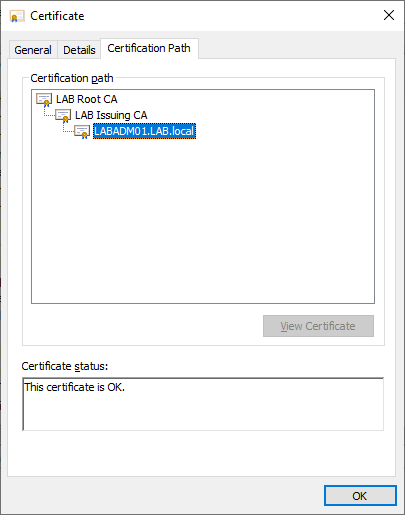
Verify that the certificate chain is valid by double clicking the certificate and selecting “Certificate Path”. Additional details such as the CRL, Subject Name, Template Name and more is available under the details tab.
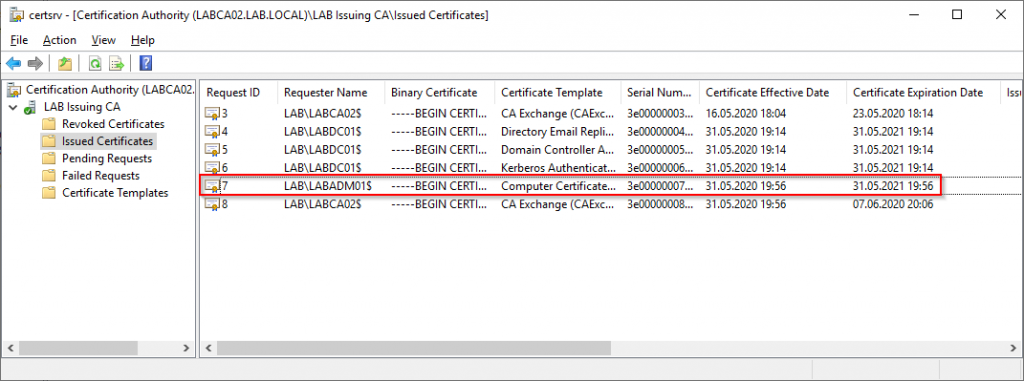
We can also verify from the Issuing CA itself, select “Issued Certificates” in the “Certification Authority” snap-in. Notice the LABADM01 server has automatically requested our Computer Certificate template.
Conclusion
We should now have a working Public Key Infrastructure (PKI) that can be used with a variety of services. For example we can use the PKI service to issue certificates to our clients that are managed by Endpoint Manger (Configuration Manager and Intune) to securely verify the identity of connecting devices.

