
In this three part series, we will be expanding our lab environment with a Public Key Infrastructure using Active Directory Certificate Services. We will be installing two new servers, the first being our Root Certification Authority (LABCA01) and the second will be an Issuing Certification Authority (LABCA02) that will issue certificates to our servers and clients.
In the first part we will discuss what a PKI is, some of the terminology and then install and configure a new Root Certification Authority (CA). In the second part we will install our Issuing CA and using the same server to host our CRL (Certificate Revocation List). In the third part we will use Group Policies to configure several enrollment settings and test our setup on a server/client.
Disclaimer: I am in no way a PKI or PowerShell expert and there might be best practice elements for production environments missing. This guide is intended for LAB purposes only. For production workloads consult a PKI expert that can make key design recommendations. The PowerShell scripts are intended for clean lab systems only.
Quick Jump
Part 1 – Installing Root Certification Authority (this post)
Part 2 – Installing Issuing Certification Authority
Part 3 – Auto Enrollment and GPO Settings
What is a Public Key Infrastructure (PKI)
So what exactly is a PKI? I like the definition Wikipedia uses, they define it as “a set of roles, policies, hardware, software and procedures needed to create, manage, distribute, use, store and revoke digital certificates and manage public-key encryption. The purpose of a PKI is to facilitate the secure electronic transfer of information for a range of network activities such as e-commerce, internet banking and confidential email. It is required for activities where simple passwords are an inadequate authentication method and more rigorous proof is required to confirm the identity of the parties involved in the communication and to validate the information being transferred”
If you are new to the world of certificates and public key infrastructures, there are several terms that you should be aware of. I wont be explaining these in detail but it should be enough to get you started and have an idea of what’s going on.
- Root Certification Authority
Certificates are based on a trust chains, the first Certification Authority that is installed will be the Root CA since its the first element in our trust-chain. - Subordinate CA
A Subordinate CA is a child node in the trust chain, and is usually one level below the Root CA (but not in all cases).
- Issuing CA
An Issuing CA is a subordinate CA that issues certificates to endpoints, such as users, servers and clients. However not all subordinate CA’s need to be issuing CA’s. - Standalone CA vs Enterprise CA
A Standalone CA is basically a CA running on a non-domain joined server. Our Root CA (LABCA01) will not be joined to the domain and hence is an example of a Standalone CA. Enterprise CA’s on the other hand are just the opposite, they are domain joined and integrated with Active Directory Domain Services. - CRL (Certificate Revocation List)
The CRL is a list of certificates that have been revoked. A CRL is hosted on a CDP and endpoints use the CRL to validate if a presented certificate is valid.
- CDP (CRL Distribution Point)
Contains information about the location of a CRL such as a URL if using a web server or an LDAP path if using Active Directory. - AIA (Authority Information Access)
Contains information on how to find the issuer of a particular certificate. The AIA also contains the address for the OCSP responder. - OCSP (Online Certificate Status Protocol)
Is a new way of validating if a certificate is valid or not, and has a few advantages over CRL such as the ability to retrieve timely information on the validity of a certificate. OCSP will not be implemented but we might add it in the future.
Overview
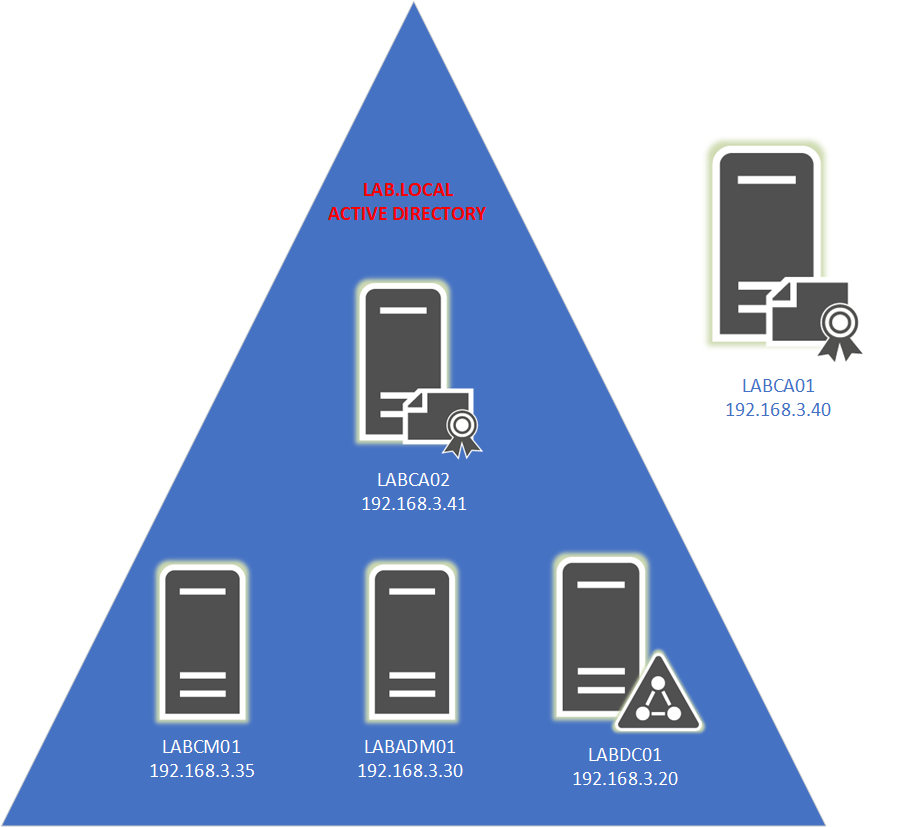
Our Public Key Infrastructure (PKI) will consist of two new servers (Windows Server 2019 Standard) that will be added into our existing LAB environment. In addition to these two servers we will reuse LABDC01 from our Configuration Manager series. We wont be covering how to setup a Domain Controller, see this post for guidance in setting up a Domain Controller.
If you have limited amount of resources in your LAB, it is possible to install the Issuing CA on the Domain Controller. That said, I would highly recommend installing the Issuing CA on its own server as there are several limitations (such as renaming the server) when a CA is installed on a Domain Controller. Once the Root CA has been configured it will be shutdown and wont take up any resources. The only time the Root CA needs to be powered on is if you need to make changes such as adding another subordinate/ issuing CA, renew the CA or make changes to the CRL.
Basic Server Configuration
With the terminology and overview out of the way lets get going. Our first task is to do some basic server configuration, but unlike all our previous servers LABCA01 will NOT be joined to Active Directory. Before starting the Certificate Services (PKI) installation make sure that all updates to the operating system have been installed.
Note: The computer name or Active Directory settings cannot be changed once the Certification Authority has been installed. If you wish to run a domain controller or other services on the same server install those first.
Use the PowerShell script below to complete the following tasks:
– Change the Computer name
– Disable IE Enhanced Security Configuration
– Enable Remote Desktop
– Configure Networking
Rename-Computer -NewName LABCA01
Write-Host "Computer Name Changed"
$AdminKey = "HKLM:\SOFTWARE\Microsoft\Active Setup\Installed Components\{A509B1A7-37EF-4b3f-8CFC-4F3A74704073}"
$UserKey = "HKLM:\SOFTWARE\Microsoft\Active Setup\Installed Components\{A509B1A8-37EF-4b3f-8CFC-4F3A74704073}"
Set-ItemProperty -Path $AdminKey -Name "IsInstalled" -Value 0
Set-ItemProperty -Path $UserKey -Name "IsInstalled" -Value 0
Write-Host "Disabled IE Enhanced Security Configuration"
New-NetIPAddress -InterfaceAlias "Ethernet" -AddressFamily IPv4 -IPAddress 192.168.3.40 -PrefixLength 24 -DefaultGateway 192.168.3.1
Set-DnsClientServerAddress -InterfaceAlias "Ethernet" -ServerAddresses 192.168.3.20
Write-Host "IP address and DNS set"
Set-ItemProperty -Path "HKLM:\System\CurrentControlSet\Control\Terminal Server" -Name "fDenyTSConnections" –Value 0
Enable-NetFirewallRule -DisplayGroup "Remote Desktop"
Write-Host "Enabled Remote Desktop"
Restart-Computer
Installing Certificates Services
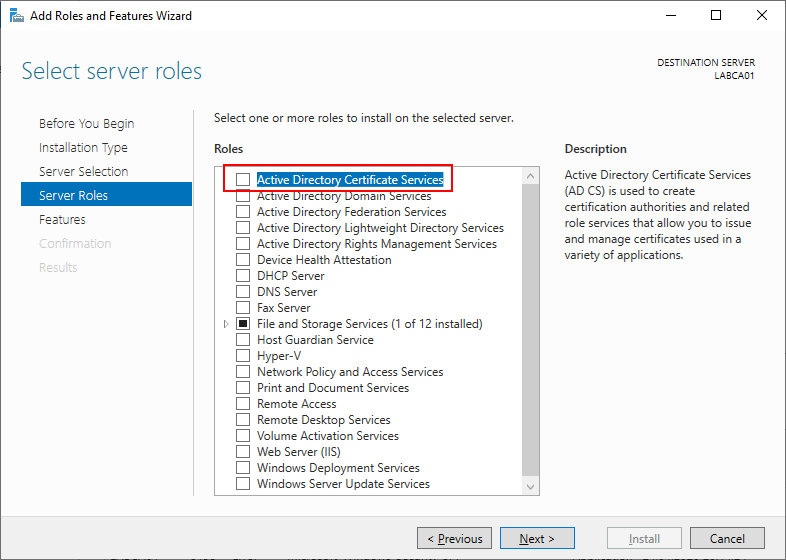
Next we need to install the Active Directory Certificates Services (ADCS) server role. Use the PowerShell command bellow or use Server Manger to add the roles manually.
Add-WindowsFeature ADCS-Cert-Authority -IncludeManagementTools -Verbose
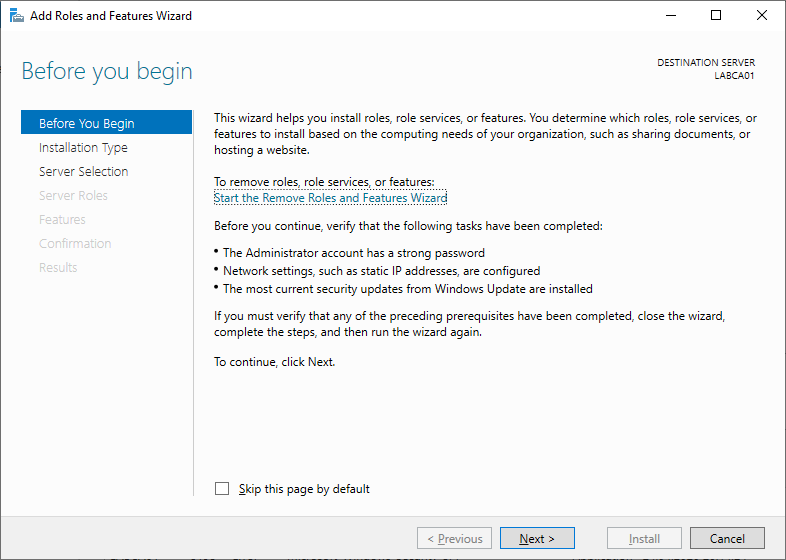
To add the roles manually open Server Manager and select “Add Roles and Features” to get started.
Select Role-based or features based installation.

Select Active Directory Certificate Services.
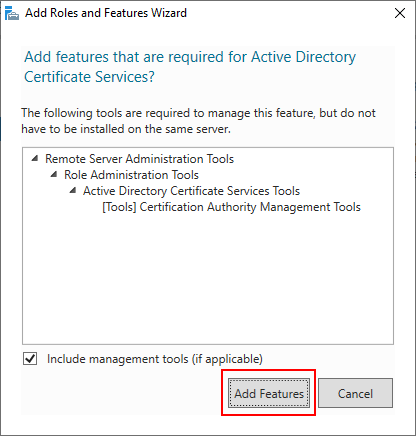
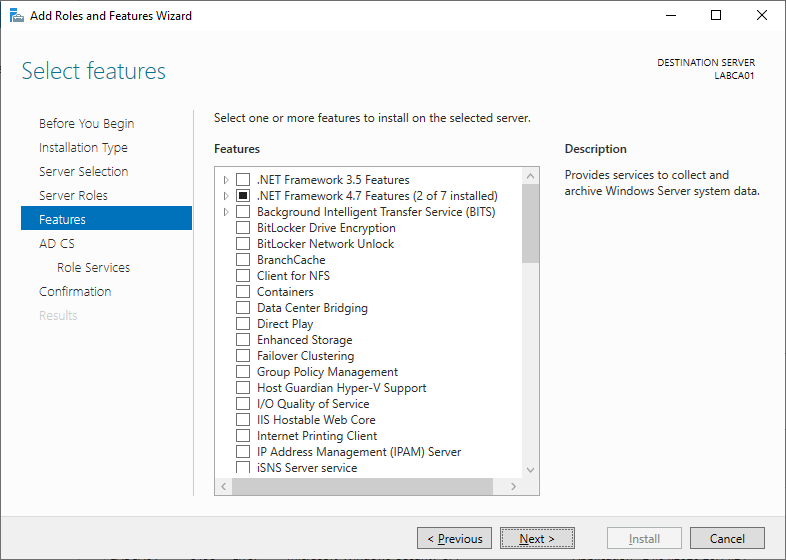
When prompted make sure to add the required features.
Since we already added the required features just click next.
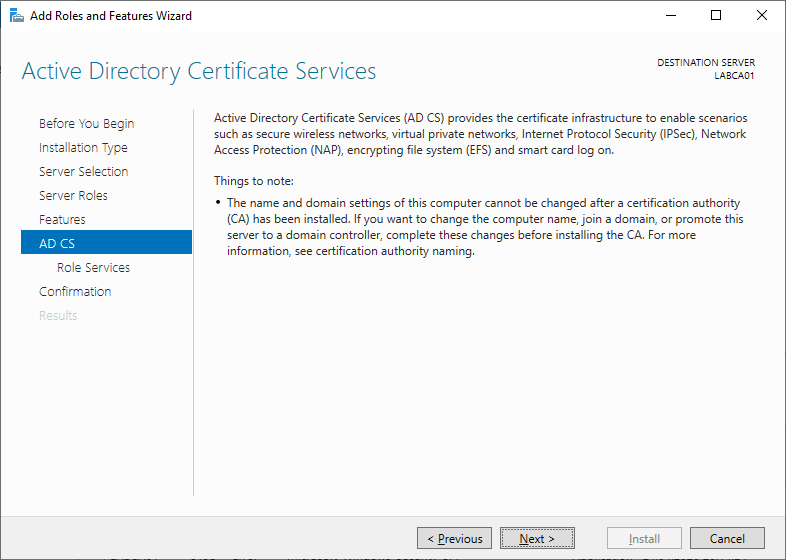
Review the information for Active Directory Certificate Services.
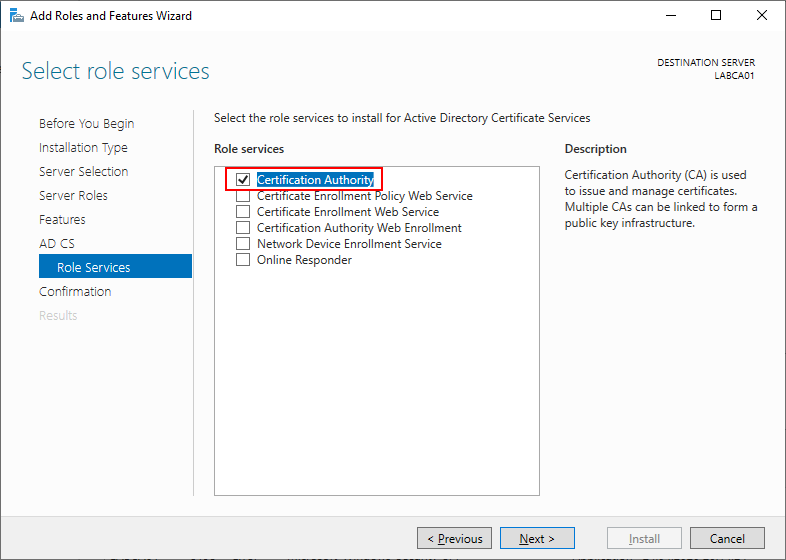
Select Certification Authority.
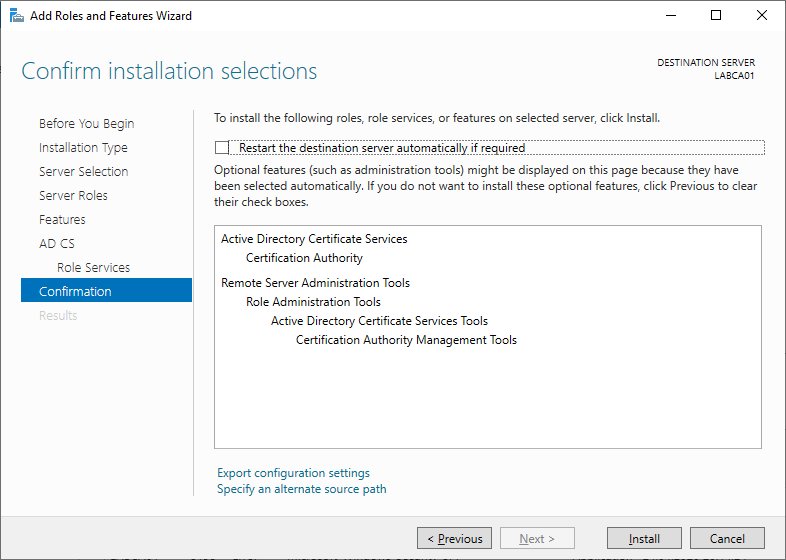
Review the choices and click install when ready.
Once the installation has completed press the link to start the Active Directory Certificate Services configuration wizard.
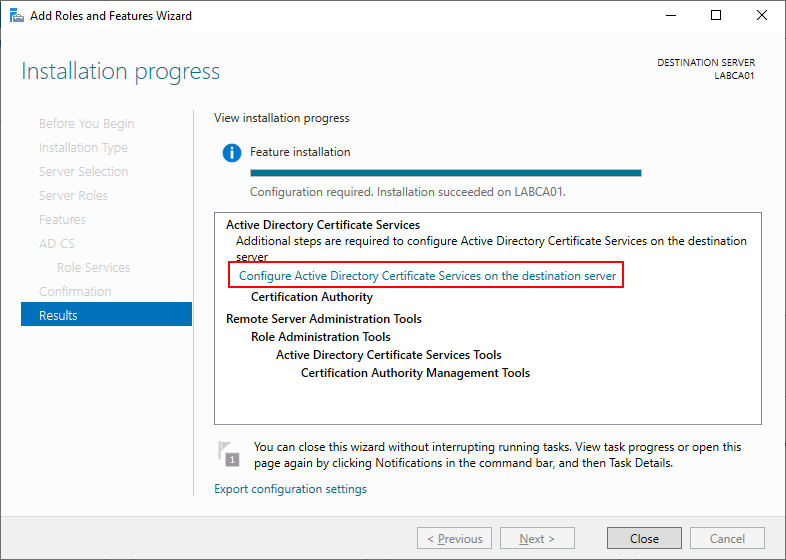
Configuring Certificate Services
Now that we have the role installed it’s time to configure it. Use the PowerShell script below to configure the server automatically or use the wizard in Server Manager.
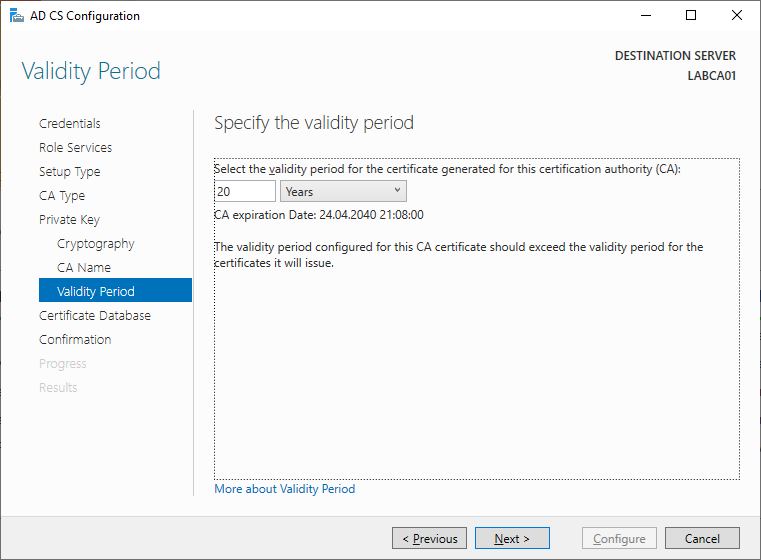
Install-ADCSCertificationAuthority -CACommonName "LAB Root CA" -CAType StandaloneRootCA -CryptoProviderName "RSA#Microsoft Software Key Storage Provider" -HashAlgorithmName SHA256 -KeyLength 2048 -ValidityPeriod Years -ValidityPeriodUnits 20 -Verbose
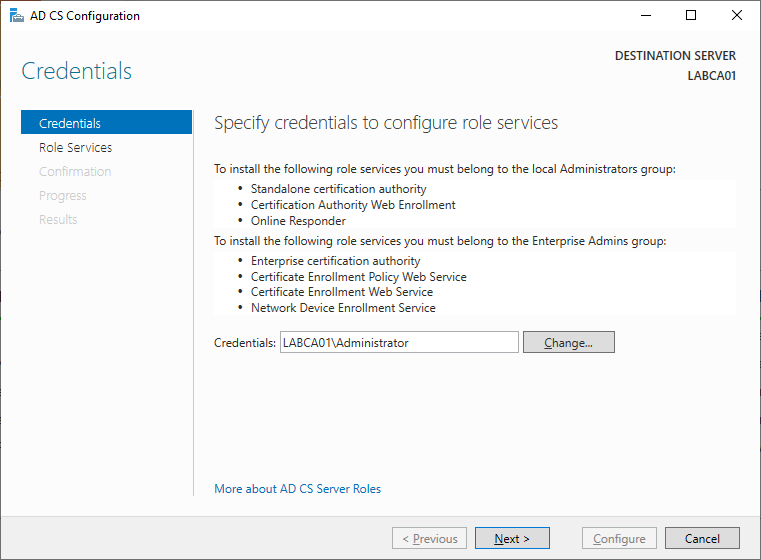
Start by specifying a user that has local administrator rights.
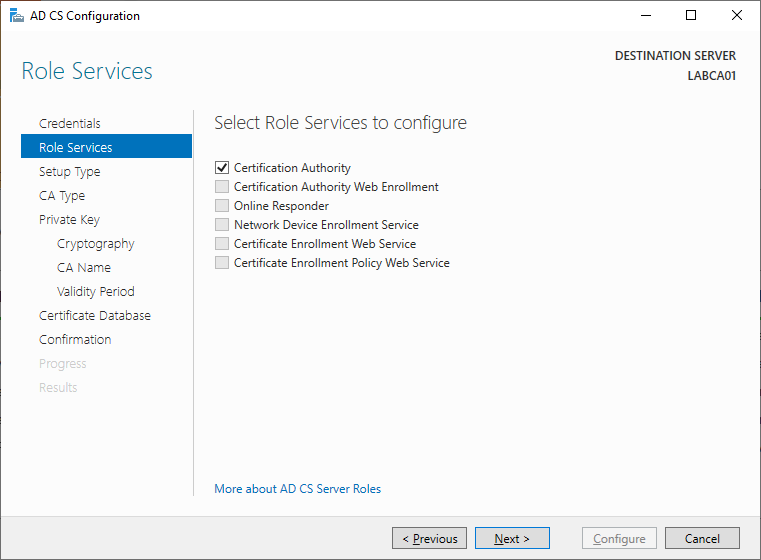
Select “Certification Authority”, it should be the only option.
“Standalone CA” will be the only choice since our server is not joined to Active Directory.
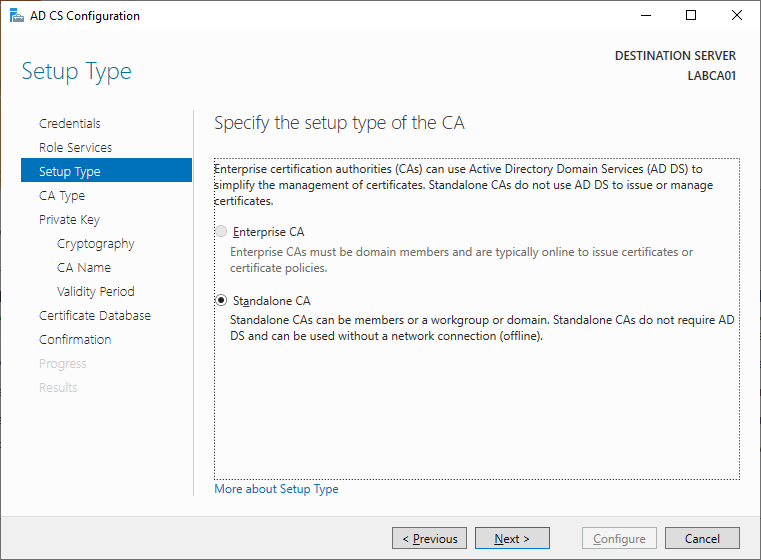
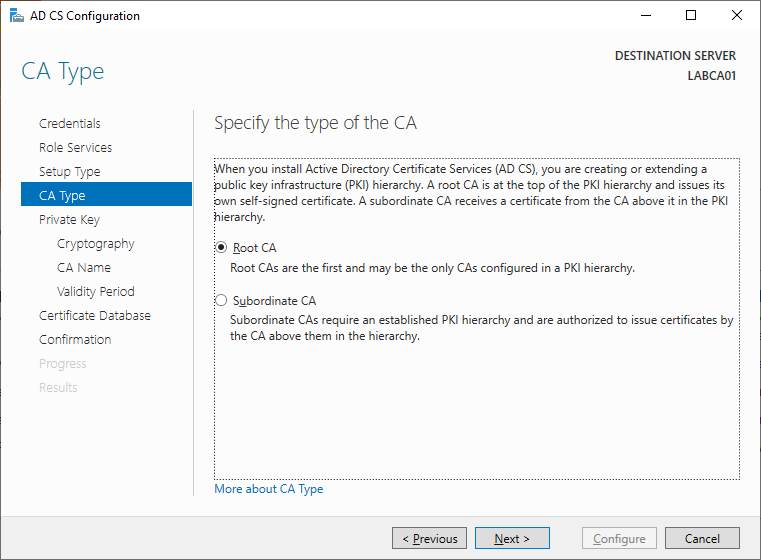
Since this will be the initial server in our trust chain, select Root CA.
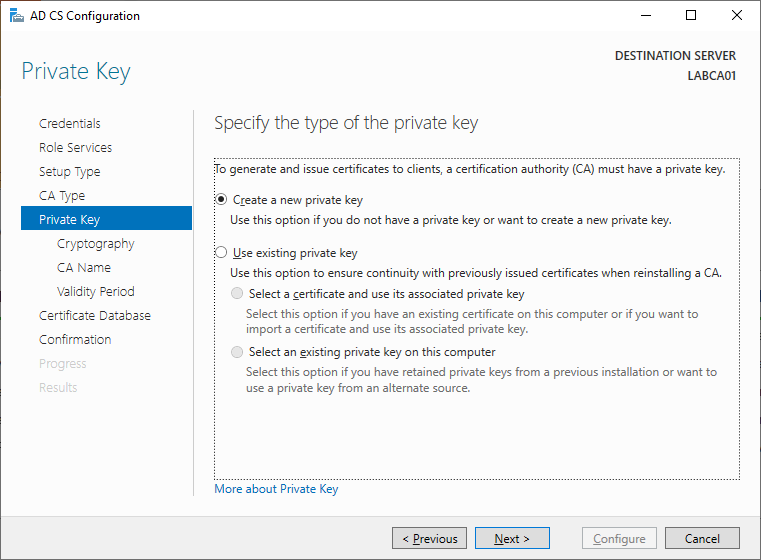
We dont have any existing keys so we need to create a new one.
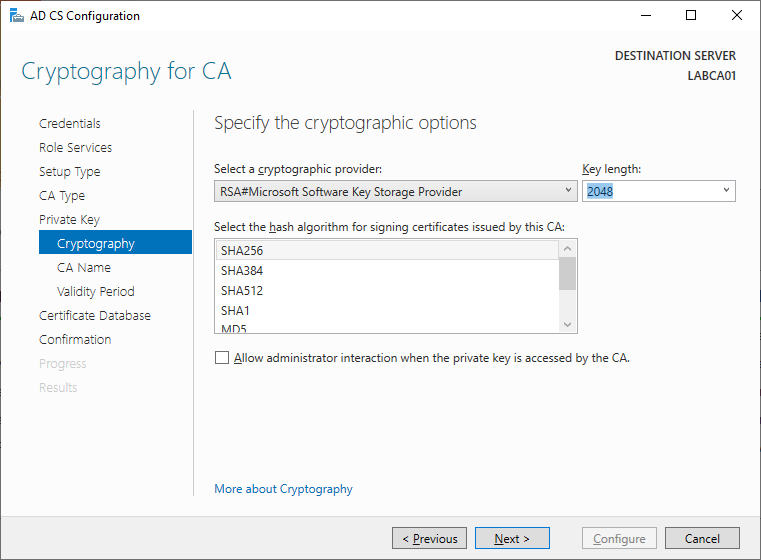
The default settings should be fine for our lab. The Key Length and/or hash algorithm can be increased, just make sure the services/applications where you wish to use the certificates support these.
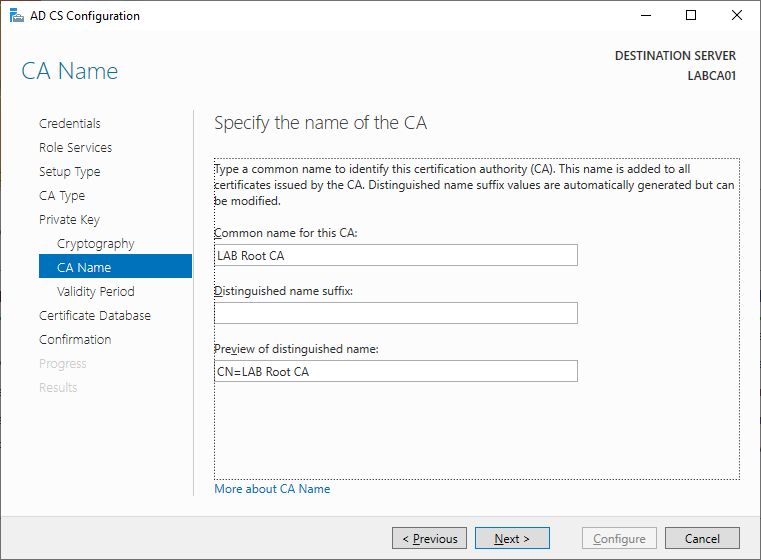
Specify a name for the Root CA, this cannot be changed later.
Specify the validity of the Root CA.
Keep the default database locations unless you have a specific requirement.

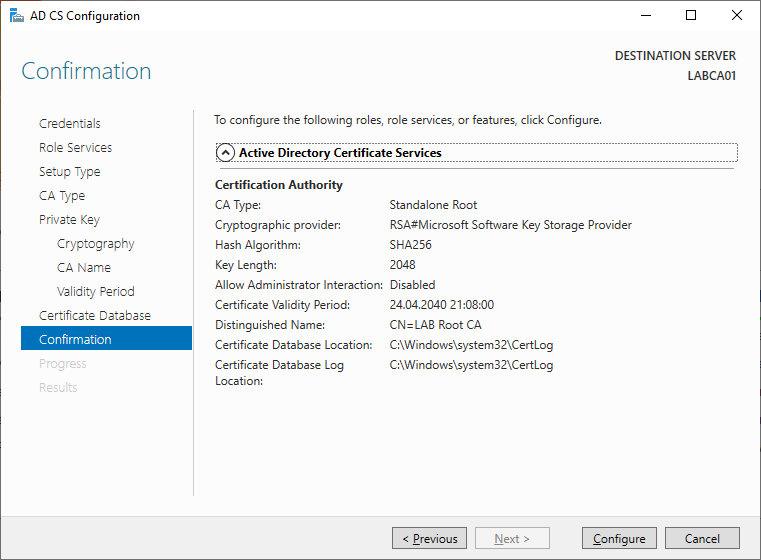
Review the settings specified
Wait for the wizard to configure Active Directory Certificate Services
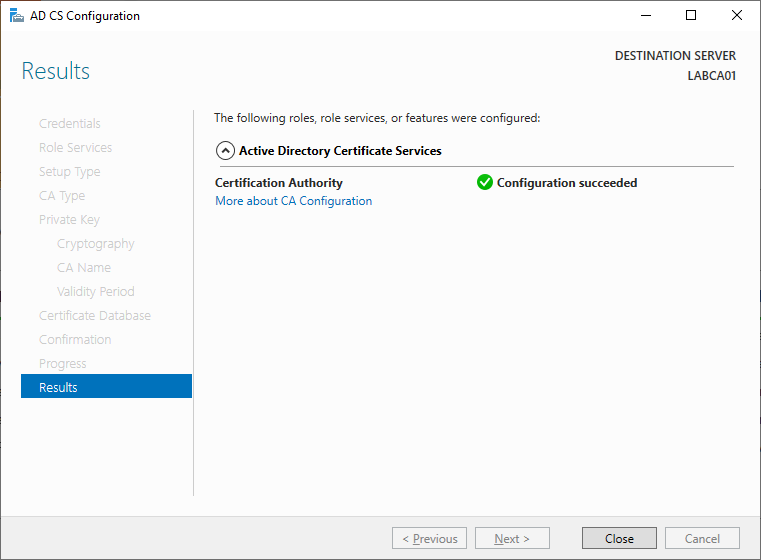
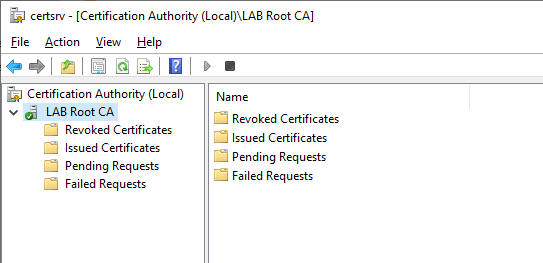
You should now be able to open the Certification Authority (certsrv.msc).
Post Configuration Settings
After the Root CA has been configured, we need to set some registry settings:
Firstly we need to specify the ValidityPeriodUnits registry value, specify the same value that was specified in the wizard (20 years in my case). Secondly, as our server is not joined to Active Directory we will need to provide some information about our domain. Lastly we need to restart the Certification Authority to apply the changes. Modify and run the script below to set the appropriate settings.
# VARIABLES #
$RootCAName = "LAB Root CA"
$DomainDN = "DC=lab,DC=local"

Set-ItemProperty -Path "HKLM:\SYSTEM\CurrentControlSet\Services\CertSvc\Configuration\$RootCAName" -Name DSConfigDN -Value "CN=Configuration,$DomainDN"
Set-ItemProperty -Path "HKLM:\SYSTEM\CurrentControlSet\Services\CertSvc\Configuration\$RootCAName" -Name DSDomainDN -Value "$DomainDN"
Set-ItemProperty -Path "HKLM:\SYSTEM\CurrentControlSet\Services\CertSvc\Configuration\$RootCAName" -Name ValidityPeriodUnits -Value 20
Set-ItemProperty -Path "HKLM:\SYSTEM\CurrentControlSet\Services\CertSvc\Configuration\$RootCAName" -Name ValidityPeriod -Value "Years"
Set-ItemProperty -Path "HKLM:\SYSTEM\CurrentControlSet\Services\CertSvc\Configuration\$RootCAName" -Name CRLPeriodUnits -Value 20
Set-ItemProperty -Path "HKLM:\SYSTEM\CurrentControlSet\Services\CertSvc\Configuration\$RootCAName" -Name CRLPeriod -Value "Years"
Restart-Service -Name CertSvc -Verbose
Setting the CDP and AIA Locations
As mentioned before the CDP contains information about the location of a CRL such as a URL (if using a web server) or an LDAP path (if using Active Directory). The CRL is then used to validate if the issued certificate is valid or not. The AIA location on the other hand contains information on how to find the issuer of a particular certificate.
If setting up the CDP and AIA locations manually make sure that you check each step carefully, as this is usually where errors are made. I would strongly recommend to use the PowerShell script below to automatically create the AIA and CDP locations if you are new to PKI services. The HTTPUrl variable needs to be populated with the location of our webserver that will host the CRL, more on that later.
Note that the URL being used in the LAB is not routable on the internet, hence it will only work within the LAB. If you intend to use the PKI infrastructure on external clients, such as remote workers connecting to a VPN, use a routable domain name that you own.
# VARIABLES #
$HTTPUrl = "pki.lab.local"

#AIA
certutil -setreg CA\CACertPublicationURLs "1:C:\Windows\system32\CertSrv\CertEnroll\%1_%3%4.crt\n0:ldap:///CN=%7,CN=AIA,CN=Public Key Services,CN=Services,%6%11\n0:http://%1/CertEnroll/%1_%3%4.crt\n0:file://%1/CertEnroll/%1_%3%4.crt\n2:http://$HTTPUrl/%3%4.crt"
#CDP
certutil -setreg CA\CRLPublicationURLs "65:C:\Windows\system32\CertSrv\CertEnroll\%3%8%9.crl\n0:ldap:///CN=%7%8,CN=%2,CN=CDP,CN=Public Key Services,CN=Services,%6%10\n0:http://%1/CertEnroll/%3%8%9.crl\n0:file://%1/CertEnroll/%3%8%9.crl\n6:http://$HTTPUrl/%3%4.crl"
Restart-Service -Name CertSvc -Verbose
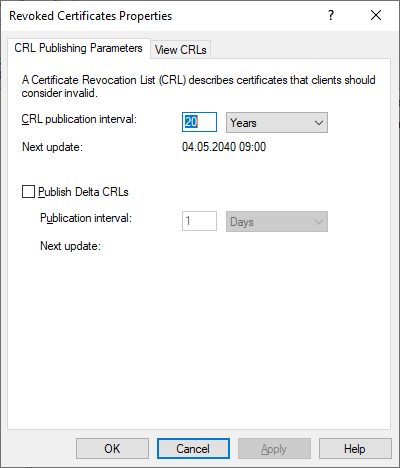
Now that the PowerShell script has been run, open the Certification Authority snap-in. Right click “Revoked Certificates”, select “Properties” and make sure the the CRL Publication Interval is set to 20 years and that the checkbox for Delta CRLs is unchecked. We wont be using Delta CRL’s for this LAB, but will retain the settings on the CDP and AIA locations so that it easily can be activated in the future.
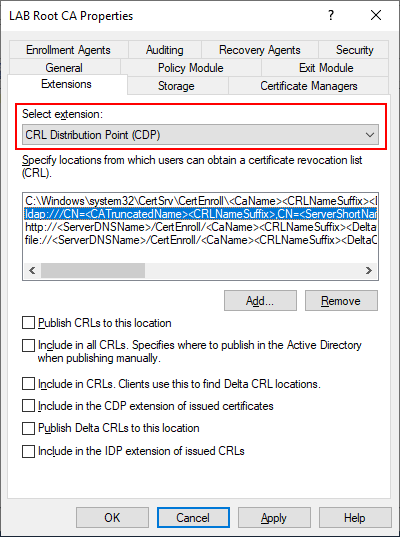
The PowerShell script should have taken care of the configuration steps below, but its a good idea to verify. Right click LAB Root CA in the Certification Authority snap-in and select properties, then select the Extensions tab. Make sure that CDP is the selected extension then select C:\Windows\system32 and make sure that the two checkboxes are selected. The other options LDAP, HTTP and FILE should not have any options checked. These can technically be removed but I choose to keep them since they are present by default.
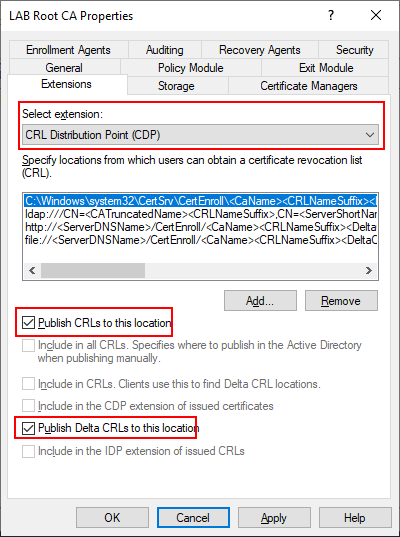
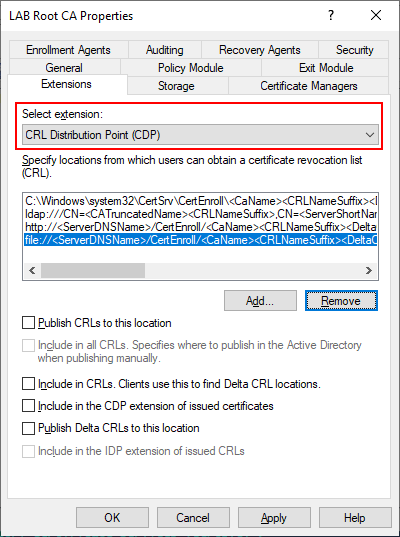
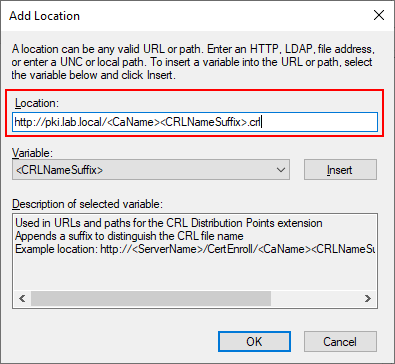
As mentioned earlier, the Root CA will remain offline once we complete the setup. However, in order to validate certificates issued by the Root CA we need make the CRL available to endpoints. To do this we will be installing a web server on our Issuing Server (LABCA02) later to host this role. Select the “Add” button and specify an HTTP path that will be resolvable by all clients and servers.
http://pki.lab.local/<CaName><CRLNameSuffix>.crl
Once we have added the URL to the webserver make sure that the following two checkboxes are selected.
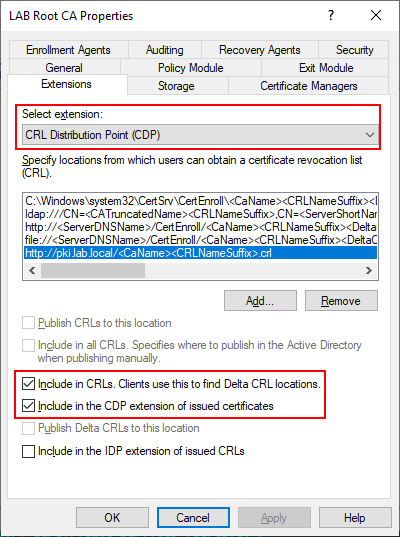
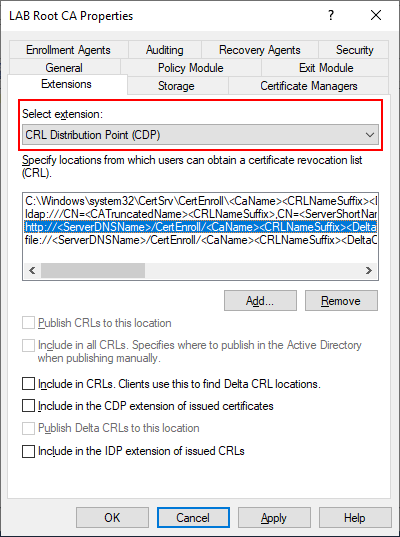
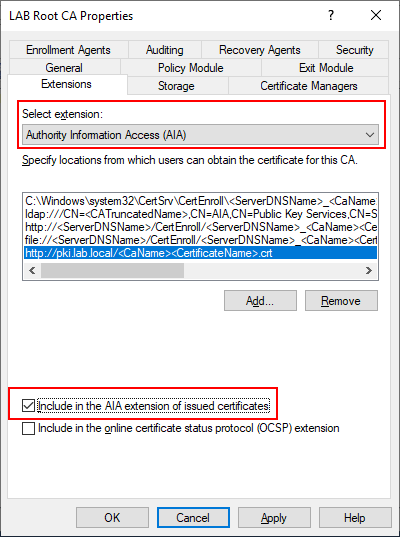
Next we need to do the exact same thing for AIA. Make sure AIA is selected in the Extension and press “Add”. Make sure that only our pki.lab.local record has the checkbox selected, the others should be disabled.
http://pki.lab.local/<CaName><CertificateName>.crt
Select Apply and close the Properties window.
Enable Auditing
Auditing can be enabled from the Certification Authority snap-in by right Clicking on LAB Root CA, selecting Properties then selecting the Auditing tab. The Audit configuration can also be set by a bitmask value as indicated in the table. To enable all the audit events enter the command below.
Certutil -setreg CA\AuditFilter 127
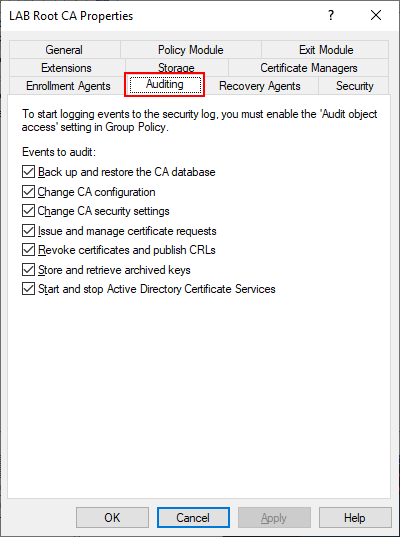
| Value | Setting |
| 1 | Start and stop Active Directory Certificate Services |
| 2 | Back up and restore the CA database |
| 4 | Issue and manage certificate requests |
| 8 | Revoke certificates and publish CRLs |
| 16 | Change CA security settings |
| 32 | Store and retrieve archived keys |
| 64 | Change CA configuration |
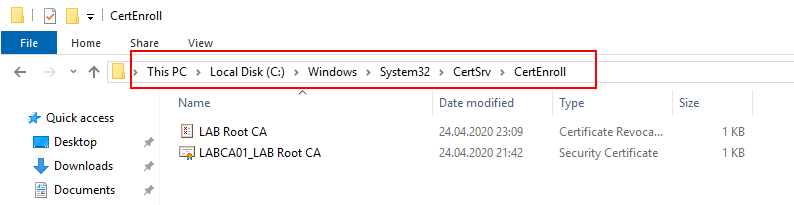
Publish the CRL
Finally we can publish our CRL by right clicking “Revoked Certificates”, select “All Tasks” and then “Publish”. Select “New CRL” and press OK.
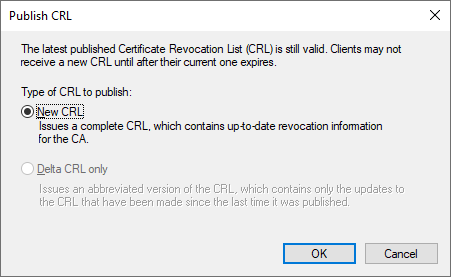
If everything was done right there should now be two files in the C:\Windows\System32\CertSrv\CertEnroll folder. Copy these two files to the Desktop as we will need them later.
Conclusion
In this post we created our Root CA and discussed some terminology relevant to PKI infrastructures. In the next post we will install our Issuing CA and using the same server to host our CRL (Certificate Revocation List).
Complete PowerShell Script
Here is the complete PowerShell script to automatically install and configure the Root CA. Note that this script also includes some extra PowerShell switches that will overwrite any existing keys and deployments without warning.
#################################
#                               #
#                               #
# ROOT CA CONFIGURATION         #
#                               #
#                               #
#################################

# VARIABLES #
$RootCAName = "LAB Root CA"
$DomainDN = "DC=lab,DC=local"
$HTTPUrl = "pki.lab.local"

Add-WindowsFeature ADCS-Cert-Authority -IncludeManagementTools -Verbose
Install-ADCSCertificationAuthority -CACommonName $RootCAName -CAType StandaloneRootCA -CryptoProviderName "RSA#Microsoft Software Key Storage Provider" -HashAlgorithmName SHA256 -KeyLength 2048 -ValidityPeriod Years -ValidityPeriodUnits 20 -OverwriteExistingKey -Verbose -Force

#Basic Configuration
Set-ItemProperty -Path "HKLM:\SYSTEM\CurrentControlSet\Services\CertSvc\Configuration\$RootCAName" -Name DSConfigDN -Value "CN=Configuration,$DomainDN"
Set-ItemProperty -Path "HKLM:\SYSTEM\CurrentControlSet\Services\CertSvc\Configuration\$RootCAName" -Name DSDomainDN -Value "$DomainDN"
Set-ItemProperty -Path "HKLM:\SYSTEM\CurrentControlSet\Services\CertSvc\Configuration\$RootCAName" -Name ValidityPeriodUnits -Value 20
Set-ItemProperty -Path "HKLM:\SYSTEM\CurrentControlSet\Services\CertSvc\Configuration\$RootCAName" -Name ValidityPeriod -Value "Years"
Set-ItemProperty -Path "HKLM:\SYSTEM\CurrentControlSet\Services\CertSvc\Configuration\$RootCAName" -Name CRLPeriodUnits -Value 20
Set-ItemProperty -Path "HKLM:\SYSTEM\CurrentControlSet\Services\CertSvc\Configuration\$RootCAName" -Name CRLPeriod -Value "Years"

#AIA
certutil -setreg CA\CACertPublicationURLs "1:C:\Windows\system32\CertSrv\CertEnroll\%1_%3%4.crt\n0:ldap:///CN=%7,CN=AIA,CN=Public Key Services,CN=Services,%6%11\n0:http://%1/CertEnroll/%1_%3%4.crt\n0:file://%1/CertEnroll/%1_%3%4.crt\n2:http://$HTTPUrl/%3%4.crt"
#CDP
certutil -setreg CA\CRLPublicationURLs "65:C:\Windows\system32\CertSrv\CertEnroll\%3%8%9.crl\n0:ldap:///CN=%7%8,CN=%2,CN=CDP,CN=Public Key Services,CN=Services,%6%10\n0:http://%1/CertEnroll/%3%8%9.crl\n0:file://%1/CertEnroll/%3%8%9.crl\n6:http://$HTTPUrl/%3%4.crl"
#Audit
Certutil -setreg CA\AuditFilter 127

#Publish and Rename
Restart-Service -Name CertSvc -Force -Verbose
certutil -crl
sleep 3

# Cleanup
Restart-Computer

