
In this post we will be installing Network Policy Server (NPS) on Windows Server 2019 in order to authenticate users/devices connecting to our corporate wireless network. Network Policy Server is Microsoft’s RADIUS implementation, and can be used to authenticate users or devices on a variety of services where VPN’s or Wi-Fi are usually the most popular. Since we will be using certificates to authenticate devices (users is also possible), an existing certificate infrastructure is required in our Active Directory environment. See my post on Creating a Two-Tier PKI Hierarchy if you don’t have a PKI already or want more information. Our NPS server should be joined to the active directory and all available updates from Microsoft should be installed.
NPS and RADIUS Terminology
If you are new to Network Policy Server and RADIUS technology there might be some terms that are new. Below is an explanation of terminology used in this post.
- RADIUS – Remote Authentication Dial-In User Service is a networking component that is used for authorization and authentication for a diverse set of services such as VPN and Wireless networks.
- RADIUS Secret – Is a string of unique characters that is used in communication between the RADIUS Server and the RADIUS Client. Think of it as a password that is validated by the server and client.
- RADIUS Client – Is not actually the endpoint PC or mobile device that initiates the connection to a particular service (wireless network in our case), but rather the service or device that will talk with the RADIUS Server. In our case the RADIUS Clients will be the Access Points providing wireless coverage.
- 802.1x – is the IEEE standard for port based authentication. Port based authentication can be used both on wired and wireless networks.
Creating the NPS Server Certificate Template
Before we can start installing the Network Policy Server (NPS) we need to create a certificate template that will be used to issue a server certificate for our NPS Server.
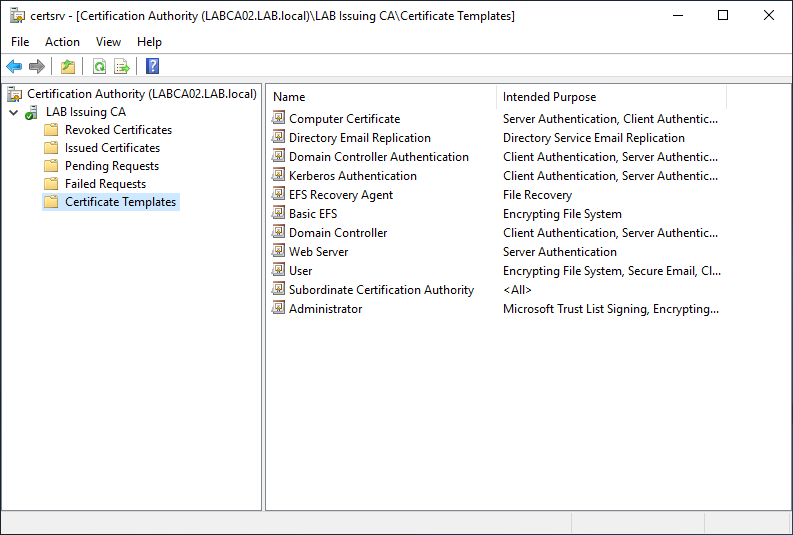
Start by opening the Certificate Authority on your Issuing CA. Right Click Certificate Templates and select Manage. Then right-click the “RAS and IAS Server” template and select Duplicate.
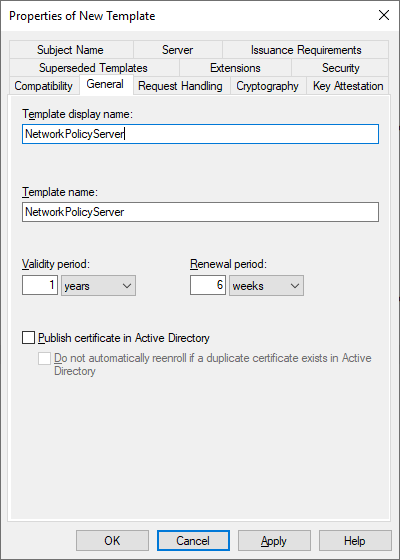
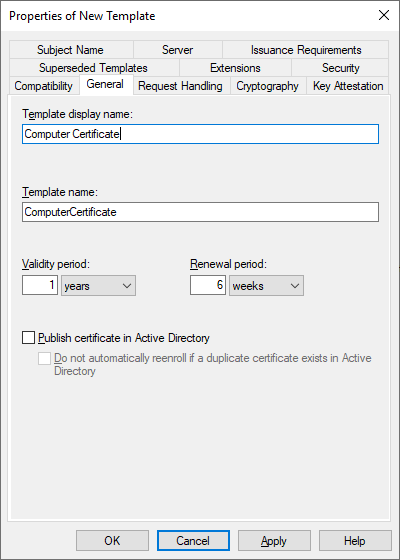
On the General tab give the Template a display name. Note that the Template name will be the same as the display name only without spaces.
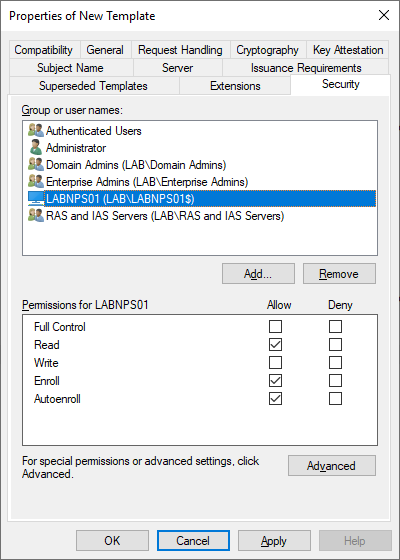
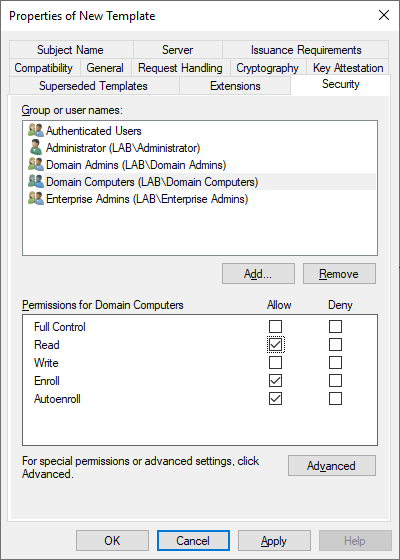
On the Security tab add the computer object of the server and make sure that the Read and Enroll options are selected. If you would like to autoenroll the certificate template to the server then also select the autoenroll option.
One completed press Apply and OK to close our newly create NetworkPolicyServer certificate template. The Certificates Templates Console can also be closed returning us to the main Certificate Authority window.
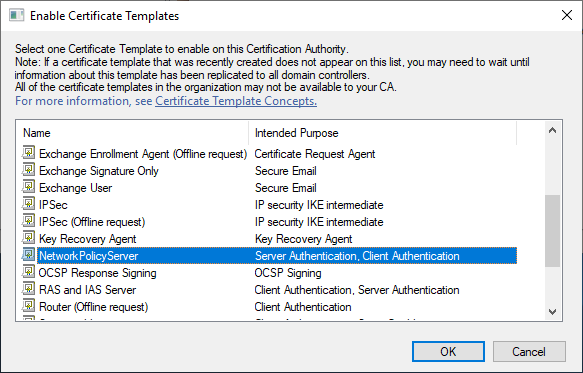
Next we need to make the certificate template available for enrollment. On the main Certification Authority screen right click Certificate Templates like before, but this time select New > Certificate Template to Issue. Select the NetworkPolicyServer template that we just created and press OK.
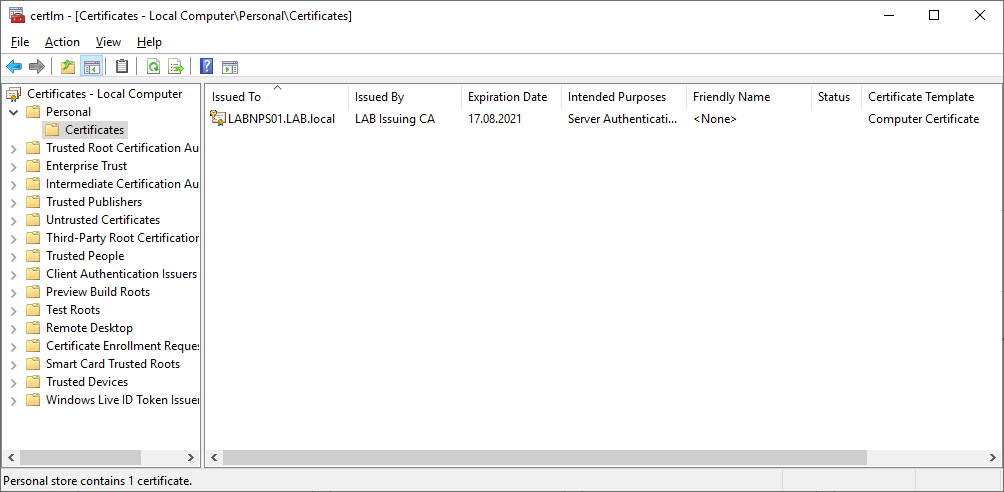
We now have a certificate template for our NPS server. Next we need to issue a certificate based on the profile we created. On your NPS server open the Local Computer Certificates store (certlm.msc in run) and navigate to the Personal store.
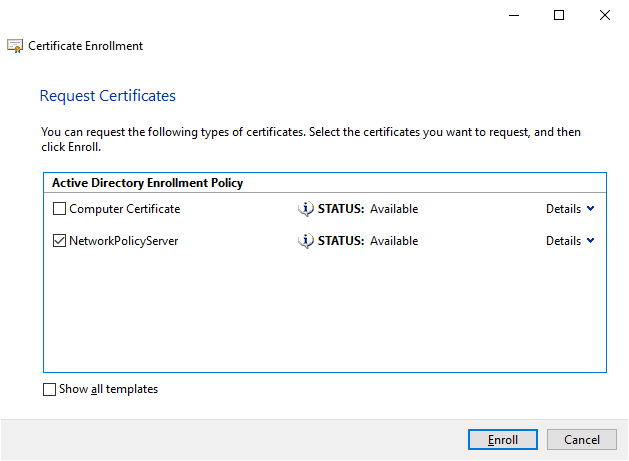
Right click anywhere in the white space and select All Tasks -> Request New Certificate (can also be done from the Action menu). Click next until the Request Certificates page is displayed, then check the Network Policy Server template that we created and press Enroll. Note the list of certificates might vary depending on templates created in your environment.
If the Network Policy Server template is not displayed try restarting your server and verify that the appropriate permissions are set on the Issuing CA.
We should now have a valid certificate for our NPS server (note the correct template name in Certificate Template column) and can start the installation. To make the certificate easier to identify later give it an optional friendly name by selecting properties on the certificate. The friendly name should be descriptive such as “NPS Server Certificate” but you can call it what you want.

Creating a Computer/User Template
The users/devices in your environment will need a certificate in order to authenticate, hence we need to create a certificate template for them too. When we use device certificates, Windows can connect to the network before any user logs on. If we decide to use user certificates, that particular user will need to be logged onto the device before connectivity to the wireless network can be established.
From this point on we will be using computer certificates to authenticate devices in our Active Directory Domain.
Go back to the issuing CA and open the Certificates Template Console (where we duplicated the RAS and IAS Server template) but this time make a duplicate of the Computer template. Give the template a name like “Computer Certificate”, the Template Name should be the Display Name without spaces.
On the Security tab make sure that Domain Computers has the Read, Enroll and AutoEnroll permissions selected. Once finished press Apply and OK to close the new template, then close the Certificate Templates Console.
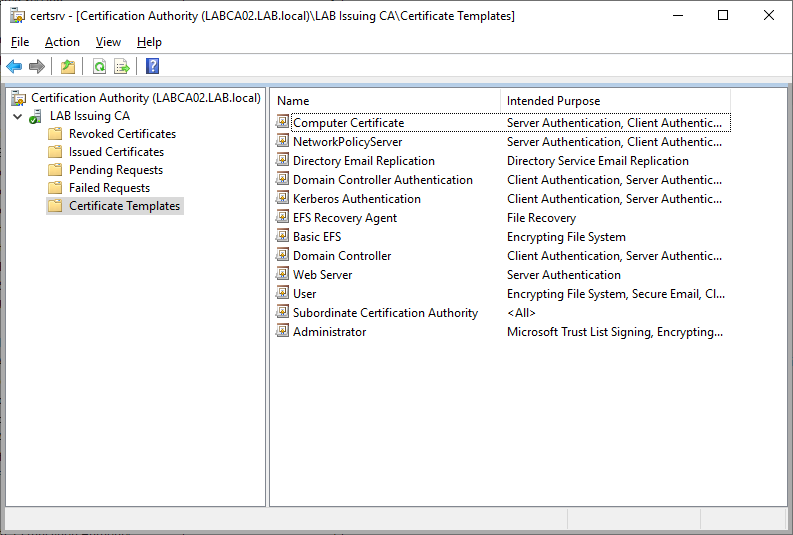
On the Certification Authority snap-in, right click Certification Templates then select New -> Certificate Template to Issue and select the Computer Certificate Template we just created.
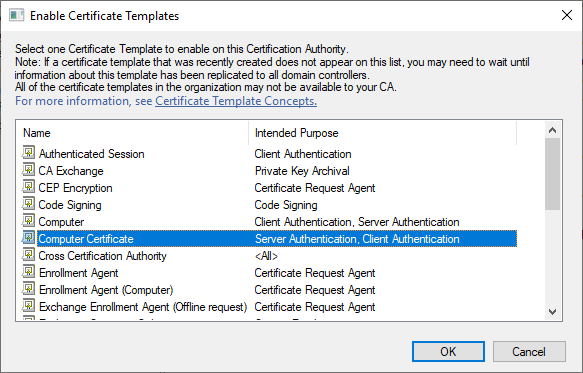
Both the Computer Certificate and Network Policy Server template should be visible in the list. Since we enabled AutoEnrollment (only on the Computer Certificate) on the Domain Computers group, all clients and servers in our Active Directory will automatically get a certificate based on this template.
Installing Network Policy Server
Network Policy Server (NPS) can be installed either by using Server Manager or by using PowerShell. The PowerShell method is preferred as it is quicker and reduces the amount of dialog boxes.
Install-WindowsFeature NPAS -IncludeManagementTools -Verbose
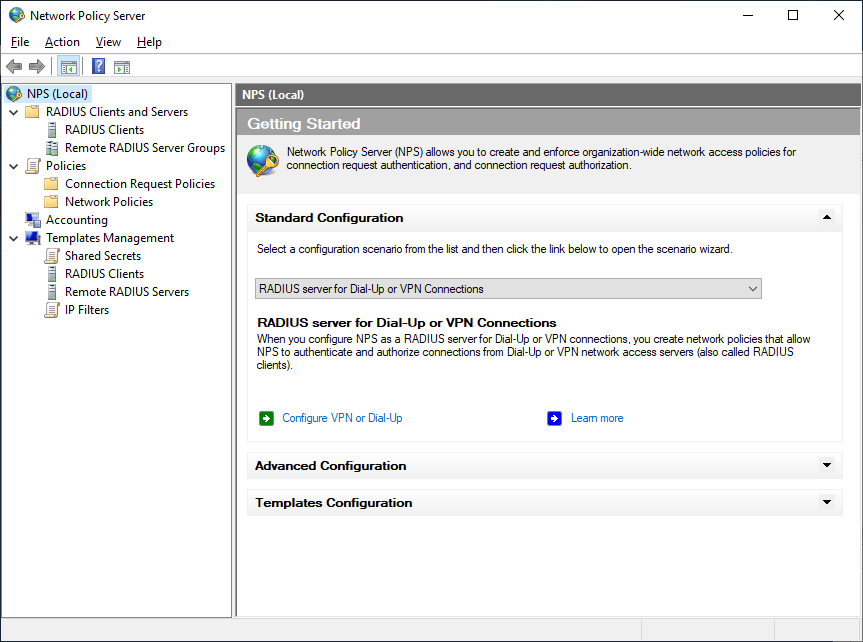
Once the installation has been completed open the Network Policy Server MMC (nps.msc) and we are ready to create our NPS Policies. Before continuing right click NPS (Local) and select Register Server in Active Directory, also verify that the NPS Service is started.
Defining Clients and RADIUS Secrets
Next we need to define all our clients. As mentioned before: A RADIUS Client is not actually the endpoint device such as a PC or mobile phone, but rather the service submitting requests to the RADIUS Server which in our case is our Wireless Access Point.
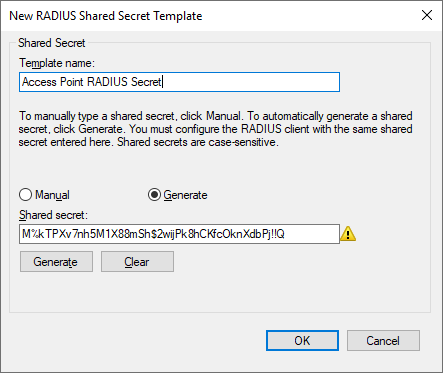
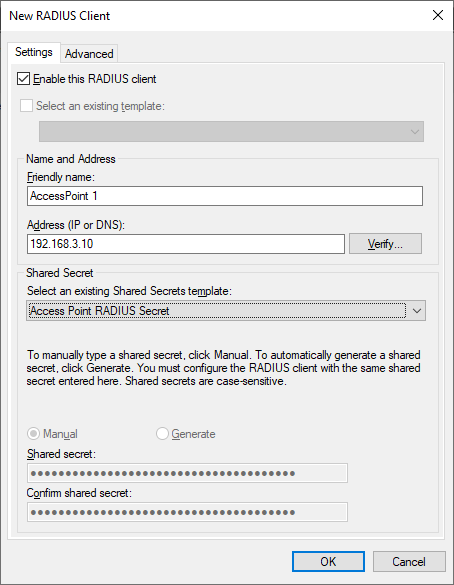
Since we might want to use the same RADIUS Secret if we deploy another Access Point later, its a good idea to create a Shared Secret Template. Expand Templates Management, right click select Shared Secrets and select New. Give the template a name such as Access Point RADIUS Secret or any other descriptive name then specify a secret or generate one.
Important: Make a note of your Shared Secret as it wont be displayed in clear text again. The secret should be documented in a safe place such as a protected password repository.
Once we have our Shared Secret Template its time to define our Access Point. Right click Radius Clients and select New. Provide a friendly name such as AccessPoint 1 and the IP address of the Access Point, then select the Shared Secret Template that we just created and Press OK.
Connection Request Policy
Connection Request Policies are a set of conditions and settings that define what sort of RADIUS messages should be handled. Technically its possible to use the default rule but consider it a best practice to create your own. Below we will create a Connection Request Policy that allows Wireless requests.
Under policies right click Connection Request Policy and select New.
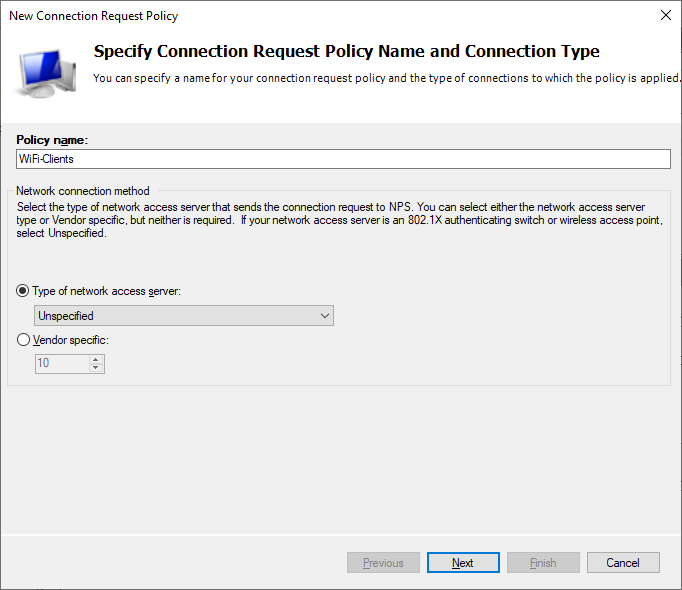
On the Specify Conditions page, press Add and select “Wireless – IEEE 802.11” and “Wireless – Other”

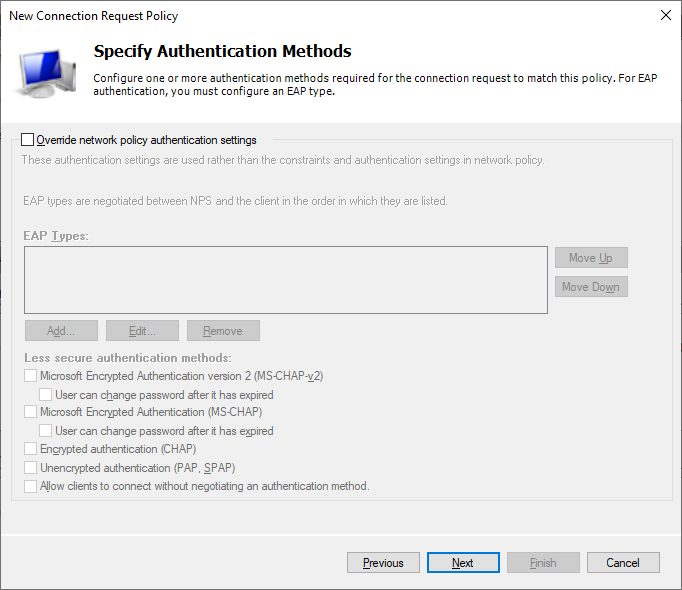
On the Specify Authentications Methods page keep the defaults.
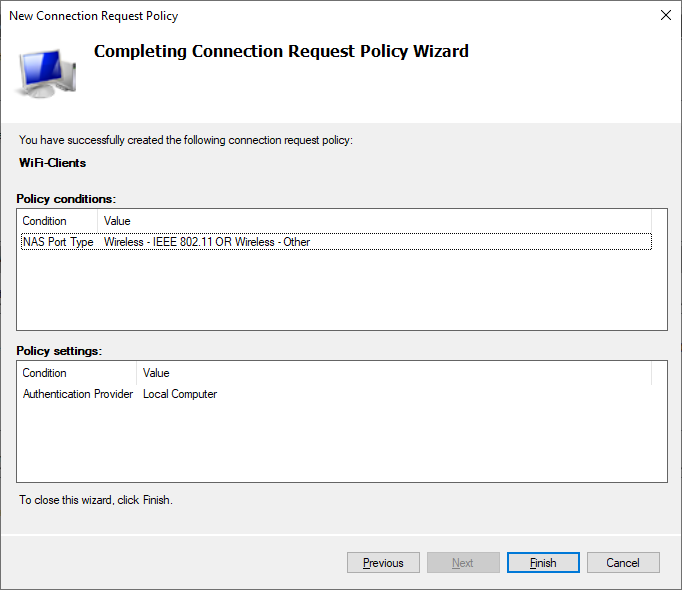
Review the conditions and policy settings then click Finish to create the policy.
Network Policies
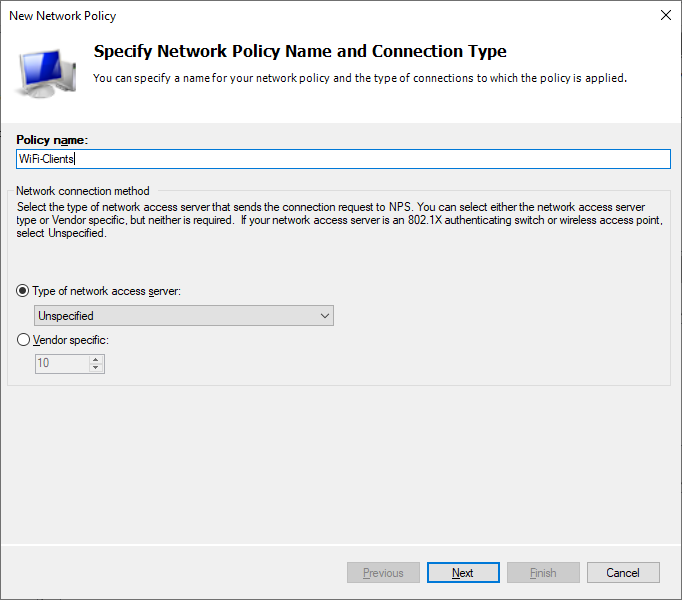
The next step is to define the Network Policy.
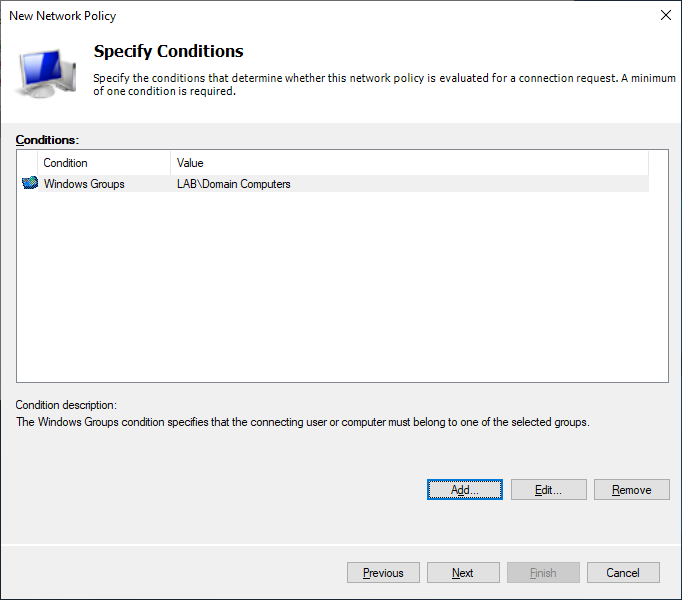
On the Specify Conditions page, add the Domain Users group or create your own group to use. Should you prefer using computer authentication add the Domain Computers group, or both if preferred.
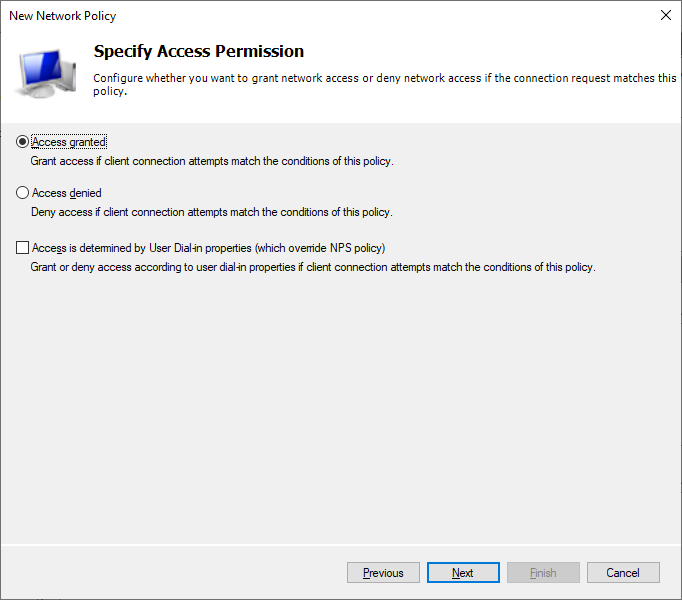
On the Specify Access Permission page select Access Granted. Note that Users have an attribute in Active Directory called User Dial-in properties, this can be used to control if the user should be provided access or not. There is a an option to ignore the Dial-in properties of users after the Network Policy has been created.
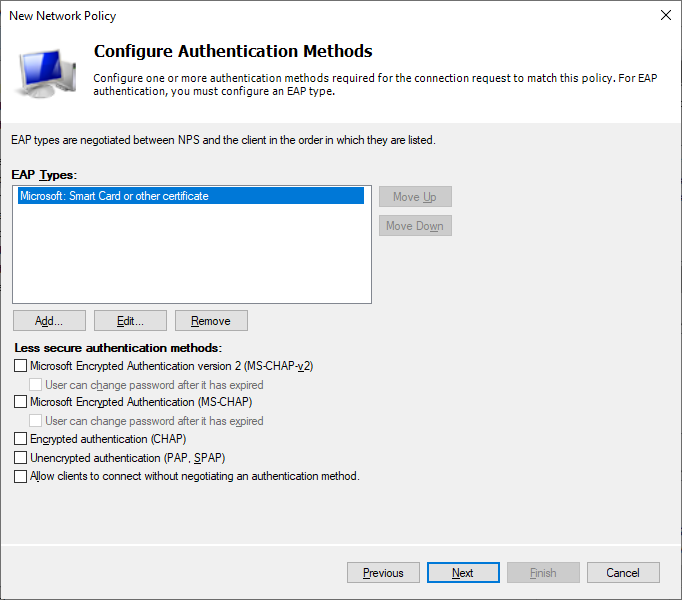
On the Configure Authentication Methods page start by disabling all the less secure authentication methods as these are not considered secure. Then click Add and select “Microsoft: Smart Card or other Certificate”.
Next select “Microsoft: Smart Card or other Certificate” and press Edit. Make sure that the certificate that we imported earlier is selected. If there are multiple certificates with the same name then compare the expiration time.
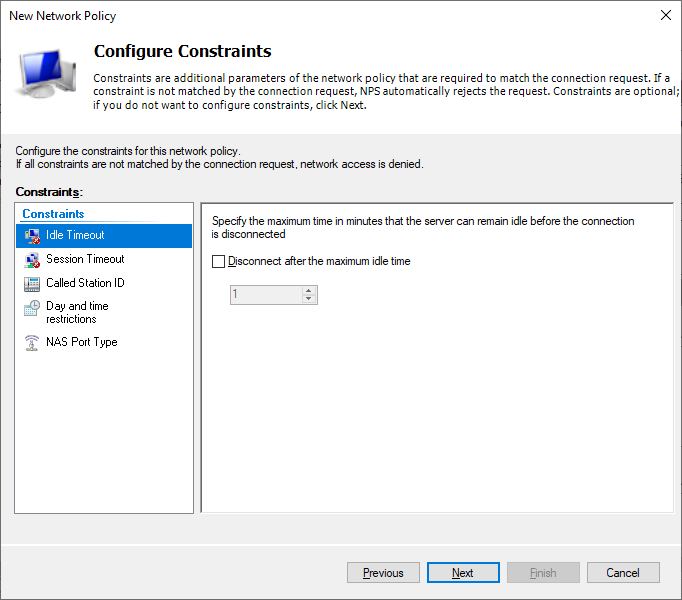
On the Configure Constraints page keep the defaults.
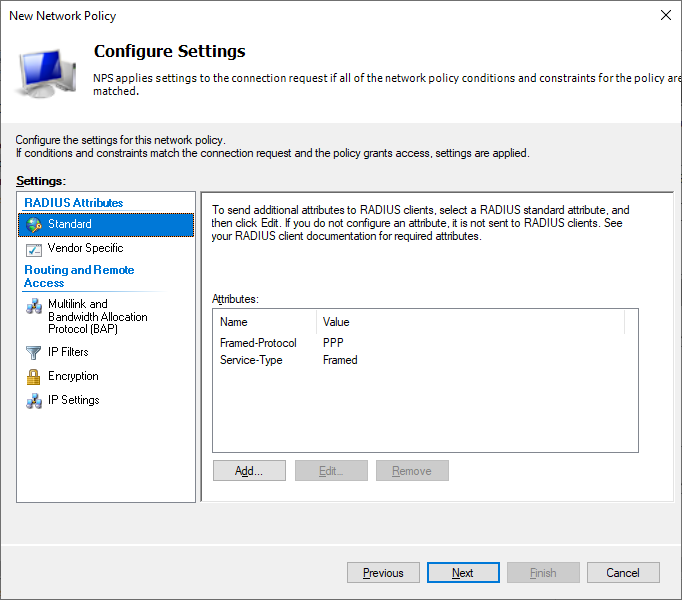
On the Configure Settings page keep the defaults.
Review the Network Policy and press Finish.
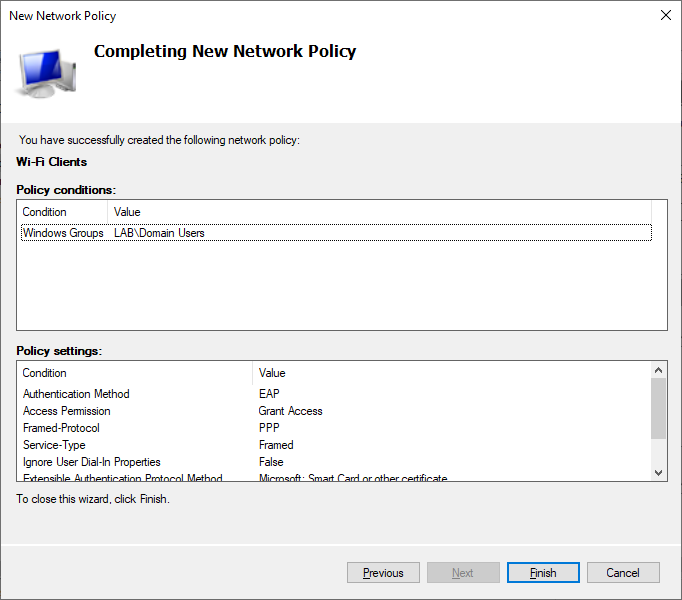
Now that our policy has been created, remember to right click the policy and check the box that says “Ignore User Account Dial-in Properties”.
Access Point Setup
After the Network Policy Server (NPS) has been configured, its time to configure our Access Point to authenticate with our NPS server. The steps for this will obviously vary to the type of hardware available, but below are steps for a Linksys consumer router and for Ubiquity’s Unifi Software.
If you are using VLAN’s in your environment then you have the NPS server assign the VLAN based on the user that is connecting. This is something that you might want to explore on your own later, and will not be covered here. Given that more and more Enterprises are moving to a Zero Trust model this type of access management might be less used in the future.
Ubiquiti Unifi
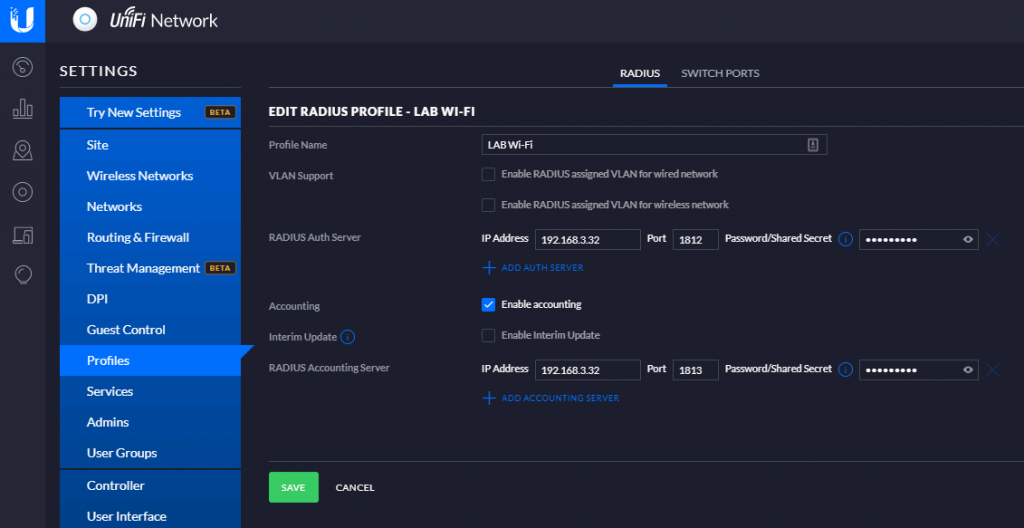
In the Unifi dashboard click settings and select Profiles, then click Create New Radius Profile. Give the Profile a name and specify the IP address of the NPS Server and Shared Secret. In the screenshot below Accounting is enabled, this is not required but helpful if you need to troubleshoot later.
Next click Wireless Networks and create a new wireless network, make sure to select the RADIUS profile that we created earlier and that Security is set to WPA Enterprise. If you need to define VLAN ID do so in the advanced options.
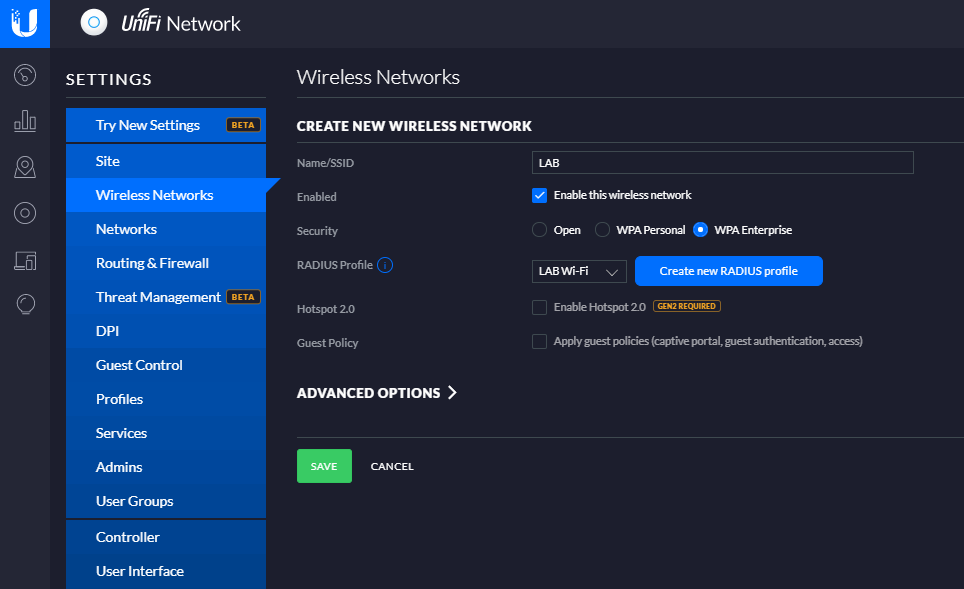
Once you press save allow a few minutes for the access point to be provisioned, and the network should be visible to clients.
Linksys E2500
The Linksys E2500 is a consumer router with Wi-Fi, that also supports WPA Enterprise. Most modern routers have the support needed.
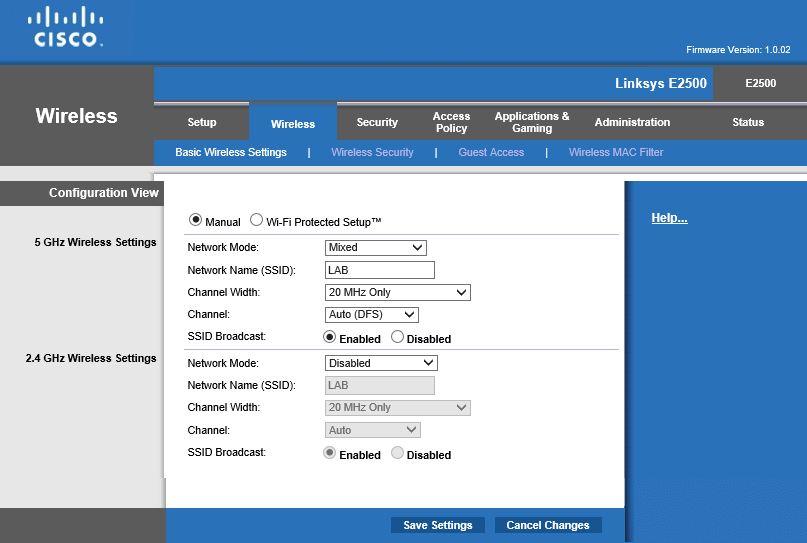
On the Basic Wireless Settings, select Manual
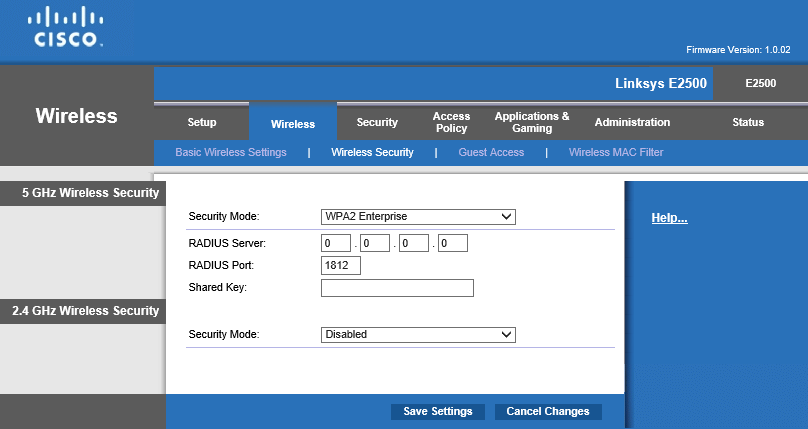
On the Wireless Security page select WPA2 Enterprise as the Security Mode, then specify the IP address of the Radius Server and the Shared Key. In this case only 5Ghz is specified but the same settings can be applied for 2.4Ghz.
Deploy Wireless Profile to Clients
The last step is to deploy a Wireless Profile to our end-user clients. This can be done in a variety of ways such as with Intune, Configuration Manager or with Group Policy like in our case.
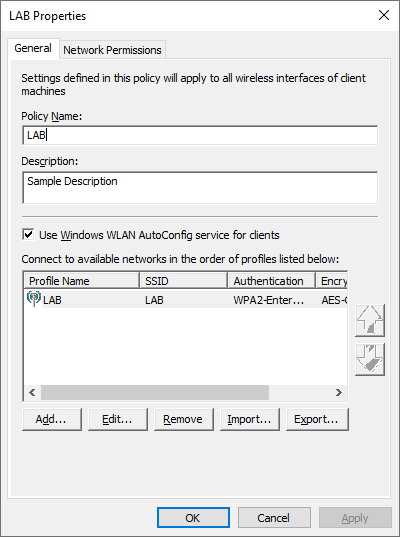
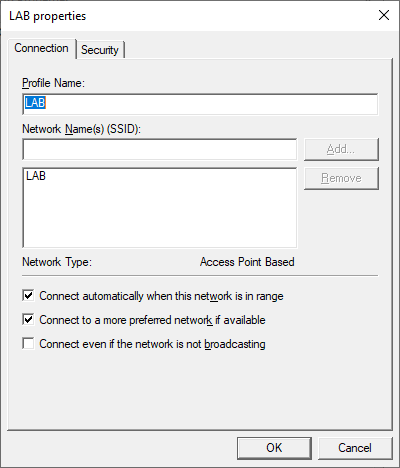
In the Group Policy Management Editor create a new policy in your Clients OU. Navigate to Computer -> Policies -> Windows Settings -> Security Settings -> Wireless Network (IEE 802.11) Policies and create a new Vista or Later Policy.
Give your policy a Name and Description then click Add
Specify the name of the Wireless network (SSID)
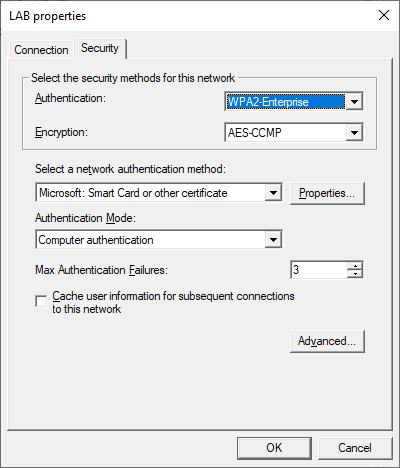
On the Security tab select Smart Card or other Certificate as the authentication method and set the Authentication Mode to Computer Authentication.
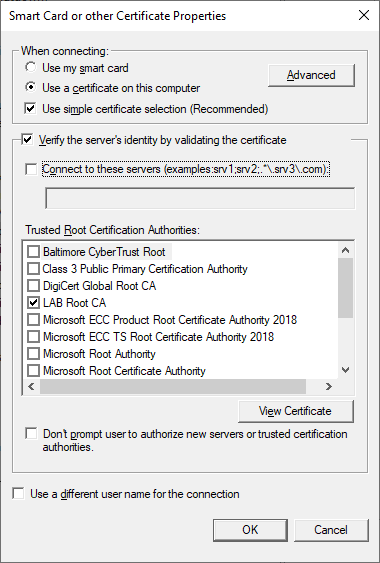
Press the Properties button and make sure that the following options are selected. Make sure to select your Root Certificate in the list and that this Certificate is deployed to clients (should have been done when the Root and Issuing CA were setup).
Verifying Connectivity
Client
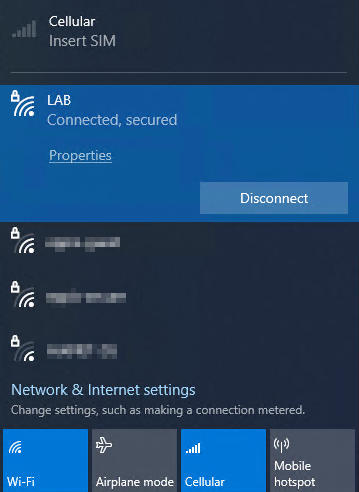
On the client make sure that the Wi-Fi profile has been applied and that all required certificates are present, then attempt to connect to the wireless network. If the connection fails check the certificates, wifi profile and verify that the settings on the Access Point and NPS Server is correct.
NPS Server
The NPS Server Event Logs is your friend when doing troubleshooting. Open the Event Logs and navigate to Custom Views -> Server Roles -> Network Policy and Access Services.
Firstly look for an This validates that the NPS server is able to read properties from Active Directory.
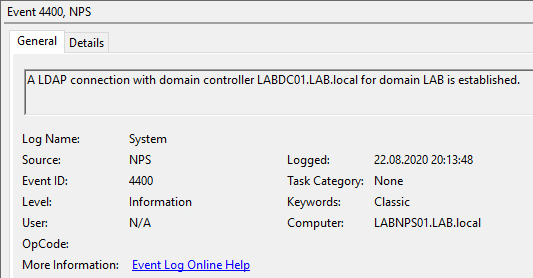
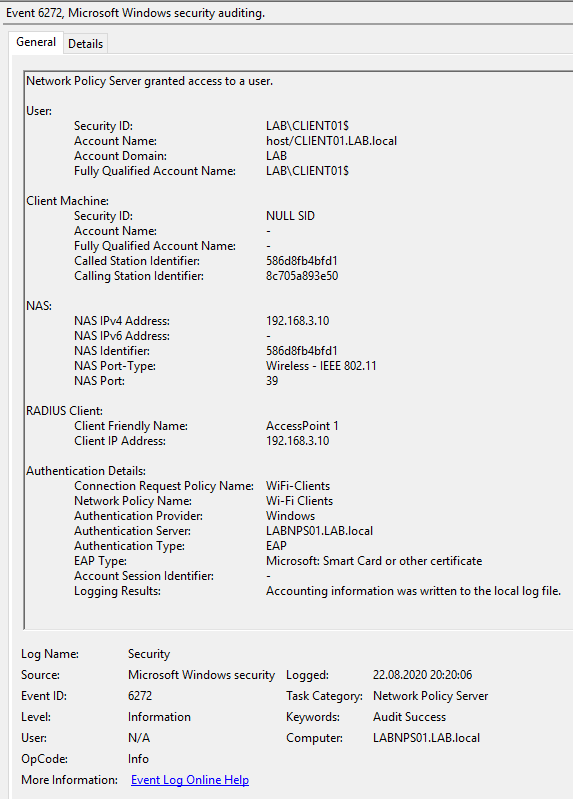
A successful connection should look like this in the Event Log on the NPS Server
Troubleshooting
Some times the Network Policy Server does not display any events in the Event Log. This is either because logging is disabled or no events are being generated. Firstly try to issue the following command from an administrative command prompt, then restart the server.
auditpol /set /subcategory:”Network Policy Server” /success:enable /failure:enable
It is also possible to enforce logging with Group Policy under Policies -> Windows Settings -> Security Settings -> Advanced Audit Configuration -> Logon/Logoff. Then set the Network Policy Server option to log both Success and Failures.

